Setting-up the system, Powering the system, Main controls – General Tools and Instruments DCS400/DCS400-05/DCS400-09 v.2 User Manual
Page 6
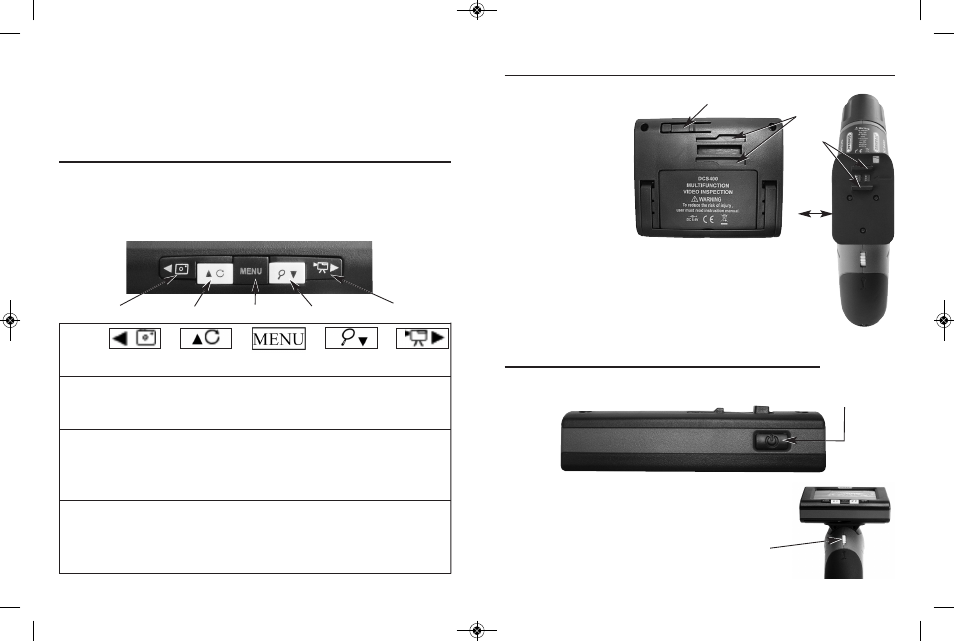
SETTING-UP THE SYSTEM
Remove the pistol grip handle with attached probe from the
hard case. Then re-
move the wireless LCD
monitor. Attach the
monitor to the handle
by aligning the signal
connector slots (#1) on
the monitor with the
dual tabs (#2) on the
top of the handle
(Fig.4). Slide the moni-
tor to the left until it se-
curely engages the locking buckle clip (#3). (To remove the
monitor you need to depress the buckle clip and slide the
monitor to the right).
You are now ready to power ON the system or to charge the
system. When using the system don’t forget to remove the
camera’s protective cover (Fig.2 #5).
POWERING THE SYSTEM
To turn the monitor ON simply press the ON/OFF button on the top of the
monitor (Fig.5).
The pistol-grip handle (Fig.6) has a yellow thumbwheel
for ON/OFF control of the camera and to adjust the
brightness of the white LED lights at the end of the
camera head.
10
LED brightness. Attached to the handle is the 1 meter long probe (#2) which
contains the camera (#3) and the LED lights (#4) in the leading end under the
black rubber protective cover (#5). Finally there’s the removable and wireless
LCD monitor (#6) which controls all of the scope’s functioning and recording
controls. The LCD monitor can be attached to the handle or removed and used
wirelessly.
MAIN CONTROLS
The main controls (Fig.3) are below the screen at the front bottom of the
display and consist of five buttons. A central black MENU button is (#6) strad-
dled right and left by two yellow buttons (#7, #8) which are straddled by two
more black buttons (#9, #10). Each of the buttons has multiple functions and
their operation depends upon what mode you are in.
#3 Locking Buckle Clip
#1
Connector
Slots
#2
Dual
Tabs
Slide
Pistol Grip
Handle
#9
#10
#7
#6
#8
Left Black
Left Yellow
Menu
Right Yellow
Right Black
Button
Button
Button
Button
Button
View and
record
images
mode
Main
Menus
Playback
mode
Take a
photo
Rotate
Screen
Image
Switch to
Main
Menus
mode
Magnify
Image
Shoot
Video
Scroll left
through the
3 main
Menus
Move up
within menu
structure
Increase Data
and time
Move down
within menu
structure
Decrease
Data and time
Select or
set menu
item
Scroll right
through the
3 main
Menus
Scroll left
through
stored
images
Play, pause
and resume
video
Stop video
playback
View stored
images and
folders
Access playback
menu
Select image
playback
Select open folder
Scroll right
through the
stored
images
Power Button
to Turn
Monitor
ON/OFF
Fig.5
Yellow Thumbwheel up to Turn On and down
to turn off Probe, Camera and LED Lights
Fig.6
11
Fig.3
Fig.4
DCS400_NEW_082610_AWB13P:Layout 1 8/26/10 10:46 AM Page 10