Mounting bracket kit assembly – Fairbanks 1100 Series Portable Utility Scale with Rechargeable battery-powered FB1100 ABS User Manual
Page 11
Section 4: Assembly
02/2011
11
51260 -- Rev. 1
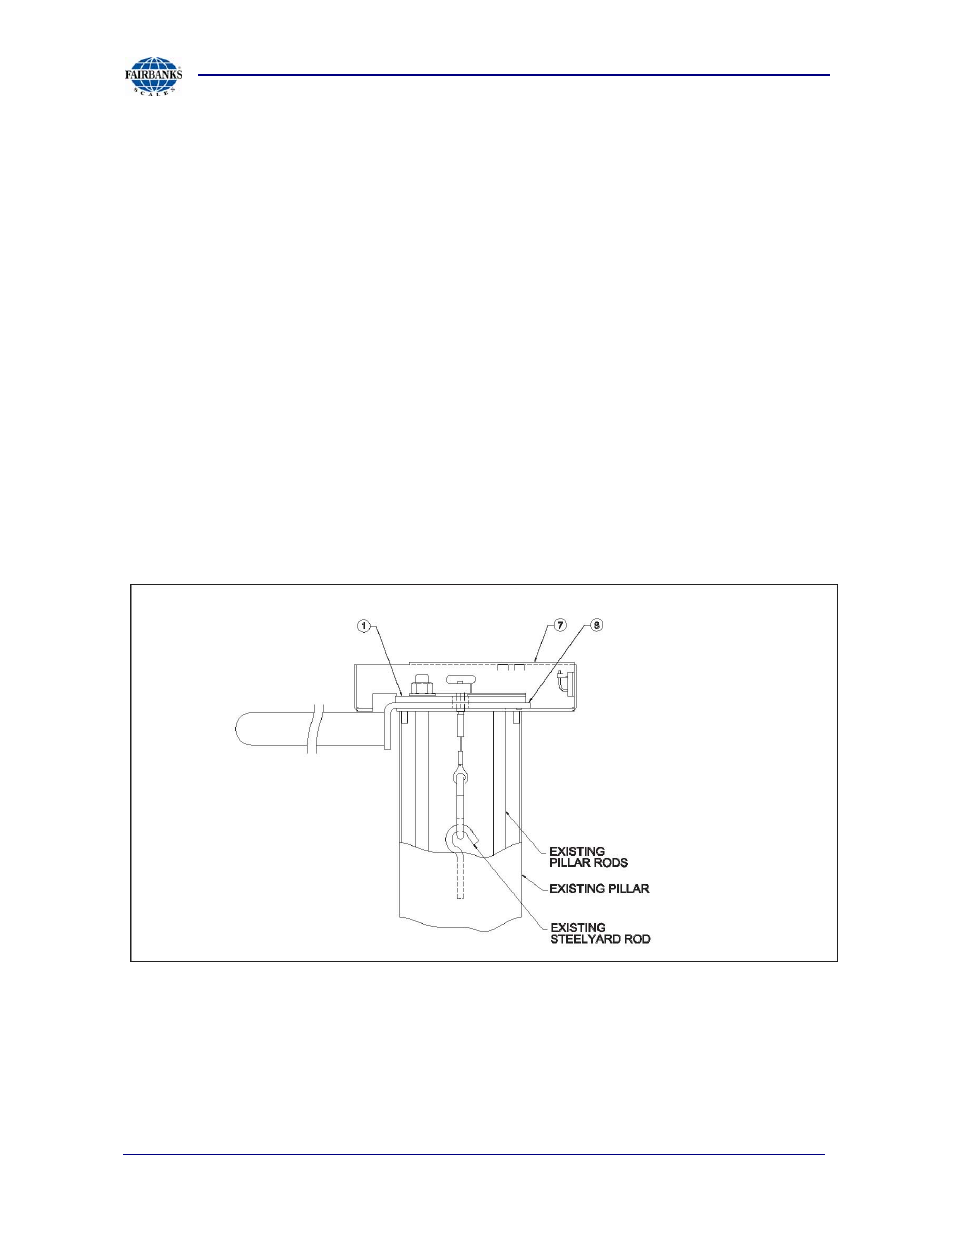
4.2. Mounting bracket kit assembly
The adapter will be partially assembled and packed with bubble wrap. The adapter
bracket (#7), stiffener plate (#8), and load cell mounting plate (#1) will be in correct
orientation in the box. See figure 4-1.
A. Lift the entire assembly out of the box and remove the bubble wrap placed
between the stiffener plate (#8) and load cell plate (#1), allowing the small
cable to go through the hole and the load cell plate (#1) to set flush on top of
the stiffener plate (#8).
B. With the slot in the back (as viewed from the platform), place the assembly
with the handle facing away from the platform deck OVER the two pillar rods
so it rests on top of the pillar.
C. Ensure that the assembly is setting flush and aligned. Looking up from the
bottom, you should see two (2) small studs in opposite corners on the INSIDE
of the pillar. Use the two pillar rod washers and nuts to secure the assembly
to the top of the pillar. Use an adjustable wrench to tighten the pillar rod nuts,
but be careful not to touch the load cell while tightening.
D. At the bottom of the scale base, in the back, lift the lever end (#34) UP while
placing the hook under the lever’s pivot while holding the hook on top of the
pull rod. Refer to page 17 in Section 7.
Figure 4-1