Nitek WB5326 User Manual
Page 3
3
These instructions are designed for configuring this system to be a network Bridge.
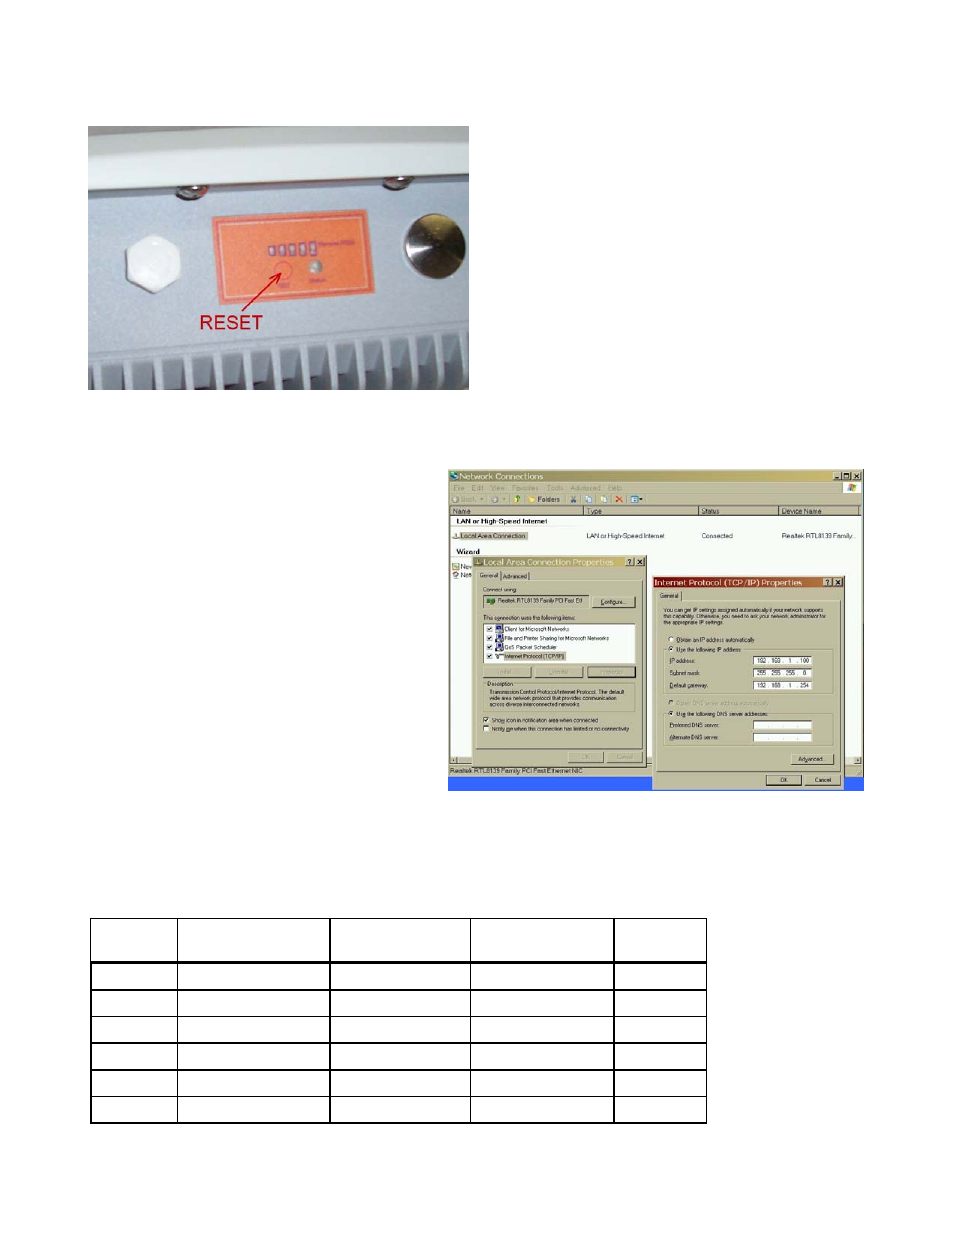
1. Power up each Bridge unit for 30 seconds, then RESET it by pressing the Reset button for 10 seconds.
2. On the PC you will be using to setup the Bridge units, select “Network Connections” in the control Panel. You
can get to it by Start>Settings>Control Panel>Network Connections. Locate the “Local Area Connection”
and right click to select “Properties”. When in that tab select “Internet Protocol (TCP/IP)”.
3. Set up a computer with a network IP address of:
IP
address
192.168.1.100
Subnet
255.255.255.0
Gateway
192.168.1.254
4. Select and note an IP address for each Bridge unit along with an ID name and password for each unit (see
Example 1). You will also need to select a Channel from 1-11 for all units. Bridge units are designed to work as a
pair. Both units of the pair must operate on the same channel. Different sets should use different channels. For
maximum data speed separate sets by 4 channels or more (i.e., 1, 6, 11).
*
Each pair of units must operate on the same channel (1 - 11). Different pairs should use different channels.
Example 1
Unit
Your IP Address
For each unit
Password Unit
ID
Channel
*
1
xxx.xxx.xxx.1
Build 1
Building One
1
2
xxx.xxx.xxx.2
Build 2
Building Two
1
3
4
5
6