Replacing the aiming guide locator – MAX HN65J User Manual
Page 10
DRIVING DEPTH ADJUSTMENT DIAL
LWAYS disconnect air supply before adjustment dial.
WARNING:
A
Adjustment
With air pressure set, drive nails into a representative
material sample to determine if adjustment is necessary.
If adjustment is required, disconnect air supply.
Refer to the mark on the Adjust Spacer for direction to turn
the adjustment dial.
Reconnect air supply.
TRIGGER LOCK MECHANISM
The tool is equipped with a Trigger Lock Mechanism. Push and
rotate the Trigger LOCK to the Trigger UNLOCK position before
driving nails.
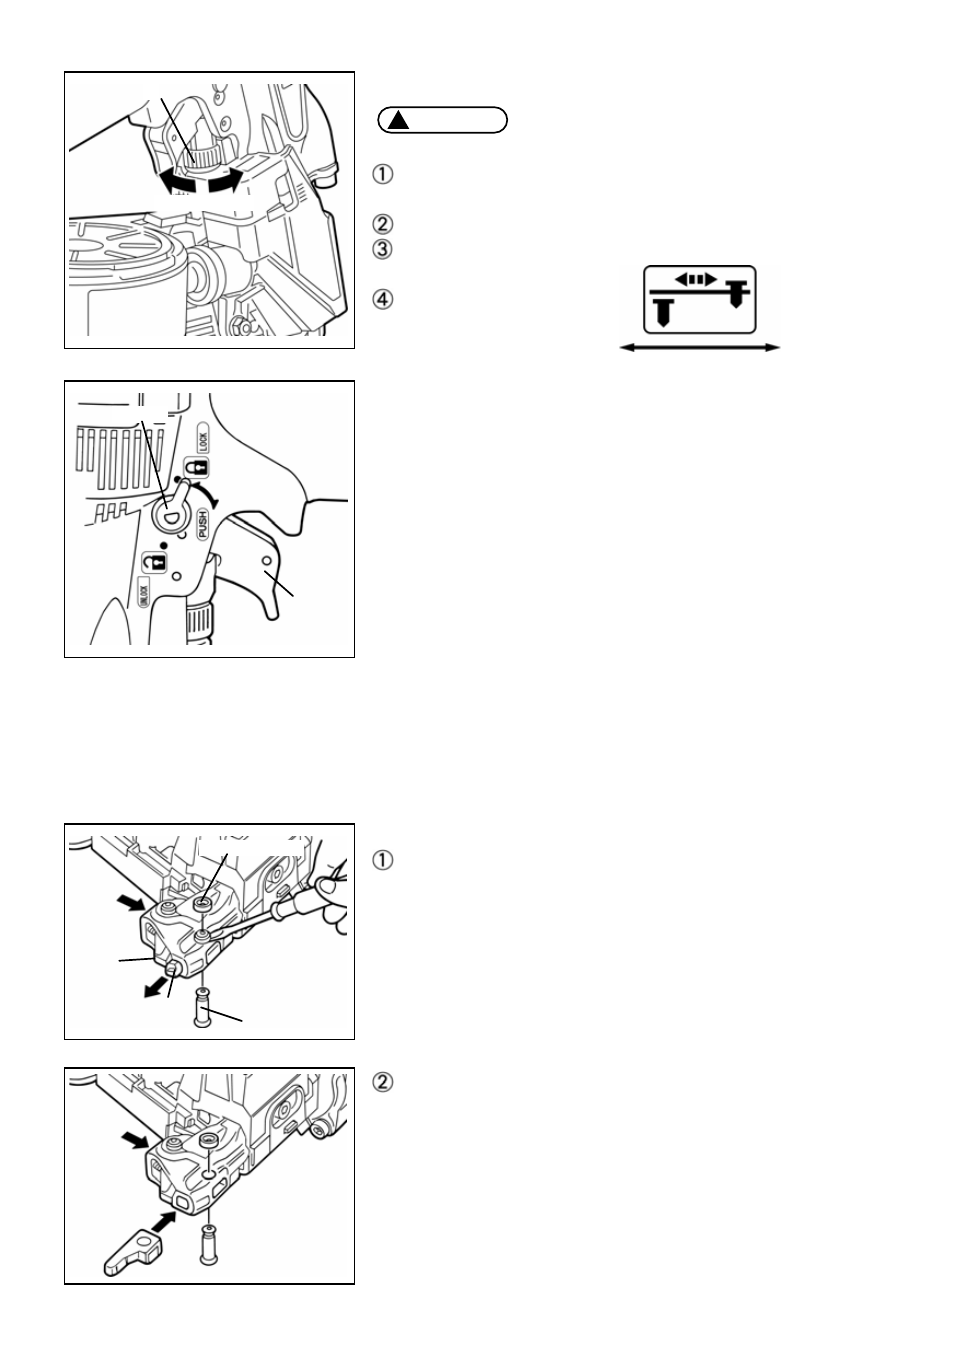
REPLACING THE AIMING GUIDE LOCATOR
The aiming guide locator is worn out depending on the frequency of use.
If the machine cannot be easily held vertically when setting the aiming guide locator
in a hole in a metal fitting, it is about time to replace.
Replace it in the following procedure:
PROCEDURE
Remove a rubber washer with a screwdriver to pull out a
pin. Push the nail leg guide to remove the aiming guide
locator.
Attach a new nail leg guide, set the pin and put back the
rubber washer.
When replacing the aiming guide locator, contact the nearest
MAX CO., LTD. authorized distributor.
Dial
!
Deeper Shallow
Deeper
Shallow
Trigger
Trigger lock dial
Pin
Nail le
guide
Aiming guide loca
g
tor
Rubber Washer
12