MAX NF255F/18 User Manual
MAX Tools
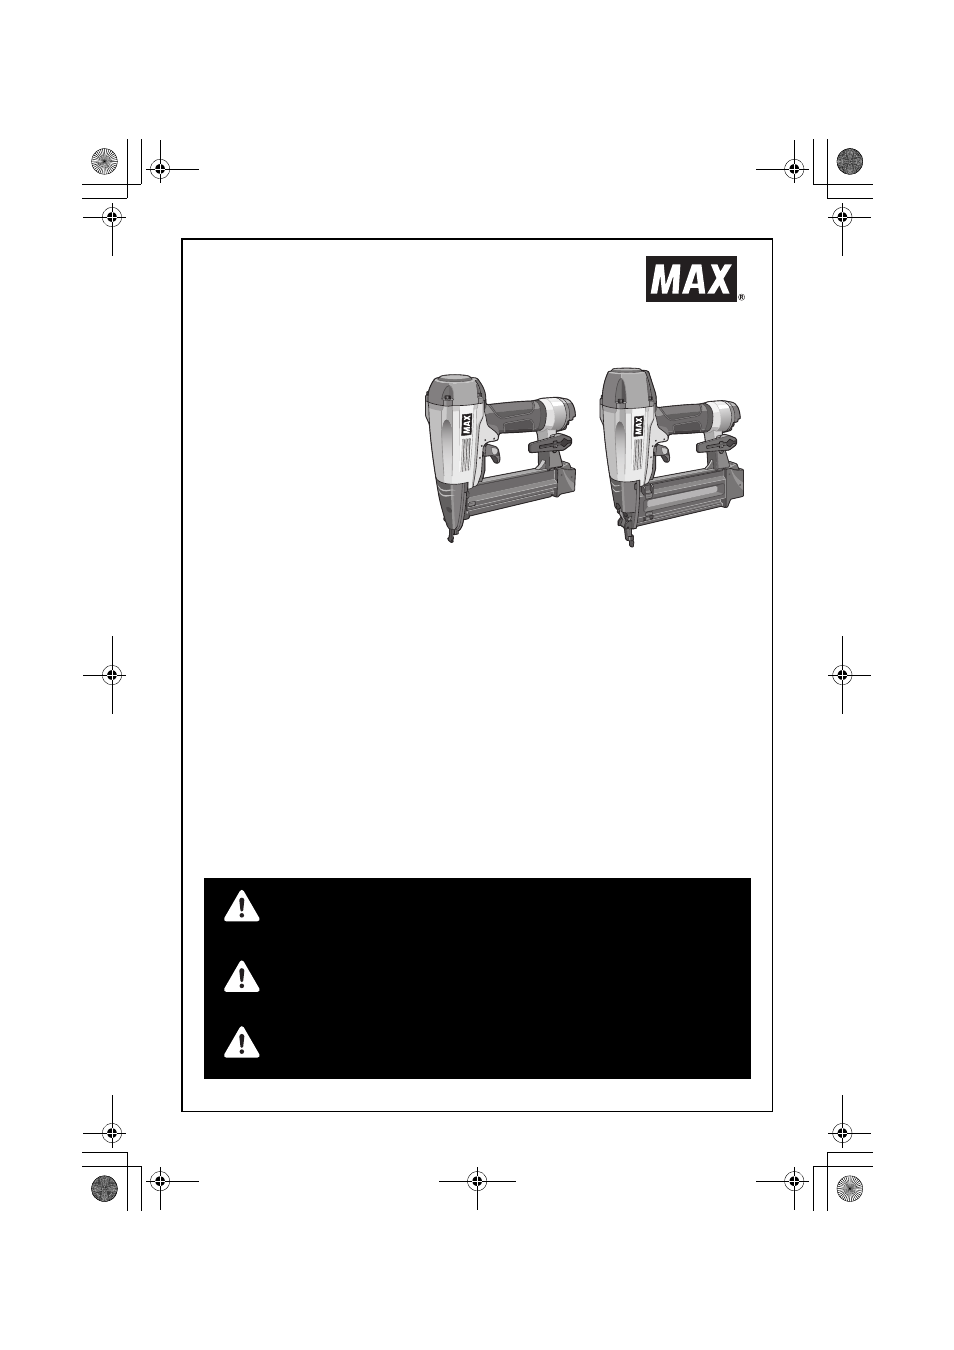
NF235F/18
NF255F/18
OPERATING and MAINTENANCE MANUAL
BETRIEBSANLEITUNG
MANUEL D'UTILISATION et D'ENTRETIEN
MANUALE DI FUNZIONAMENTO E MANUTENZIONE
MANUAL DE FUNCIONAMIENTO Y MANTENIMIENTO
PNEUMATIC BRAD NAILER
CLOUEUSES PNEUMATIQUES
CLAVADORAS DE CLAVILLOS
NEUMÁTICAS
BEFORE USING THIS TOOL, STUDY THIS MANUAL TO ENSURE SAFETY WARNING AND IN-
STRUCTIONS.
KEEP THESE INSTRUCTIONS WITH THE TOOL FOR FUTURE REFERENCE.
AVANT D’UTILISER CET OUTIL, LIRE CE MANUEL ET LES CONSIGNES DE SÉCURITÉ AFIN DE
GARANTIR UN FONCTIONNEMENT SÛR.
CONSERVER CE MANUEL EN LIEU SÛR AVEC L’OUTIL AFIN DE POUVOIR LE CONSULTER UL-
TÉRIEUREMENT.
ANTES DE UTILIZAR ESTA HERRAMIENTA, LEA DETENIDAMENTE ESTE MANUAL PARA FAMILIARIZARSE CON
LAS ADVERTENCIAS E INSTRUCCIONES DE SEGURIDAD.
CONSERVE ESTAS INSTRUCCIONES JUNTO CON LA HERRAMIENTA PARA FUTURAS CONSULTAS.
NF255F/18
NF235F/18
WARNING
AVERTISSEMENT
ADVERTENCIA
NF235-255F-USA.book 1 ページ 2010年7月12日 月曜日 午後5時23分
Document Outline
- NF235F/18
- NF255F/18
- OPERATING and MAINTENANCE MANUAL
- BETRIEBSANLEITUNG
- MANUEL D'UTILISATION et D'ENTRETIEN
- MANUALE DI FUNZIONAMENTO E MANUTENZIONE
- MANUAL DE FUNCIONAMIENTO Y MANTENIMIENTO
- 1. SAFETY INSTRUCTIONS
- WARNING
- PRECAUTIONS ON USING THE TOOL
- 1. WEAR SAFETY GLASSES OR GOGGLES
- 2. EAR PROTECTION MAY BE REQUIRED IN SOME ENVIRONMENTS
- 3. DO NOT USE ANY POWER SOURCE EXCEPT AN AIR COMPRESSOR
- 4. OPERATE WITHIN THE PROPER AIR PRESSURE RANGE
- 5. DO NOT OPERATE THE TOOL NEAR A FLAMMABLE SUBSTANCE
- 6. NEVER USE THE TOOL IN AN EXPLOSIVE ATMOSPHERE
- 7. DO NOT USE A WRONG FITTINGS
- 8. DISCONNECT THE AIR SUPPLY AND EMPTY THE MAGAZINE WHEN THE TOOL IS NOT IN USE
- 9. INSPECT SCREW TIGHTNESS
- 10. DO NOT TOUCH THE TRIGGER UNLESS YOU INTEND TO DRIVE A FASTENER
- 11. NEVER POINT THE DISCHARGE OUTLET TOWARD YOURSELF AND OTHER PERSONNEL
- 12. USE SPECIFIED FASTENERS (SEE PAGE 6)
- 13. PLACE THE DISCHARGE OUTLET ON THE WORK SURFACE PROPERLY
- 14. KEEP HANDS AND BODY AWAY FROM THE DISCHARGE OUTLET
- 15. DO NOT DRIVE FASTENERS CLOSE TO THE EDGE AND CORNER OF THE WORK AND THIN MATERIAL
- 16. DO NOT DRIVE FASTENERS ON TOP OF OTHER FASTENERS
- 17. REMOVING THE FASTENERS AFTER COMPLETING OPERATION
- 18. CHECK OPERATION OF THE CONTACT TRIP MECHANISM FREQUENTLY INCASE OF USING A CONTACT TRIP TYPETOOL
- 19. WHEN USING THE TOOL OUTSIDE OR ELEVATED PLACE
- 20. NEVER USE THE TOOL IF ANY PORTION OF THE TOOL CONTROLS (e.g., TRIGGER, CONTACT ARM) IS INOPERABLE, DISCONNECTED, ALTERED OR NOT WOKING PROPERLY
- 21. NEVER ACTUATE THE TOOL INTO FREE SPACE
- 22. ALWAYS ASSUME THAT THE TOOL CONTAINS FASTENERS
- 23. RESPECT THE TOOL AS A WORKING IMPLEMENT
- 24. NO HORSEPLAY
- 25. NEVER LOAD THE TOOL WITH FASTENERS WHEN ANY ONE OF THE OPERATING CONTROLS (e.g., TRIGGER, CONTACT ARM) IS ACTIVATED
- 26. WHEN DISPOSING THE MACHINE OR ITS PARTS, FOLLOW THE RELEVANT NATIONAL RULES
- 1. WEAR SAFETY GLASSES OR GOGGLES
- OBSERVE THE FOLLOWING GENERAL CAUTION IN ADDITION TO THE OTHER WARNINGS CONTAINED IN THIS MANUAL
- 2. SPECIFICATIONS AND TECHNICAL DATA
- 1. NAME OF PARTS
- TOOL AIR FITTINGS:
- RECOMMENDED OPERATING PRESSURE:
- 3. AIR SUPPLY AND CONNECTIONS
- 4. INSTRUCTIONS FOR OPERATION
- Read section titled "SAFETY INSTRUCTIONS".
- 1. BEFORE OPERATION
- 1 Wear Safety Glasses or Goggles.
- 2 Do not connect the air supply.
- 3 Inspect screw tightness.
- 4 Check operation of the contact arm & trigger if moving smoothly.
- 5 Connect the air supply.
- 6 Check the air-leakage. (The Tool must not have the air- leakage.)
- 7 Hold the Tool with finger-off the trigger, then push the contact arm against the work-piece. (The tool must not operate.)
- 8 Hold the Tool with contact arm free from work-piece and pull the trigger. (The Tool must not operate.)
- 9 Disconnect the air supply.
- WARNING
- WARNING
- 1 Push the click lever and pull the slider unit gently as far as it will go.
- 2 Insert the nails into the magazine.
- 3 Push the slider unit forward until it stops.
- 1 Adjust the air pressure at 70p.s.i. (5 bar) and connect the air supply.
- 2 Without touching the trigger, depress the contact arm against the work-piece.
- 3 With the tool off the work-piece, pull the trigger.
- 4 Adjust the air pressure as much as the lowest possible according the length of fastener and the hardness of work piece.
- WARNING
- 1. BEFORE OPERATION
- DRIVING FASTENERS
- WARNING
- WARNING
- WARNING
- WARNING
- 1 Disconnect the air hose.
- 2 Remove the set of nails from the magazine.
- 3 Take out the 2 hexagon socket head cap screws from the driver guide and remove the front cover.
- 4 Take out the 4 hexagon socket head cap screws from the magazine.
- 5 Clear the nails-jammed inside the driver guide using a thin iron bar or A flat-blade screw driver.
- 6 Reinstall the driver guide and the front cover, reinsert the set of nails And bring back the slider unit.
- 1 Disconnect the air hose.
- 2 Remove the magazine release from behind nails.
- 3 Open the front cover then pull up to open the driver guide A.
- 4 Clear the nails-jammed inside the driver guide A. and the ware plate using a thin iron bar or a flat-blade screwdriver.
- 5 Remove bar on screwdriver and close the driver guide A and the front cover.
- 6 Reinsert the set of nails and bring back the slider unit.
- WARNING
- Read section titled "SAFETY INSTRUCTIONS".
- 5. MAINTENANCE
- 6. STORAGE
- 1 When not in use for an extended period, apply a thin coat of the lubricant to the steel parts to avoid rust.
- 2 Do not store the tool in a cold weather environment. Keep the tool in a warm area.
- 3 When not in use, the tool should be stored in a warm and dry place. Keep out of reach of children.
- 4 All quality tools will eventually require servicing or replacement of parts because of wear from the normal use.
- 7. TROUBLE SHOOTING/REPAIRS
- 1. PORTEZ DES LUNETTES DE PROTECTION OU DE SÉCURITÉ
- 2. DANS CERTAINS ENVIRONNEMENTS UNE PROTECTION AUDITIVE PEUT ÊTRE EXIGÉE
- 3. NE PAS UTILISER D’AUTRE SOURCE D’ALIMENTATION QU’UN COMPRESSEUR D’AIR
- 4. RESPECTER LA PLAGE DE PRESSION D’AIR APPROPRIÉE POUR L’UTILISATION
- 5. NE PAS UTILISER L’OUTIL PRÈS D’UNE SUBSTANCE INFLAMMABLE
- 6. N’UTILISEZ JAMAIS L’OUTIL EN PRÉSENCE DE GAZ EXPLOSIFS
- 7. NE PAS UTILISER DES PIÈCES DE RACCORDEMENT INADÉQUATES
- 8. COUPER L’ALIMENTATION EN AIR COMPRIMÉ ET VIDER LE MAGASIN LORSQUE L’OUTIL N’EST PAS UTILISÉ
- 9. CONTRÔLER LE SERRAGE DES VIS
- 10. NE PAS TOUCHER LE DÉCLENCHEUR SAUF POUR ENFONCER UN ÉLÉMENT DE FIXATION
- 11. NE JAMAIS DIRIGER L’ORIFICE DE SORTIE VERS VOUS OU VERS UNE AUTRE PERSONNE
- 12. UTILISER LES ÉLÉMENTS DE FIXATION APPROPRIÉS (VOIR PAGE 14)
- 13. PLACER CORRECTEMENT L'ORIFICE DE SORTIE SUR LA SURFACE DE TRAVAIL
- 14. ÉLOIGNER VOTRE CORPS ET VOS MAINS DE L'ORIFICE DE SORTIE DE L’APPAREIL
- 15. NE PAS APPLIQUER LES ÉLÉMENTS DE FIXATION PRÈS DU BORD DE LA PIÈCE ET SUR UN MATÉRIAU MINCE
- 16. NE PAS ENFONCER DES POINTES OU AGRAFES SUR D’AUTRES ÉLÉMENTS DE FIXATION
- 17. RETRAIT DES ÉLÉMENTS DE FIXATION APRÈS LA FIN DE L’OPÉRATION
- 18. VÉRIFIER FRÉQUEMMENT LE FONCTIONNEMENT DU MÉCANISME DE DECLENCHEMENT AU COUP À COUP EN CAS D’UTILISATION D’UN OUTIL DE TYPE À DÉCLENCHEMENT AU COUP À COUP
- 19. UTILISATION DE L’OUTIL À L’EXTÉRIEUR OU SUR UN ENDROIT SURÉLEVÉ
- 20. NE JAMAIS UTILISER L’OUTIL SI N’IMPORTE QUELLE PARTIE DES COMMANDES D’OUTIL (PAR EXEMPLE, DÉCLENCHEUR, BRAS DE CONTACT) EST INOPÉRABLE, DÉBRANCHÉE, CHANGÉE OU NE FONCTIONNANT PAS CORRECTEMENT
- 21. NE JAMAIS ORIENTER L'OUTIL VERS UN ESPACE LIBRE
- 22. TOUJOURS PRÉSUMER QUE L’OUTIL EST MUNI D'ÉLÉMENTS DE FIXATION
- 23. CONSIDÉREZ L’OUTIL COMME UN INSTRUMENT DE TRAVAIL
- 24. NE FAITES PAS DE GESTES BRUSQUES
- 25. NE JAMAIS MONTER LES FERMOIRS SUR L’OUTIL LORSQU’UNE COMMANDE (DÉTENTE OU BRAS DE CONTACT par exemple) EST ACTIVÉE
- 26. LORSQUE LA MACHINE OU SES PIÈCES SONT MISES AU REBUT, SUIVEZ LES RÈGLEMENTS NATIONAUX EN VIGUEUR
- 2. CARACTÉRISTIQUES TECHNIQUES ET ACCESSOIRES
- 1. NOM DES PIÈCES
- 1. AVANT CHAQUE UTILISATION
- 1 Porter des lunettes de protection ou de sécurité.
- 2 Ne pas encore brancher l’alimentation en air comprimé.
- 3 Vérifier le serrage des vis.
- 4 Vérifier le fonctionnement de la barre de contact et s’assurer que le levier de commande se déplace librement.
- 5 Brancher l’alimentation en air comprimé.
- 6 Rechercher une éventuelle présence d’une fuite d’air. (L’outil ne doit pas présenter de fuite d’air.)
- 7 Tenir l’outil (ne pas mettre de doigt sur le levier de commande) et appuyer la barre de contact contre la pièce à fixer. (L’outil ne doit pas fonctionner.)
- 8 Tenir l’outil en sorte que la barre de contact ne repose pas sur la pièce à fixer et appuyer sur le levier de commande. (L’outil ne doit pas fonctionner.)
- 9 Débrancher l'alimentation en air comprimé.
- AVERTISSEMENT
- AVERTISSEMENT
- 1 Appuyer sur le levier de blocage et tirer vers l’arrière avec précaution aussi loin que possible le coulisseau du magasin.
- 2 Placer les pointes dans le magasin.
- 3 Pousser le coulisseau à fond vers l’avant.
- 1 Régler l’air comprimé sur 70 psi (5 bar) et brancher l’alimentation en air comprimé.
- 2 Appuyer la barre de contact contre la pièce à fixer sans cependant toucher au levier de commande.
- 3 Appuyer sur le levier de commande, l’outil ne devant pas toucher la pièce à fixer.
- 4 Régler la pression de l'air comprimé à un niveau aussi bas que possible, selon la longueur de l'attache et la dureté de la pièce de travail.
- AVERTISSEMENT
- AVERTISSEMENT
- AVERTISSEMENT
- AVERTISSEMENT
- AVERTISSEMENT
- 1 Débrancher le tuyau d'air.
- 2 Retirer le jeu de clous du magasin.
- 3 Extraire les 2 vis à six pans creux du guide d'entraînement et retirer le capot avant.
- 4 Extraire les 4 vis à six pans creux du magasin.
- 5 Retirer les clous coincés à l'intérieur du guide d'entraînement à l'aide d'une tige de fer ou d'un tournevis à lame plate.
- 6 Réinstaller le guide d'entraînement et le capot avant, insérer de nouveau l'ensemble de clous et ramener en arrière le système à coulisse.
- 1 Débrancher le tuyau d'air.
- 2 Retirer le système de libération du magasin situé derrière les clous.
- 3 Ouvrir le capot avant, puis tirer vers le haut pour ouvrir le guide d'entraînement A.
- 4 Retirer les clous coincés à l'intérieur du guide d'entraînement A et la plaque d'usure à l'aide d'une tige de fer ou d'un tournevis à lame plate.
- 5 Retirer la barre du tournevis et fermer le guide d'entraînement A et le capot avant.
- 6 Insérer de nouveau l'ensemble de clous et ramener en arrière le système à coulisse.
- AVERTISSEMENT
- AVERTISSEMENT
- (1) Vider le filtre de la conduite d’air et le compresseur
- (2) Veiller à ce que le graisseur soit toujours plein dans l’unité d’air comprimé à trois éléments
- (3) Nettoyer l’élément filtrant de l’unité d’air comprimé à trois éléments
- (4) Bien serrer toutes les vis
- 6. STOCKAGE
- 1 Si l’outil doit rester inutilisé pendant un certain temps, appliquer une mince couche de lubrifiant sur les pièces en acier pour éviter l’apparition de rouille.
- 2 Ne pas entreposer l’outil dans un endroit exposé au froid. Le conserver dans un endroit chaud.
- 3 Si l’outil reste inutilisé, il faut le conserver dans un endroit chaud et sec. Le conserver hors de portée des enfants.
- 4 Même les outils de qualité peuvent éventuellement nécessiter des mesures d’entretien ou le remplacement de pièces en raison de l’usure normale.
- 7. DÉPISTAGE DES PANNES/ RÉPARATIONS
- ESPAÑOL
- MANUAL DE FUNCIONAMIENTO Y MANTENIMIENTO
- ÍNDICE
- 1. INSTRUCCIONES DE SEGURIDAD 19
- 2. ESPECIFICACIONES Y DATOS TÉCNICOS 22
- 3. SUMINISTRO DE AIRE COMPRIMIDO Y CONEXIONES 22
- 4. INSTRUCCIONES DE FUNCIONAMIENTO 23
- 5. MANTENIMIENTO 26
- 6. ALMACENAMIENTO 26
- 7. LOCALIZACIÓN DE AVERÍAS/REPARACIONES 26
- ADVERTENCIA
- ADVERTENCIA
- 1. LLEVE GAFAS PROTECTORAS O DE SEGURIDAD
- 2. EN ALGUNAS CIRCUNSTANCIAS PUEDE SER NECESARIO UTILIZAR PROTECCIÓN DE OÍDOS
- 3. NO UTILICE NINGUNA FUENTE DE ENERGÍA EXCEPTO UN COMPRESOR DE AIRE
- 4. UTILICE DENTRO DEL LÍMITE DE PRESIÓN DE AIRE ADECUADO
- 5. NO UTILICE LA HERRAMIENTA CERCA DE SUSTANCIAS INFLAMABLES
- 6. NUNCA UTILICE LA HERRAMIENTA EN UN AMBIENTE EXPLOSIVO
- 7. NO UTILICE ACCESORIOS INADECUADOS
- 8. MIENTRAS LA HERRAMIENTA NO ESTÉ EN USO, DESCONECTE EL SUMINISTRO DE AIRE COMPRIMIDO Y VACÍE EL CARTUCHO
- 9. COMPRUEBE LA TENSIÓN DE LOS TORNILLOS
- 10. NO TOQUE EL GATILLO A MENOS QUE TENGA INTENCIÓN DE UTILIZARLO
- 11. NUNCA APUNTE LA SALIDA DE DESCARGA HACIA USTED U OTRAS PERSONAS
- 12. UTILICE GRAPAS ESPECÍFICAS (VÉASE PÁGINA 22)
- 13. COLOQUE LA SALIDA DE DESCARGA SOBRE LA SUPERFICIE DE TRABAJO DEL MODO CORRECTO
- 14. MANTENGA LAS MANOS Y EL CUERPO ALEJADOS DE LA SALIDA DE DESCARGA
- 15. NO GRAPE JUNTO AL BORDE DE SUPERFICIES O MATERIALES FINOS
- 16. NO GRAPE SOBRE OTRAS GRAPAS
- 17. QUITE LAS GRAPAS DESPUÉS DE COMPLETAR LA OPERACIÓN
- 18. COMPROBAR LA OPERACIÓN MECANISMO DE CONTACTO CON FRECUENCIA EN CASO DE UTILIZAR UNA HERRAMIENTA DE TIPO “TRIP” CONTACTO
- 19. UTILIZACIÓN DE LA HERRAMIENTA AL AIRE LIBRE O EN SITIOS ELEVADOS
- 20. NUNCA UTILICE LA HERRAMIENTA SI CUALQUIER PORCIÓN DE LOS CONTROLES DE LA HERRAMIENTA (POR EJEMPLO, DISPARADOR, BRAZO DE CONTACTO) ES INOPERABLE, DESCONECTADA, ALTERADA O NO OPERA CORRECTAMENTE
- 21. NUNCA DISPARE AL AIRE
- 22. SIEMPRE SE DEBE ASUMIR QUE LA HERRAMIENTA CONTIENE GRAPAS
- 23. DEBE RESPETAR LA HERRAMIENTA COMO UN IMPLEMENTO DE TRABAJO
- 24. NO JUEGUE HACIENDO BROMAS
- 25. NUNCA CARGUE LA HERRAMIENTA CON LOS AFIANZADORES CUANDO CUALQUIERA DE LOS CONTROLES DE OPERACIÓN (ej.: DISPARADOR, BRAZO DE CONTACTO) SE ENCUENTRA ACTIVADO
- 26. CUANDO SE DESECHEN LA MÁQUINA O SUS PIEZAS, DEBEN SEGUIRSE LAS NORMATIVAS NACIONALES PERTINENTES
- 2. ESPECIFICACIONES Y DATOS TÉCNICOS
- 1. DENOMINACIÓN DE LAS PIEZAS
- 1. PREVIO AL USO
- 1 Lleve gafas de seguridad o protectoras.
- 2 No conecte el aire comprimido.
- 3 Compruebe la firmeza de los tornillos.
- 4 Compruebe el funcionamiento del brazo de contacto y la marcha fácil del disparador.
- 5 Conecte el aire comprimido.
- 6 Compruebe la herramienta en cuanto a fugas de aire. (No deben existir fugas de aire.)
- 7 Sujete la herramienta (sin colocar el dedo en el disparador) y apriete el brazo de contacto contra la pieza. (La herramienta no debe funcionar.)
- 8 Mantenga la herramienta de modo que el brazo de contacto no esté aplicado contra la pieza, y accione el disparador. (La herramienta no debe funcionar.)
- 9 Mientras la herramienta no se esté utilizando, desconectar el suministro de aire comprimido y vaciar el cartucho.
- ADVERTENCIA
- ADVERTENCIA
- 1 Apretar el trinquete y retirar el carro del cargador cuidadosamente al máximo posible hacia atrás.
- 2 Colocar los clavos en el cargador.
- 3 Deslizar el carro del cargador hacia delante hasta el tope.
- 1 Ajuste la presión del aire a 70p.s.i. (5 bares) y conecte el suministro de aire comprimido.
- 2 Sin tocar el disparador, apriete el brazo de contacto contra la pieza.
- 3 Accione el disparador sin que la herramienta esté aplicada contra la pieza.
- 4 Ajuste la presión atmosférica a un nivel lo más bajo posible, dependiendo de la longitud de la grapa y la dureza de la pieza de trabajo.
- ADVERTENCIA
- ADVERTENCIA
- ADVERTENCIA
- ADVERTENCIA
- ADVERTENCIA
- 1 Desconecte la manguera de aire comprimido.
- 2 Saque el juego de clavos del cartucho.
- 3 Saque los 2 tornillos de cabeza hexagonal de la guía del impulsor y quite la tapa delantera.
- 4 Extraiga los 4 tornillos de cabeza hexagonal del cartucho.
- 5 Retire del interior de la guía del impulsor los clavos atascados utilizando una barra fina de hierro o un destornillador de cabeza plana.
- 6 Vuelva a colocar la tapa delantera y la guía del impulsor, introduzca nuevamente el juego de clavos y lleve la unidad deslizante hacia atrás.
- 1 Desconecte la manguera de aire comprimido.
- 2 Extraiga la tapa del cartucho desde los clavos traseros.
- 3 Abra la tapa delantera y tire hacia arriba para abrir la guía del impulsor A.
- 4 Retire del interior de la guía del impulsor A los clavos atascados y la placa de desgaste utilizando una barra fina de hierro o un destornillador de cabeza plana.
- 5 Extraiga la barra o el destornillador y cierre la guía del impulsor A y la cubierta delantera.
- 6 Vuelva a introducir el juego de clavos y lleve la unidad deslizante hacia atrás.
- ADVERTENCIA
- ADVERTENCIA
- (1) Vacíe el filtro del suministro de aire y del compresor.
- (2) Mantenga lleno el dispositivo de lubrificación presente en el set para aire comprimido compuesto de 3 elementos.
- (3) Limpie el elemento del filtro del sistema de aire de 3 piezas
- (4) Apriete todos los tornillos.
- 6. ALMACENAMIENTO
- 1 Para evitar la formación de óxido, aplique una capa de lubricante sobre las partes de acero antes de guardar la máquina durante un período de tiempo prolongado.
- 2 No conserve la máquina a temperaturas bajas. Guarde la herramienta en un lugar templado.
- 3 Cuando no la utilice, guárdela en lugares templados y secos. Mantenga la herramienta fuera del alcance de los niños.
- 4 Para que la grapadora o clavadora proporcione siempre un resultado óptimo, realice el mantenimiento y la sustitución de las piezas gastadas.
- 7. LOCALIZACIÓN DE AVERÍAS/ REPARACIONES