Magnum Venus Plastech PVSensor User Manual
Page 7
PVSensor Instruction Manual. Issue-08 25/06/2008 Page 7 of 8
APPENDIX B
SENSOR REPAIR / CLEANING
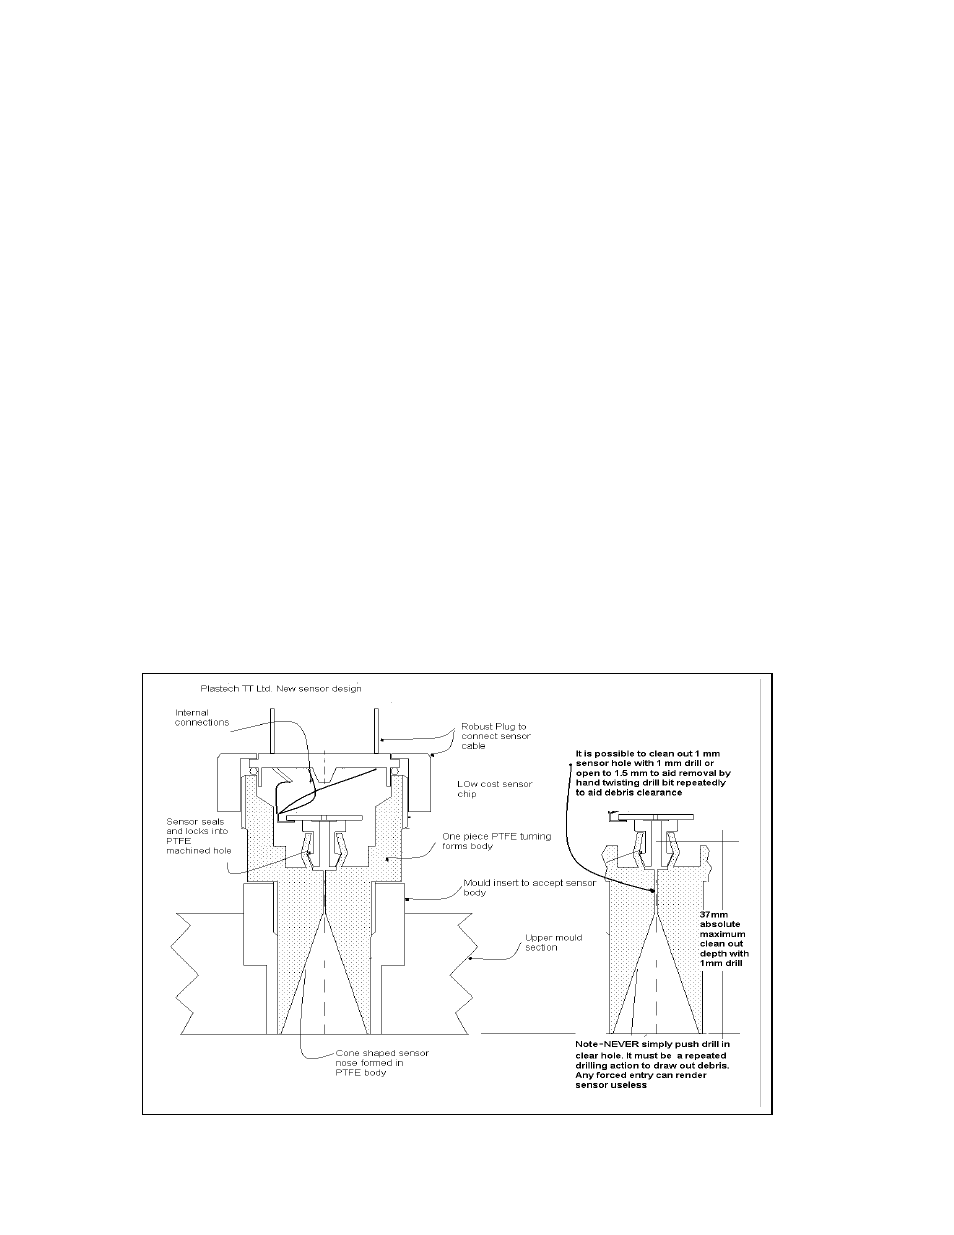
The PVSensor measures pressures between 0 and 2000mb absolute. It is designed to work upright
and NOT inverted. This is in order that resin does not enter the small 1mm diameter hole leading to the
sensitive electronic chip placed within the Sensor’s top body.
Operated correctly in this upright position, no resin should accumulate within the cone entrance,
however when cleaning, releasing or polishing the mould, the Sensor is left in the mould in the inverted
position. - In these circumstances we recommend that the upturned cone is covered with a small foam
plug, such as PE foam or anything which protects the 1mm hole against ingress of dirt, cleaning fluid or
new release agent.
If it is found that the cone becomes contaminated, or partially blocked with resin or build up of debris
and ceases to sense the pressures we recommend the following cleaning process.
See attached diagram of cross section of Sensor
1.
Obtain a 1mm drill.
2.
Mark a drilling depth of 37mm on the drill bit, measured from the tip.
3.
Hold the drill between thumb and index finger and start to rotate the drill clockwise.
NOTE
: It is important not to simply push the drill bit into the 1mm hole at the top of the Sensor
without a drilling action, as any debris could be pushed forward damaging the Sensor’s
sensitive diaphragm.
4.
After drilling in a couple of millimetres remove the drill and tap out the debris. Continue this
action in small drilling depths and continue to tap out debris often until it is possible to read
pressure changes on the digital meter by blowing into the Sensor’s open cone end.
5.
NEVER
drill deeper than 37mm.
6.
Damage to the PVSensor electronics could cause permanent damage to the PVSensor
system.