Magnum Venus Plastech PVSensor User Manual
Page 2
PVSensor Instruction Manual. Issue-08 25/06/2008 Page 2 of 8
RETRO FITTING THE ELECTRONIC MODULE TO YOUR MACHINE:
If your PVSensor system was not factory fitted you will need to fit the mounting bracket and make some
minor changes to the machine’s air circuit. The PVSensor is supplied complete with, Machine Control
Solenoid Valve assembly # 5789, and fixing bracket, spacers and screws to mount the Electronic Module
to the SSB chassis, or the Megaject Cabinet. See Appendix A.1, A.2 and A.3 for full instructions.
CONNECTING THE ELECTRONIC MODULE TO THE MACHINE:
With the power switched OFF, connect the 12vDC PSU to the socket on the left hand end of the
Electronic Module.
Connect the 3 way, black socket to the injection machine plug now fitted as standard on all
standard Magnum Venus Plastech meter mix machines.
This plug can be found flush mounted on the side of older Megaject SSB model chassis, on the
rear of Patriot SSB chassis, or on the back of the yellow Megaject MkIV and MkV machine
cabinets.
Switch the power ON, and assuming the mould is not under vacuum supply, the atmospheric
pressure on the electronic display screen should read between 95 and 105 (950 to 1050 mb),
dependent upon weather conditions.
SETTING UP THE ELECTRONIC MODULE:
For the PVSensor system to operate, the Electronic Module must be connected to the machine via
the Machine Control Solenoid Valve assembly.
Whilst pressing, and holding in the left hand button on the Electronic Module, adjust the right hand
knob to select the desired set-point value (at which the operator is to be warned that the maximum
set pressure has been reached). This should be about 10-20 mb BELOW atmospheric pressure.
E.g. If atmospheric pressure reads 100 on the digital display (1000 mb) then set the control unit
pressure (when pressing the left hand button) to read 99 or 98. (990 or 980 mb). If this pressure
setting in the mould is reached during injection the system will send a signal to the machine to
slow down the injection rate or stop the machine.
The PVSensor set-point cannot be adjusted when the output solenoid is energized. (LED is on).
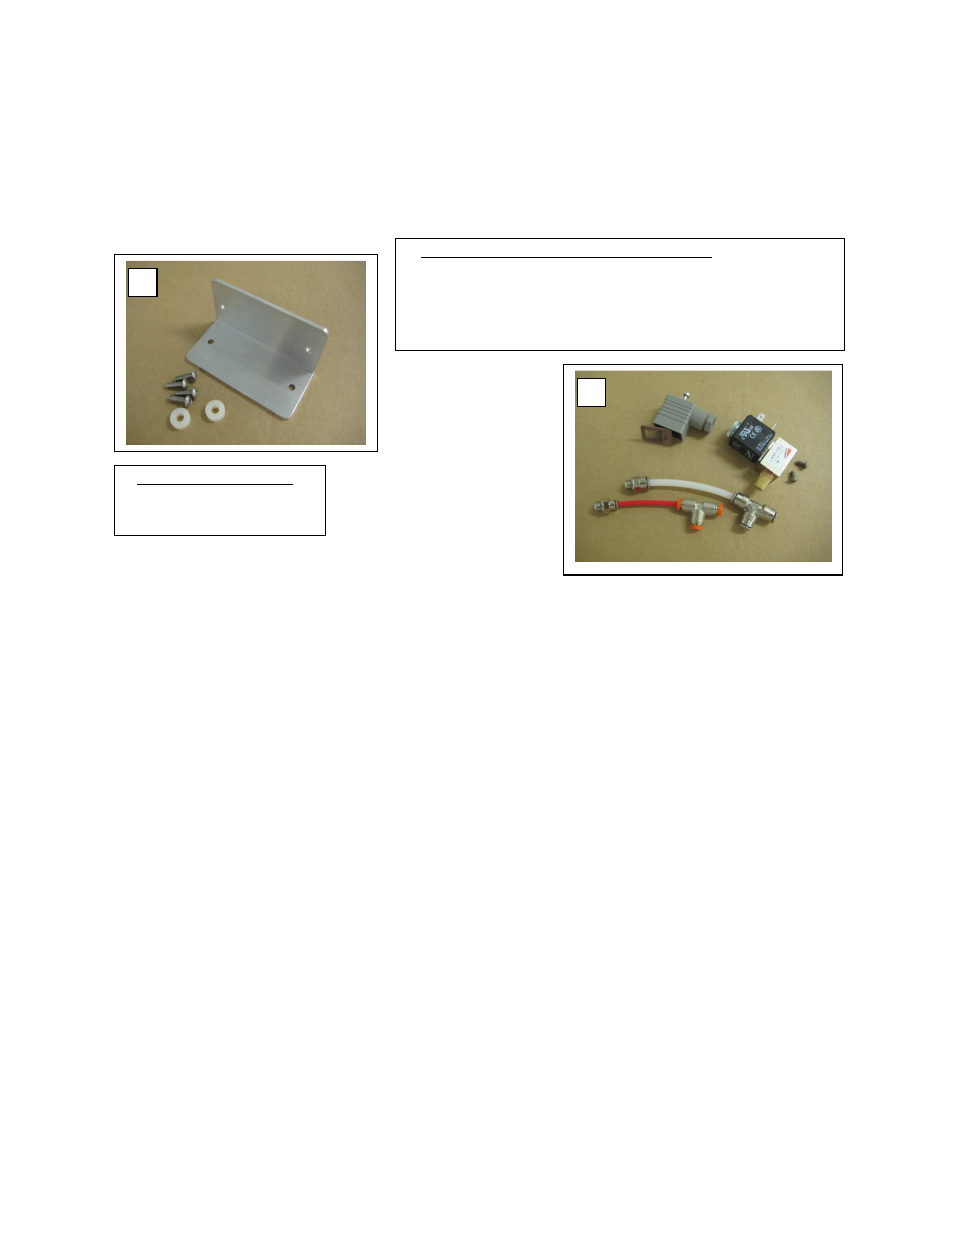
1. Retro Mounting Kit includes:
Mounting Bracket, 4 x Bolts and
2 x Spacers.
2. Machine Control solenoid assembly # 5789 includes:
- Solenoid Socket.
- Solenoid Valve & silencer with mounting screws to SSB or MkIV / MkV.
- 6mm clear nylon pipe with Tee and stud fittings for SSB connection.
- 4mm red nylon pipe with Tee and stud fittings for MkIV & MkV connection.
- Retro Mounting Kit.
1
2