Magnum Venus Plastech PVSensor User Manual
Page 5
PVSensor Instruction Manual. Issue-08 25/06/2008 Page 5 of 8
APPENDIX A.1 -
Retro-fit to Megaject MkIV and MkV machines.
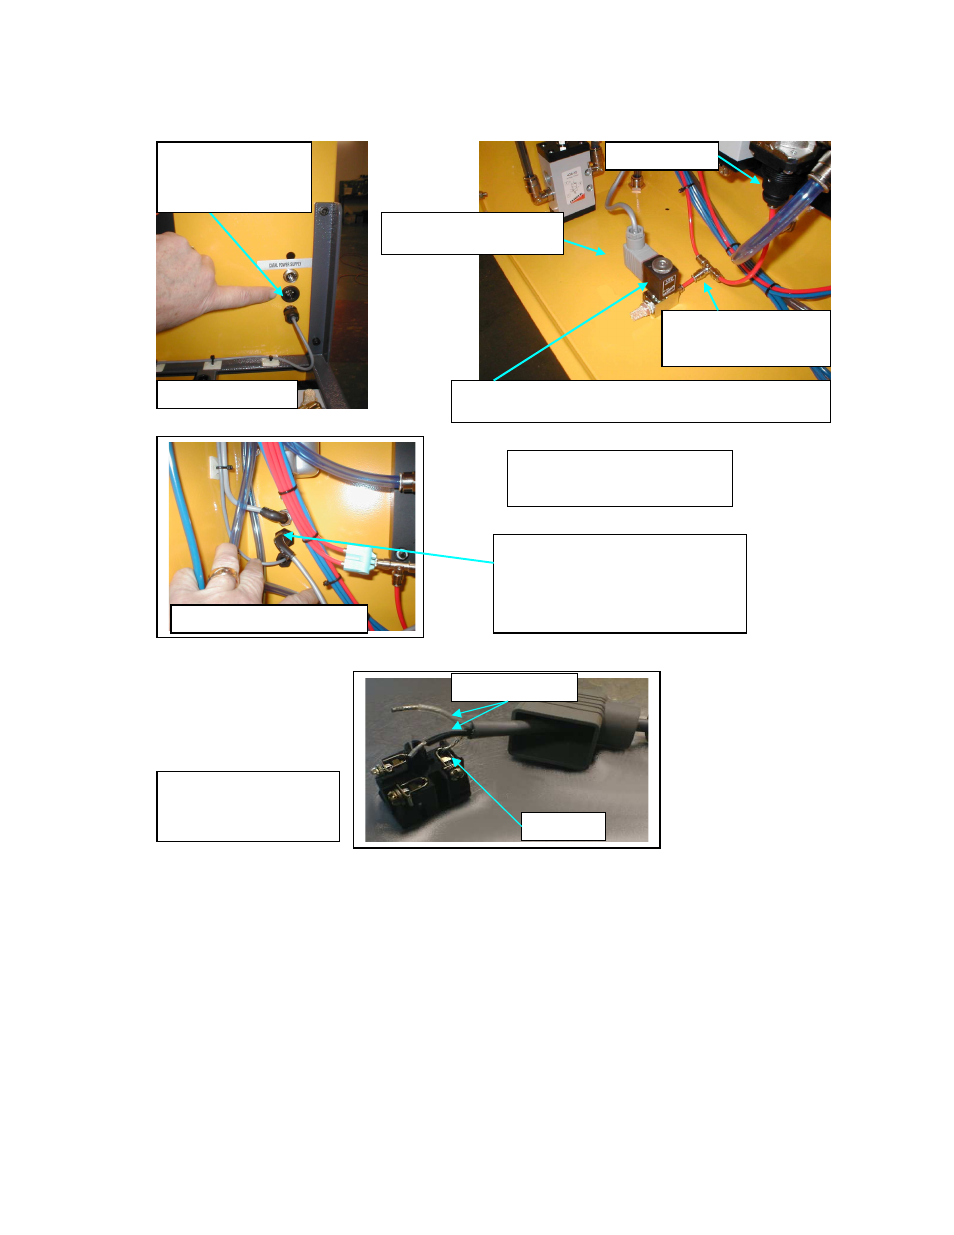
1. Ensure machine is isolated from air and electrical supply before carrying out any modification or
maintenance.
2. Connect the Feed Wires (leading from the PVS plug mounted on the chassis), to the Solenoid Socket as
shown and making sure that the gasket is in place, replace the socket cover using the central retaining
screw.
3. Screw the Machine Control solenoid assembly on to the base of the yellow cabinet as per photo, using the
M4 x 12 button head screws provided.
4. Using the 4mm red nylon pipe, 4mm Tee and the 4mm stud provided, cut the 4mm red pipe leading from the
MPG block to the MPG regulator as per the photo. Insert the Tee and connect to the solenoid assembly
using the 4mm stud fitting.
5. Connect the Mounting Bracket on to the rear of the cabinet using the 2 qty M5 x 16 button head screws and
nuts provided.
6. Screw the PVS Electronic Module on to the top of the mounting bracket and connect the Module socket to
the machine mounted plug.
7. The PVSensor is now ready to set and connect to the mould.
MPG Regulator
Machine Control solenoid
assembly #5789
PVSensor Plug inside the cabinet with
grey feed wire leading to the Solenoid
valve.
Note – The other 2 wires shown refer to
other options
.
Fix the Solenoid Valve through the 4.5mm hole at this point.
The exact position is NOT critical.
Factory cut hole.
IF NOT drill 19mm hole
for Solenoid plug
Rear view of cabinet.
Internal view of PVSensor plug
Tee in to 4mm red nylon
pipe between MPG and
MPG Regulator
Connecting the PVS to the
Megaject MkIV & MkV
Earth wire
Electrical connection
to the solenoid
socket
Power feed wires