Installation – Liquid Controls Dual Meter Multiplexer User Manual
Page 3
3
Installation
The following instructions show how to install and set up
the Dual Meter Multiplexer in different configurations,
depending on which device will be used to control the
LCR registers (Lap Pad, Hand Held PC, or Laptop PC).
NOTE: Make sure vehicle is OFF while the following
procedures are being implemented.
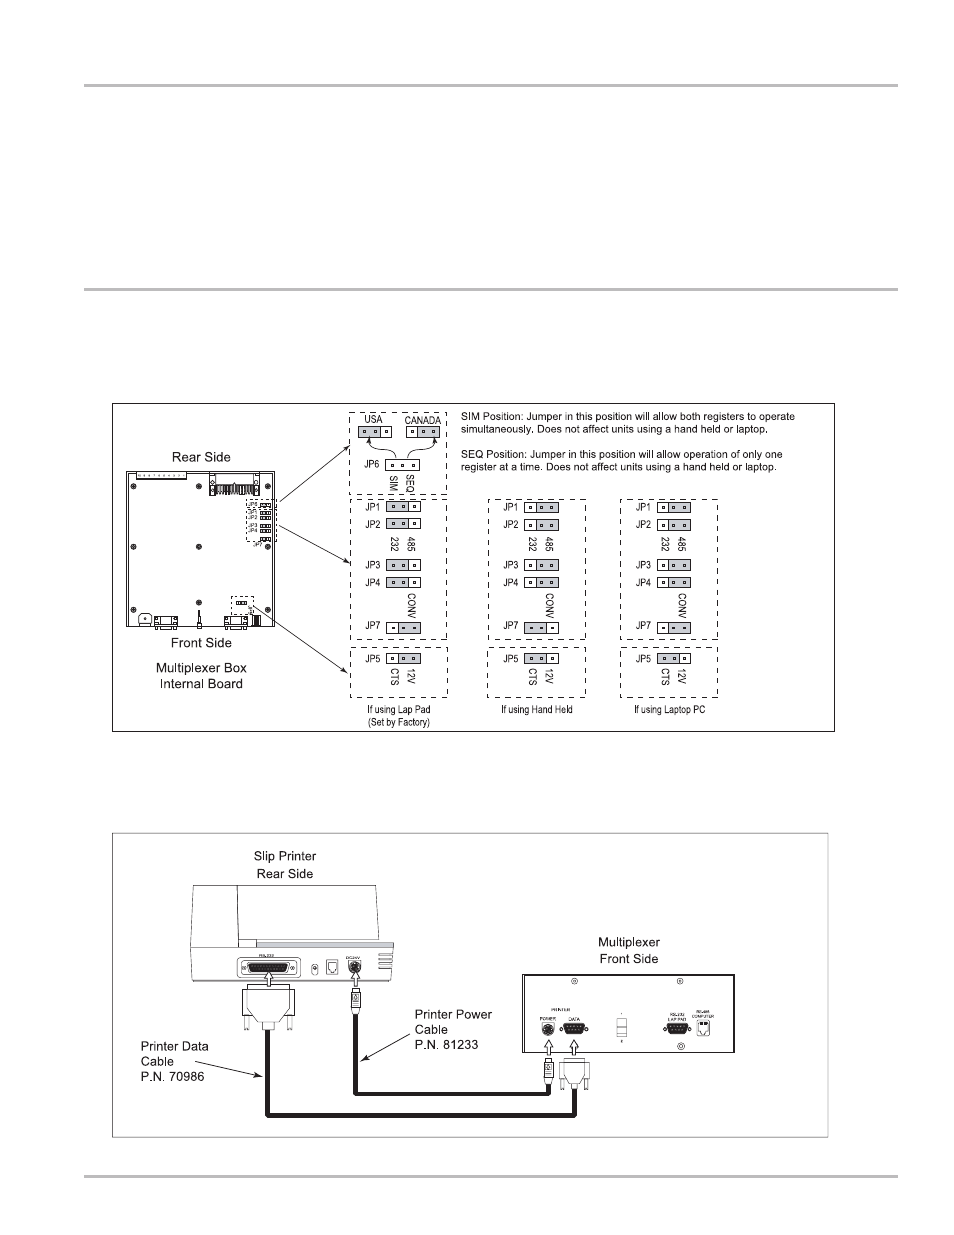
STEP 1: SET THE INTERNAL JUMPERS
The Multiplexer box has several jumpers inside that have to be set to a certain position depending on the device that
will be used to setup the registers. Using a 5/64” allen wrench, remove the 8 black, socket head screws and remove
the lid. Using needle nose pliers, set the jumpers to the position required and then replace the lid and tighten the
screws.
STEP 2: INSTALL THE MULTIPLEXER AND CONNECT THE PRINTER
Install the multiplexer in it’s final location and make sure it is grounded properly. Next, plug in the data and the
power cable into the front side of the multiplexer. Plug the other end of the cables into the back of the printer.
When looking for the proper place to install the
multiplexer, the unit should be mounted:
•
In a place where it will not be exposed to water or
excessive dust.
•
In an easily accessible location.
•
Where cables cannot be pulled, bent or stepped on.
•
Using sturdy metal brackets.
•
Close to a good grounding spot.
This will ensure that the unit will not get damaged and
that it is properly grounded.
Figure 1.3 Printer Connection.
Figure 1.2 Multiplexer Internal Jumper Settings.