Seai/o-463 ribbon cable installation, I/o-463, Ibbon – Impulse 520W User Manual
Page 61: Able, Nstallation
SeaI/O-463 Ribbon Cable Installation
A copy of these instructions is included with the SeaI/O-463 module and can also be
downloaded from the SeaI/O-463 product page on the Sealevel website.
NOTE:
Do not perform these instructions with the power connected. Be
sure to follow proper ESD procedures by grounding yourself and the
SeaI/O module.
What you will need:
SeaI/O-463 module
Phillips head screwdriver
Slotted screwdriver
50-pin IDC ribbon cable* (up to four)
*Ribbon cable accessories available:
•
CA167 – 40” IDC 50-pin to IDC 50-pin ribbon cable
•
CA197 – 18” IDC 50-pin to IDC 50-pin ribbon cable
•
CA135 – 40” IDC 50-pin to 50-pin edge connector ribbon cable
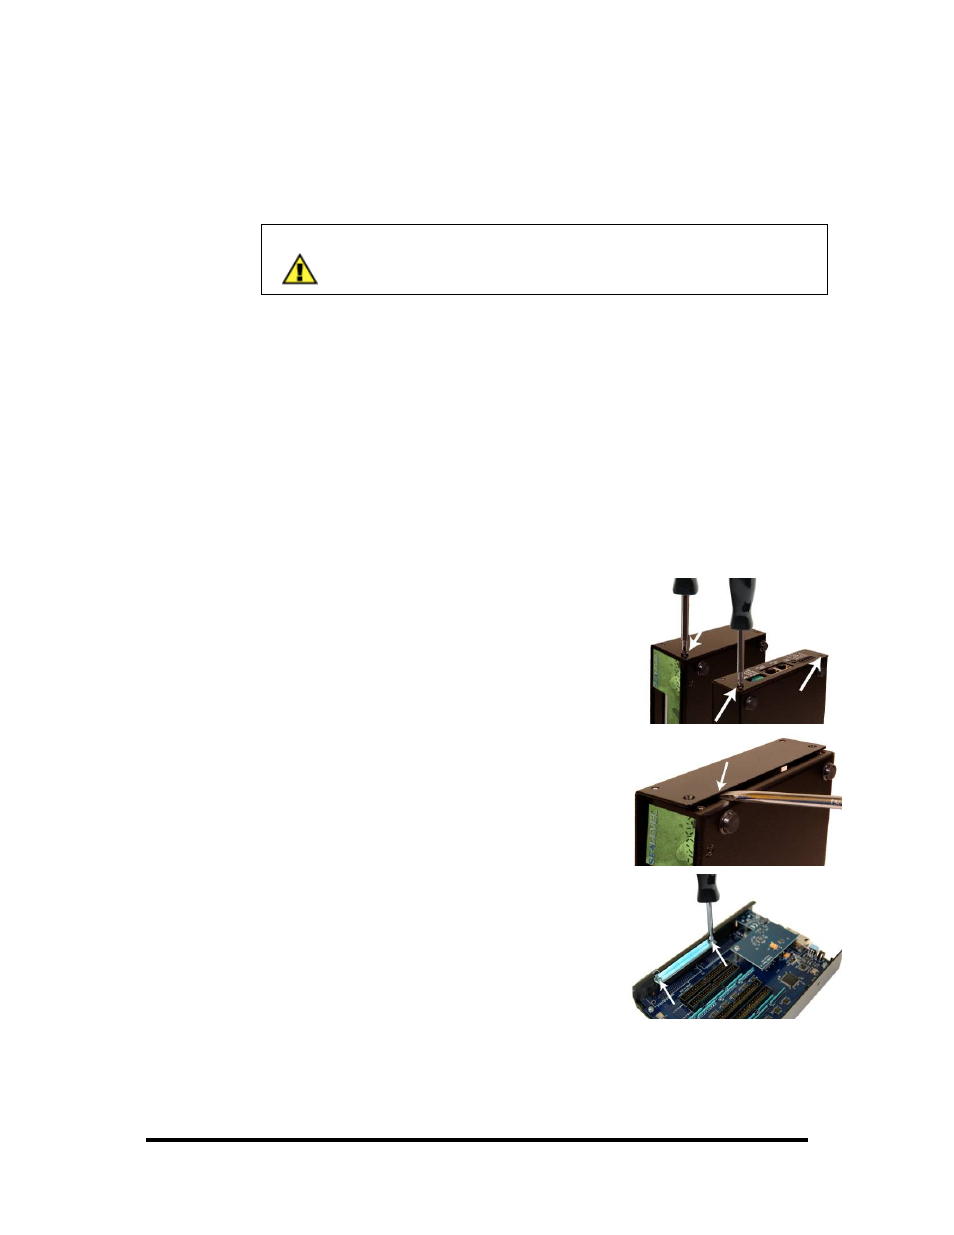
Step 1
Remove the terminal block from the left side and
then remove the two black screws from each side
of the module as shown in the image.
Step 2
On the front right side of the module, wedge a
slotted screwdriver between the top and bottom
halves as shown. Pry upwards – a pem in the top
half must clear the metal lip in the bottom half of
the enclosure.
Step 3
Remove the two screws from the metal strain
relief, as shown.
© Sealevel Systems, Inc.
- 58 -
SeaI/O User Manual