American Power Conversion 100 VAC User Manual
Page 20
990-7096 Rev. 2
16
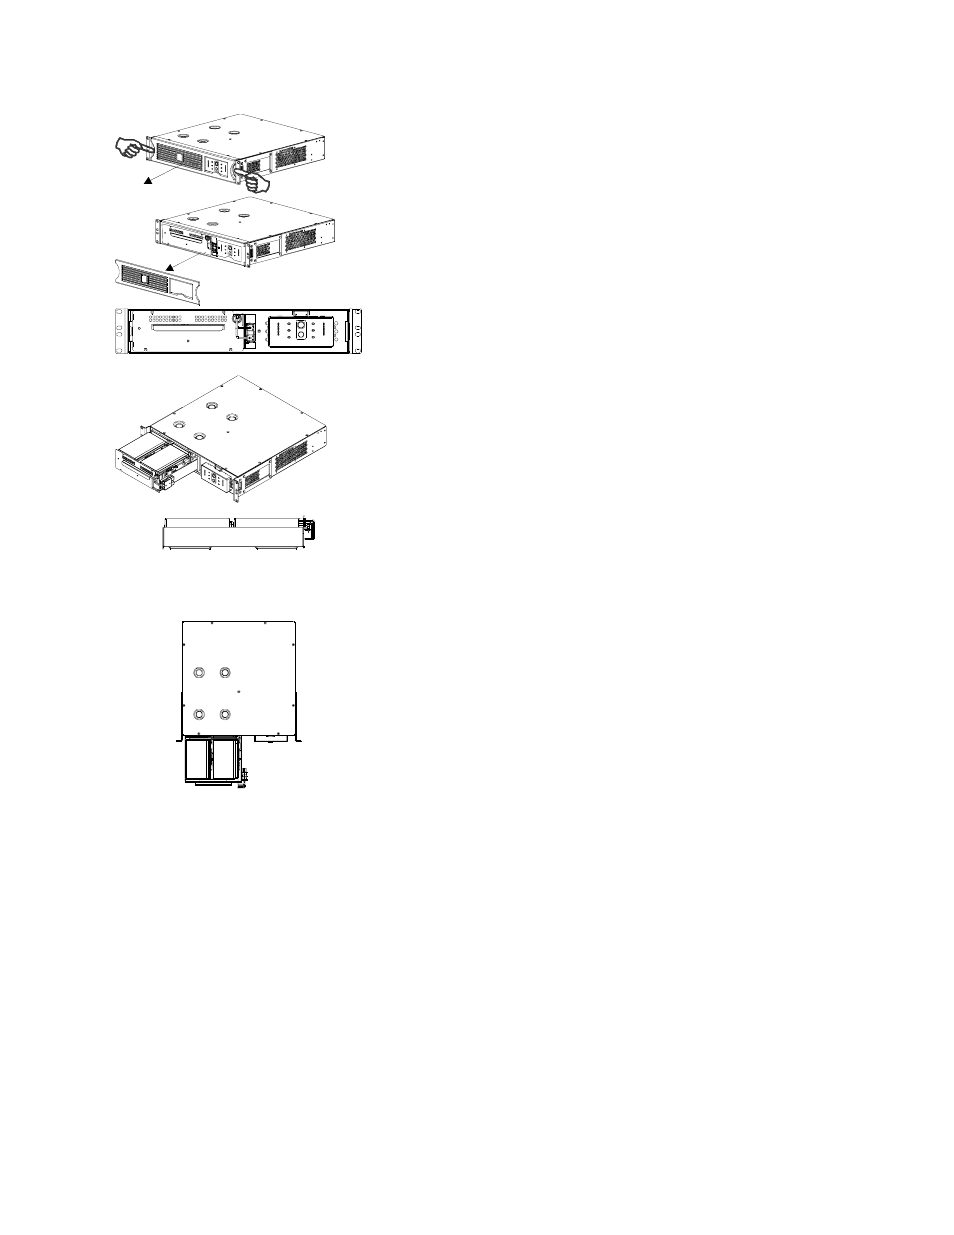
1. Face the front of the UPS and, using both hands, insert each
index finger behind the lip of the curved section of the front
panel bezel and pull towards you. The front panel bezel
will unsnap.
2. Set the bezel aside.
3. Take out the white cord, which is tucked into the space
above the battery connector
. Grasp the cord and pull
firmly towards you to disconnect the battery.
4. Use a Phillips head screwdriver to remove the four (4)
screws
that secure the battery tray. Set the screws aside.
5. Use the battery tray handle
to slide the tray out halfway.
Then hold the tray from the sides and slide it out to the
maximum extended position. A stop tab
on the bottom
of the tray will prevent the tray from coming out
completely.
6. Carefully lift the tray up so that the stop tab
clears the
ledge on the unit.
7. Return the battery tray to APC using the package in which
your replacement tray shipped. (See How to Contact APC,
page 3, for details.) The battery replacement kit includes a
new battery tray.
8. Hold the new tray on the sides and align it with the opening.
9. Raise the back of the tray up slightly to position the stop tab
on the inside of the opening. Then level the tray and push it
in completely.
10. Remove the tape on the new battery tray connector to
expose the cable connector.
11. Locate the UPS battery connector
which is to the right
of the battery tray and recessed. Connect the battery cable
connector to the UPS connector. Press firmly to ensure that
the connection is tight. You will hear a “snap” when the
connector is properly seated.
12. Replace the four (4) screws removed in step 4.
13. Tuck the white battery cable cord neatly into the space
above the UPS connector.
14. Hold the front panel bezel with the cutout section on the
right. Align the tabs on the side of the bezel with the slots
on the front of the UPS
and firmly snap it into place.