Bead bre a ker directions – Ken Tool 38620-99 ATV Bead Breaker User Manual
Page 4
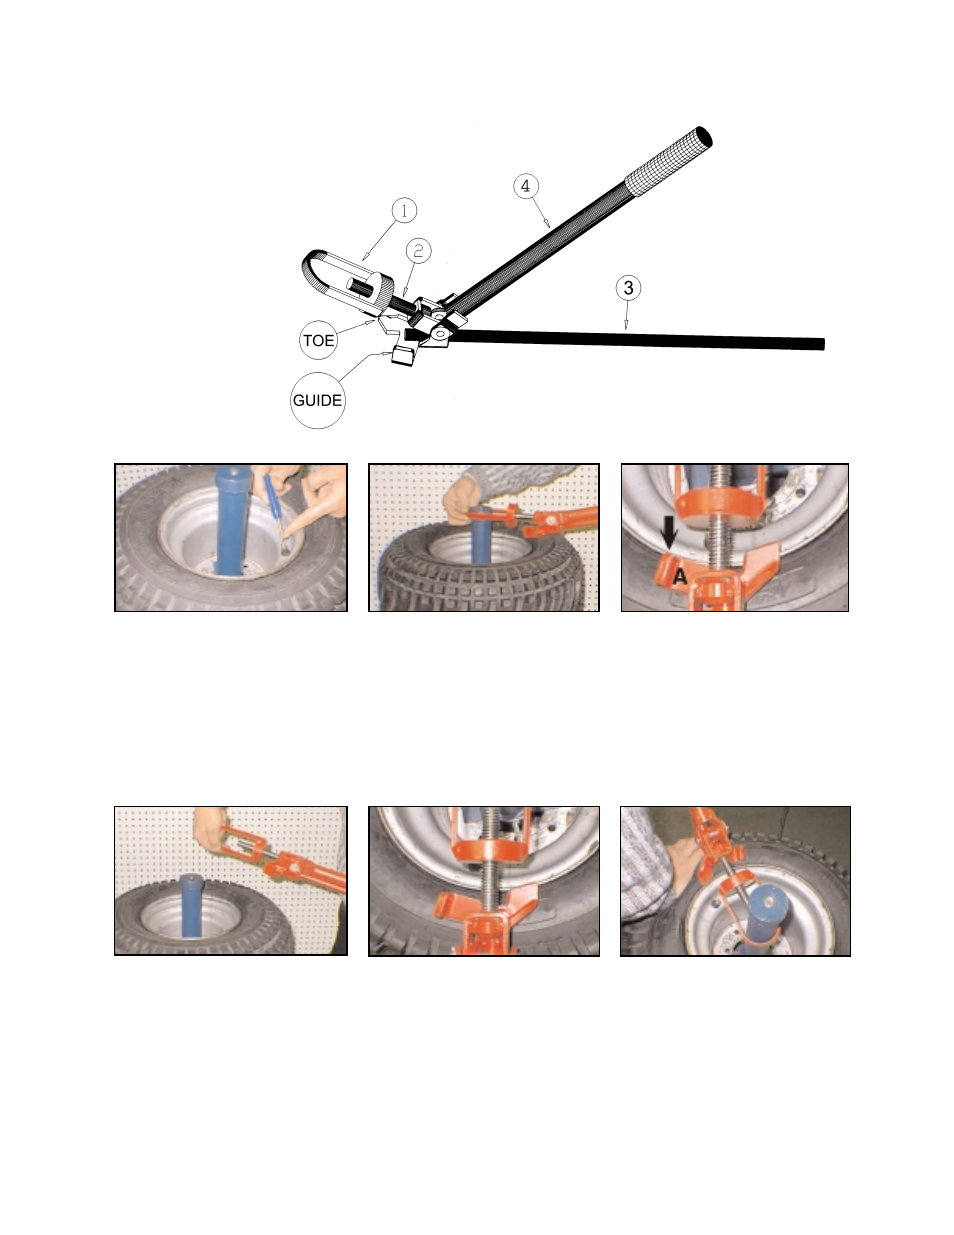
Bead Bre a ker Directions
Remove valve core and place ATV
tire and rim assembly on any sturdy,
center-post, tire-changing machine
(we recommend Ken-Tool 38600 or
38601 series). Center the tire and
secure the rim to the tire-changing
machine.
Hold both handles of the ATV Bead
Breaker in your left hand. With your
right hand, lower the adjustable,
mounting collar over the center-post
of the tire-changing machine. Hold
both handles horizontal and look
downward to check the tool align-
ment.
To adjust the breaker, remove the tool
from the center-post and rotate the
mounting collar. Replace the mount-
ing collar over the center-post and re-
examine the alignment. Repeat if nec-
essary.
It is important that the
edge of the guide rests next to
the outer flange.
Align the edge of guide (A) with
the edge of the outer-flange of
the wheel (see above diagram for
proper placement).
If the guide is not properly positioned
(see above diagram), the tool may slip
out from under the rim or cause dam-
age to either the bead or sidewall of
the tire during use. Once properly
adjusted, LUBRICATE THE ENTIRE
BEAD AREA (Ken-Tool recommends
Bead-Eze). This is particularly impor-
tant to provide a gliding effect as the
bead breaker is moved around the
tire, and to prevent damage to the tire.
After the guide is properly positioned,
hold both handles in your left hand.
Push down on the sidewall with your
right hand. This provides a "starting
place" for insertion of the tool. Raise
both handles and slide the toe
between the rim and bead.
keep
your right hand clear of the
insertion area to avoid pinch-
ing.
1.) Mounting Collar
2.) All Thread
3.) Bottom Handle
4.) Black Grip Handle