INTELLINET NETWORK ICC-130 User Manual User Manual
Page 26
- 26 -
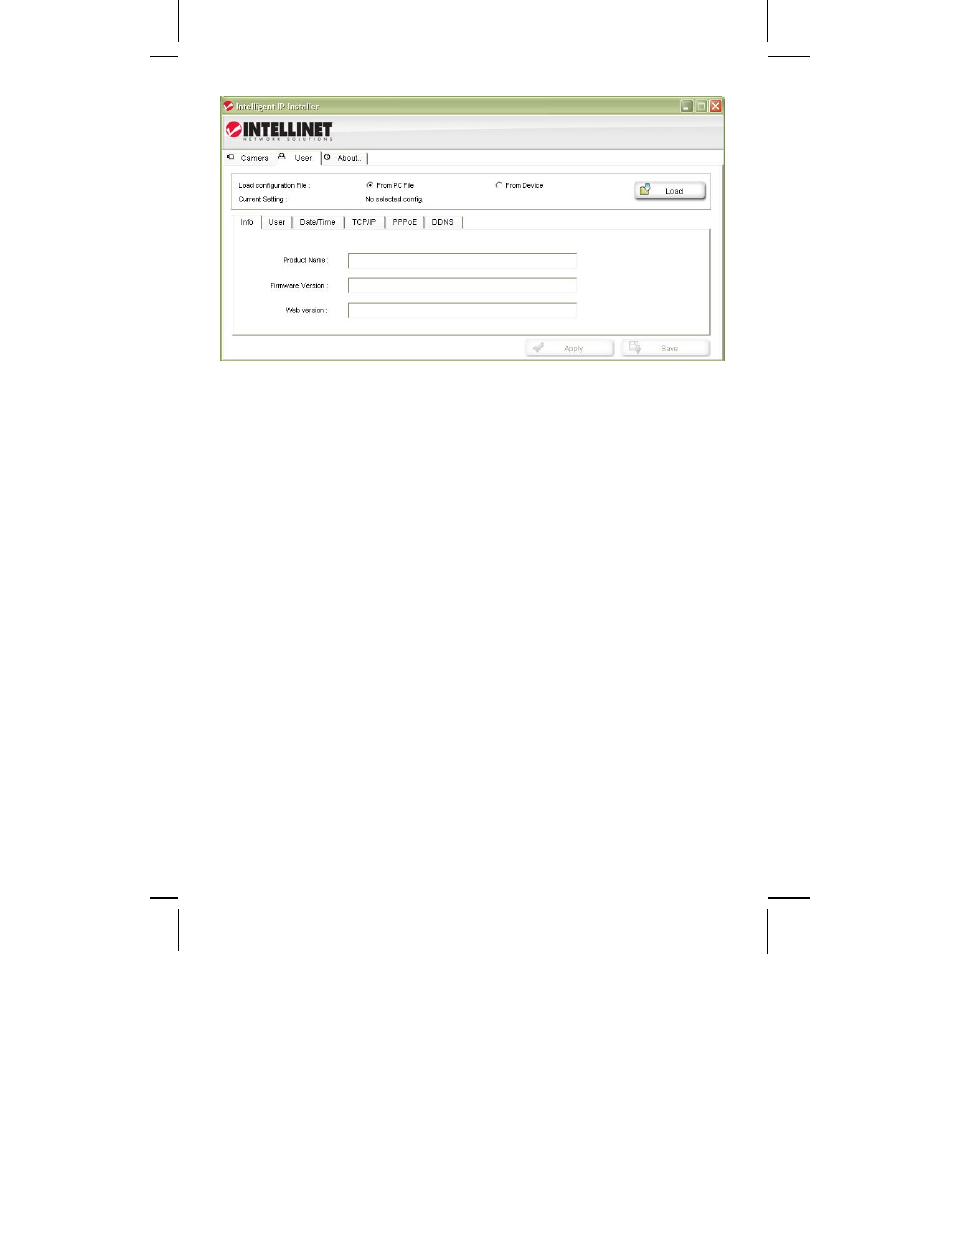
User tab
This screen offers two functions:
1. You can change the individual settings of the camera in a similar fashion as
with the Setup function on the main screen. However, instead of clicking on
Previous and Next to switch between the screens, you can access the individual
options more quickly by clicking on any of the tabs (User, Date/Time, TCP/IP,
PPPoE and DDNS). You cannot install additional languages with this function,
however.
2. You can load the camera configuration into the IP Installer utility, and then
save it to your computer hard drive. This can be useful if you wish to create a
backup of the entire configuration in case you want to reload it at a later time.
You can also use this function to load a configuration previously saved on the
PC and load it back into the camera configuration.
To begin, select either “From PC File” or “From Device,” then click Load.
If you select “From PC File” you will be asked to specify the configuration file on
your computer hard drive.
If you select “From Device” a screen opens up that asks you to select the
camera and enter the administrator user name and password.
Once completed, the screen shows the configuration data, and you can make
changes to the settings as you see fit. When you are ready to submit the
settings to the camera, click on Apply. Select the camera from the device list,
enter the administrator user name and password and click OK. The camera
settings are now saved into the camera configuration.
If you want to create another backup of the configuration, click on Save and
enter a proper filename, such as “camera_1_config.conf,” before you click
Save.