Inspection and first-time setup procedures – Hydrotech PURA Ultimate 19-GU-PURA Operation Manual User Manual
Page 9
INSPEcTION ANd FIRST-TIME SETUP PROcEdURES
Proper cleaning and sanitization of the complete cooler is critical to delivering great tasting water.
The PURA Ultimate unit was assembled, tested and drained at the factory before shipping. The design includes
a unique internal water tank with a large surface area that stores the high quality product water the customer will
drink. Therefore this tank must be thoroughly cleaned of anything that could compromise the taste and quality of
the water.
The inspection and first time start-up procedures for the PURA Ultimate consist of five steps.
1. Unpack and inspect the unit for any shipping damage.
2. Wash the internal plastic reservoir, lid, and floats with dish soap. Rinse thoroughly.
3. Connect a feed water line (RO or DI water recommended) to the unit.
4. Sanitize the entire unit with chlorine.
5. Install and flush the water treatment components.
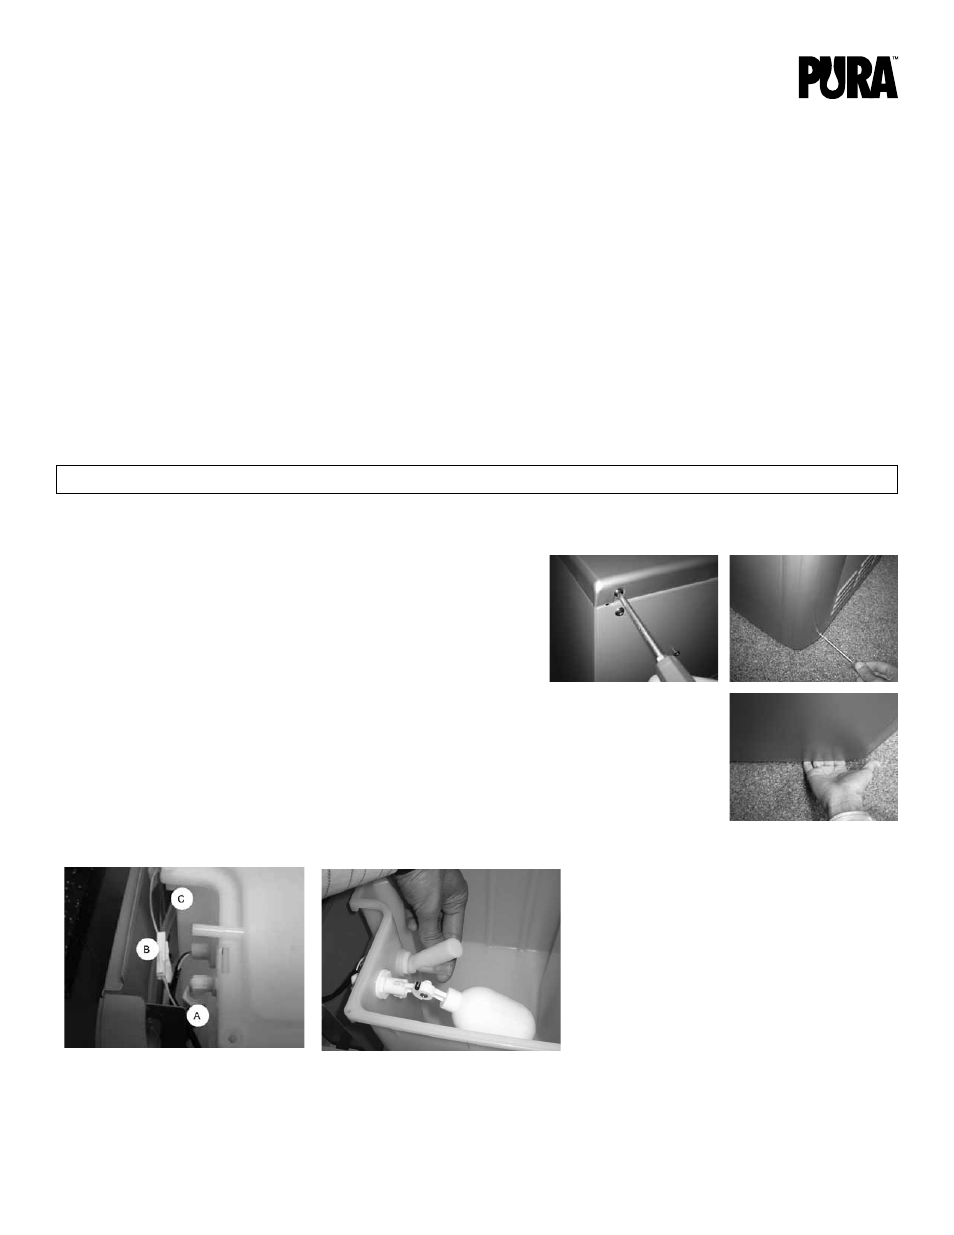
STEP ONE: Unpack and inspect
1. Unpack the cooler and check exterior for damage.
2. Remove the top cover. Screws are located in the rear corners.
3. Remove the lower front panel. Two screws securing the lower
front panel are located on the front, lower sides near the floor.
Depress the recessed tabs of the lower front panel (under the
front-end of the unit) and pull outward simultaneously to remove.
4. Visually inspect the internals of the unit for breakage and any wires that may have come
loose during shipment.
STEP TWO: Wash the internal plastic reservoir
1. Completely remove the internal plastic reservoir (see Figure 4) from the unit. Remove
the protective silicon sleeve from the electronic float.
a. Disconnect the water supply line fitting from the mechanical float.
NOTE
Sanitizing is mandatory prior to installing the PURA Ultimate.
Figure 4: Internal plastic reservoir
9