Step five – ic-send testing – Contemporary Research SW-DX Integration Guide User Manual
Page 7
Contemporary Research
7
iC-Net Tips – RF Design and Installation
Step Five
– IC-Send Testing
Very often, an integrator will send over a higher-level tech to test operation after the
displays are installed. At this point, there may not be a Display Express PC or software
installed as yet, or the control system code isn’t finalized. However, you can take a laptop
with free IC Send software to test the system.
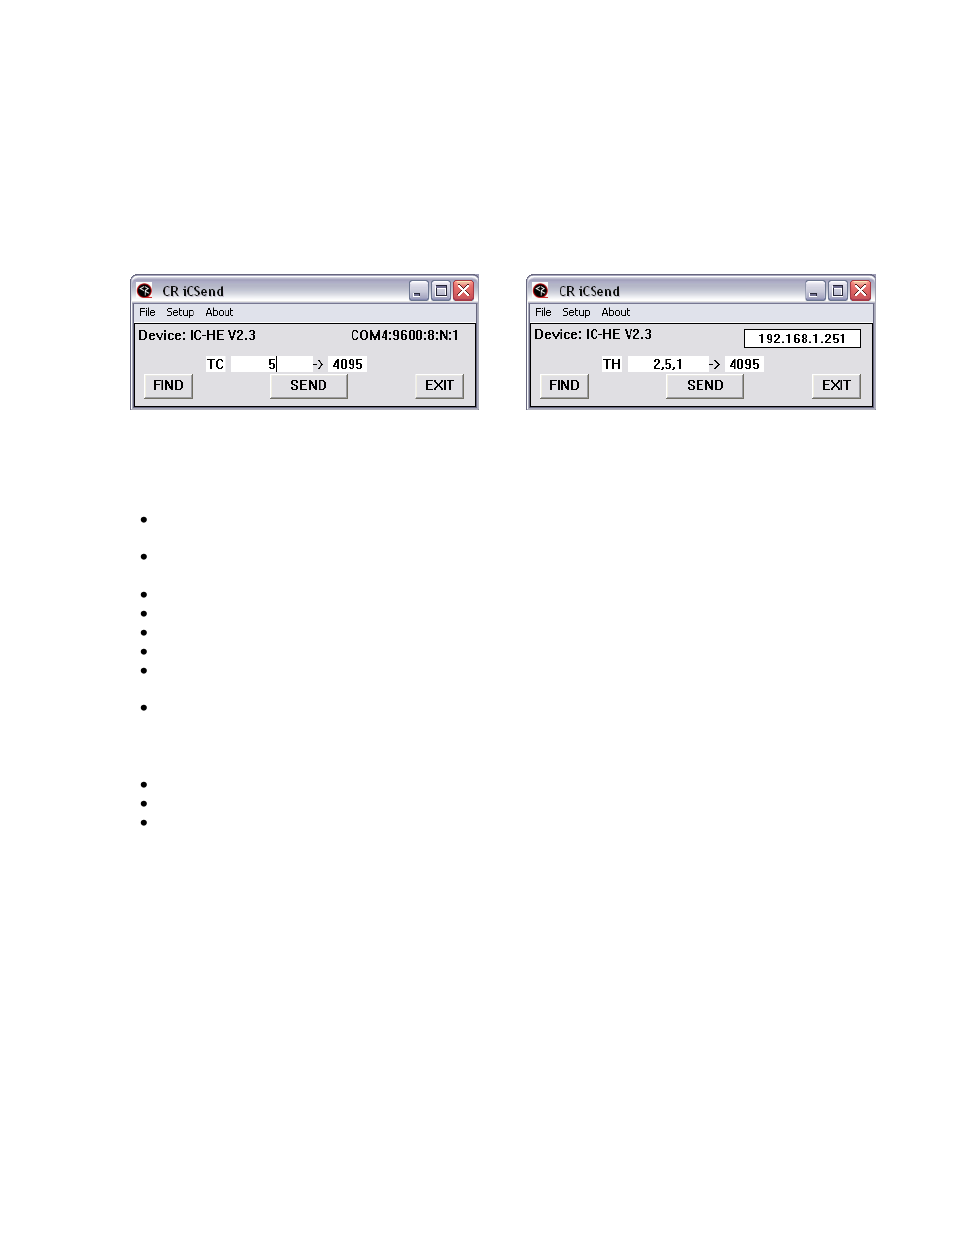
Com Setting
IP Setting
IC Send is a Windows application for testing iC-Net communication and control. Setup just
takes a few steps:
Connect a Female to Female null model cable (TX and RX swapped at one end) between a PC
and a CR iC-Net Head End.
Connect the cable to the Program Port, not the iC-Net port.
Check to make sure the DIP switches on the from of the Head End is set to 19.2 Kb.
Switch 6 set to Off, Switches 7 and 8 On.
Launch iC Send – no installation is needed.
Click Setup to choose RS-232 port or IP port.
For IP Port, enter the IP address of the Head End.
Click FIND to connect to the IC Head End, then IC Send will display “Seeking Device”.
If IC-Send connects to the Head End, the firmware version of the HE will appear at the top left
below the menus.
If you change the cable or DIP switch settings on the HE, click FIND to re-connect.
Entering Commands
Command: Enter the command code in the first field.
Parameter: Enter the parameter, if needed, in the second
Device: Enter the device or Zone number for the controller(s)
Click SEND to send the command.
Devices and Zones
To send a command to an individual controller, enter its unique address. To send a command to
an entire Zone (up to 255 controllers) or all controllers use a Zone address (see page 5).