Keyboard tray adjustments – CHIEF KWT110 User Manual
Page 22
KWT-110
Installation Instructions
22
Figure 46
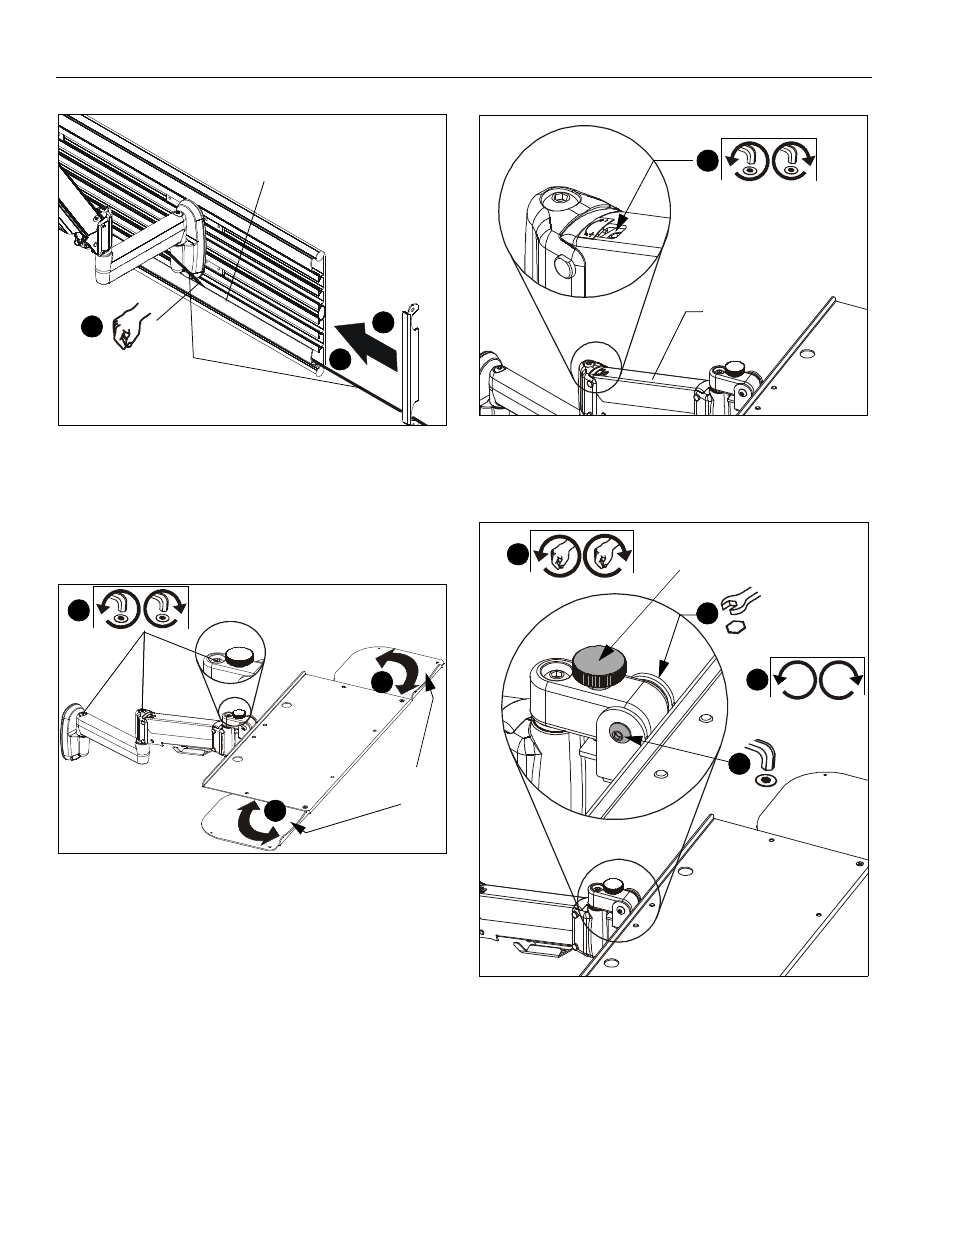
KEYBOARD TRAY ADJUSTMENTS
Swing Arm Pivot/Swing Adjustment
1.
Slightly loosen or tighten the adjustment screw(s) as
necessary, using the 3/16" hex key (Z). (See Figure 47)
Figure 47
Mouse Tray Adjustment
2.
Mouse trays slide open and closed on both sides of the tray
for use by both right- and left-handed users. (See Figure 47)
Height Adjustment
3.
Slightly loosen or tighten the height adjustment screw as
necessary, using the 5/32" hex key (AA). (See Figure 48)
•
If keyboard tray lowers on its own, rotate
adjustment screw counterclockwise (towards
the "+" symbol).
•
If keyboard tray rises on its own, rotate
adjustment screw clockwise (towards the "-"
symbol).
NOTE:
It may be necessary to raise or lower the height
adjustable arm to expose the adjustment screw.
Figure 48
4.
Adjust tray tension using a 7/16" wrench and a 5/32" (AA)
hex key. (See Figure 49)
Figure 49
5.
Adjust the tilt angle adjustment knob as necessary to set tilt
angle of keyboard tray. (See Figure 49)
Display Installation
The mounting holes on the back of your display will either be
flush with the back surface, or recessed into the back surface.
Refer to the applicable installation procedure.
1
cable management flap
cable path
4
3
(typical)
Pivot/Swing adjustment screws
Adjustable
mouse trays
1
2
2
Height adjustment
screw
Height
adjustable
arm
3
4
4
5
4
Tilt angle
adjustment knob