Cable management - keyboard tray – CHIEF KWT110 User Manual
Page 21
Installation Instructions
KWT-110
21
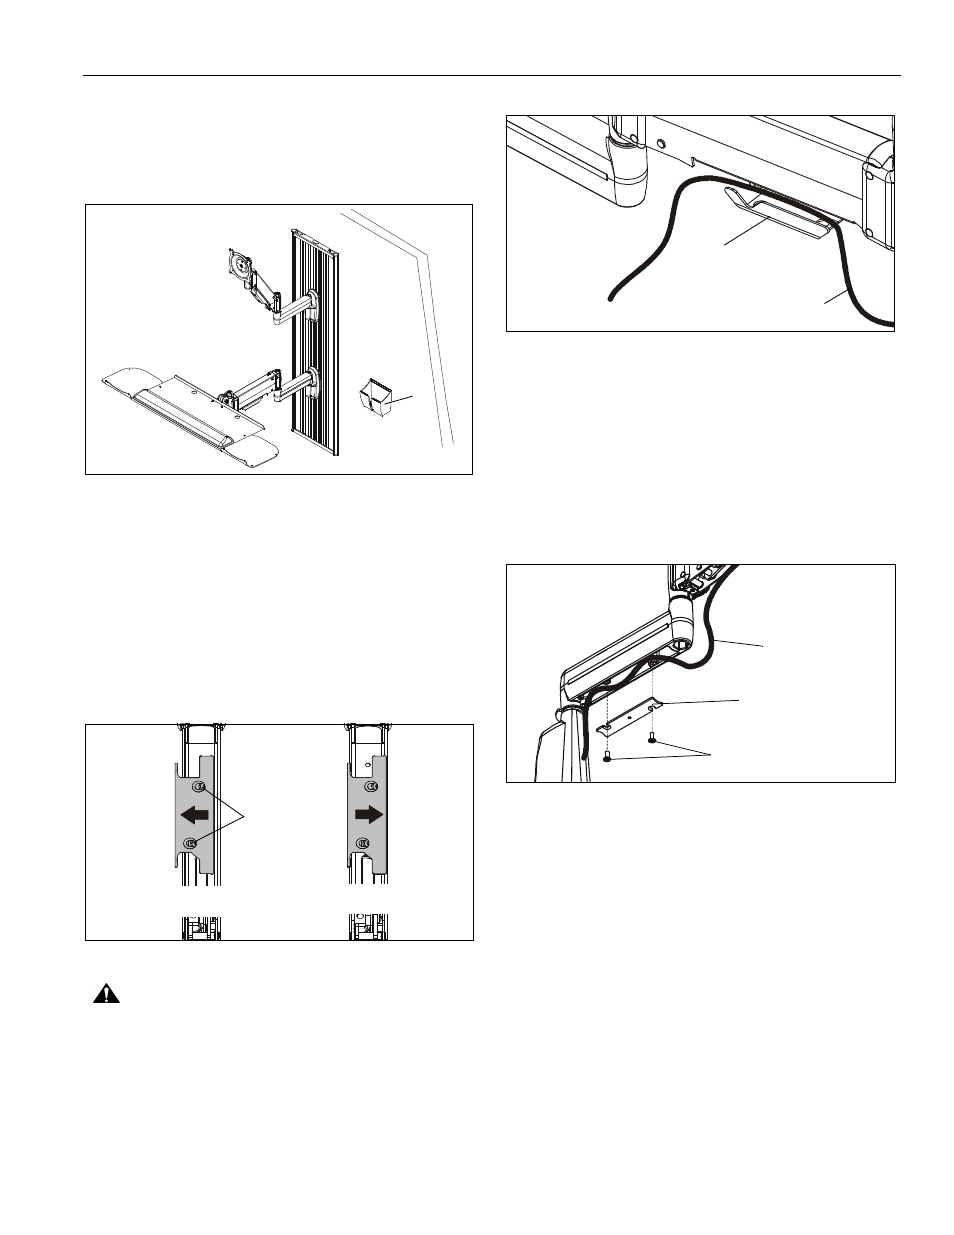
Mouse Holder Installation
1.
Remove adhesive backing from mouse holder (G).
2.
Place mouse holder (G) on wall at desired location. (See
Figure 42)
Figure 42
Cable Management - Keyboard Tray
1.
Thread keyboard cable through one of two holes along the
back edge of the keyboard tray.
2.
Open the cable management bracket by sliding it towards
the edge of the arm. (See Figure 43)
NOTE:
If necessary, cable management bracket attach screws
may be loosened using 3/16" hex key (Z).
Figure 43
CAUTION:
Ensure that adequate cable slack exists for
movement of keyboard and mouse, and that cables will not
be pinched when bracket is closed.
3.
Carefully insert cables into bracket. (See Figure 44)
Figure 44
4.
Close cable management bracket by sliding it back towards
the centerline of the arm.
NOTE:
If necessary, cable management bracket attach screws
may be tightened using 3/16" hex key (Z).
5.
Carefully insert cables in cavity located in lower portion of
mount arm. (See Figure 45)
6.
Using Phillips screwdriver, install cover (L) with two #8-32 x
3/8" Phillips flat screws (W). (See Figure 45)
Figure 45
7.
Tuck cable inside cable management flap. (See Figure 46)
8.
Remove side cover to wall track accessory.
9.
Pull cable through cable management flap until cable outlet
plug extends outside the wall track accessory. (See Figure
46)
10. Reinstall side cover making sure the cable runs through the
cable hole. (See Figure 46)
(G)
OPEN Position
CLOSED Position
Attach
Screws
View from Bottom
Cable Management
Bracket (in open position)
Cable Path (typical)
Cable Path
(typical)
(L) x 1
(W) x 2