M. installing the tire and adjustments – American Expedition Vehicles JK Rear Bumper/Tire Carrier User Manual
Page 17
15
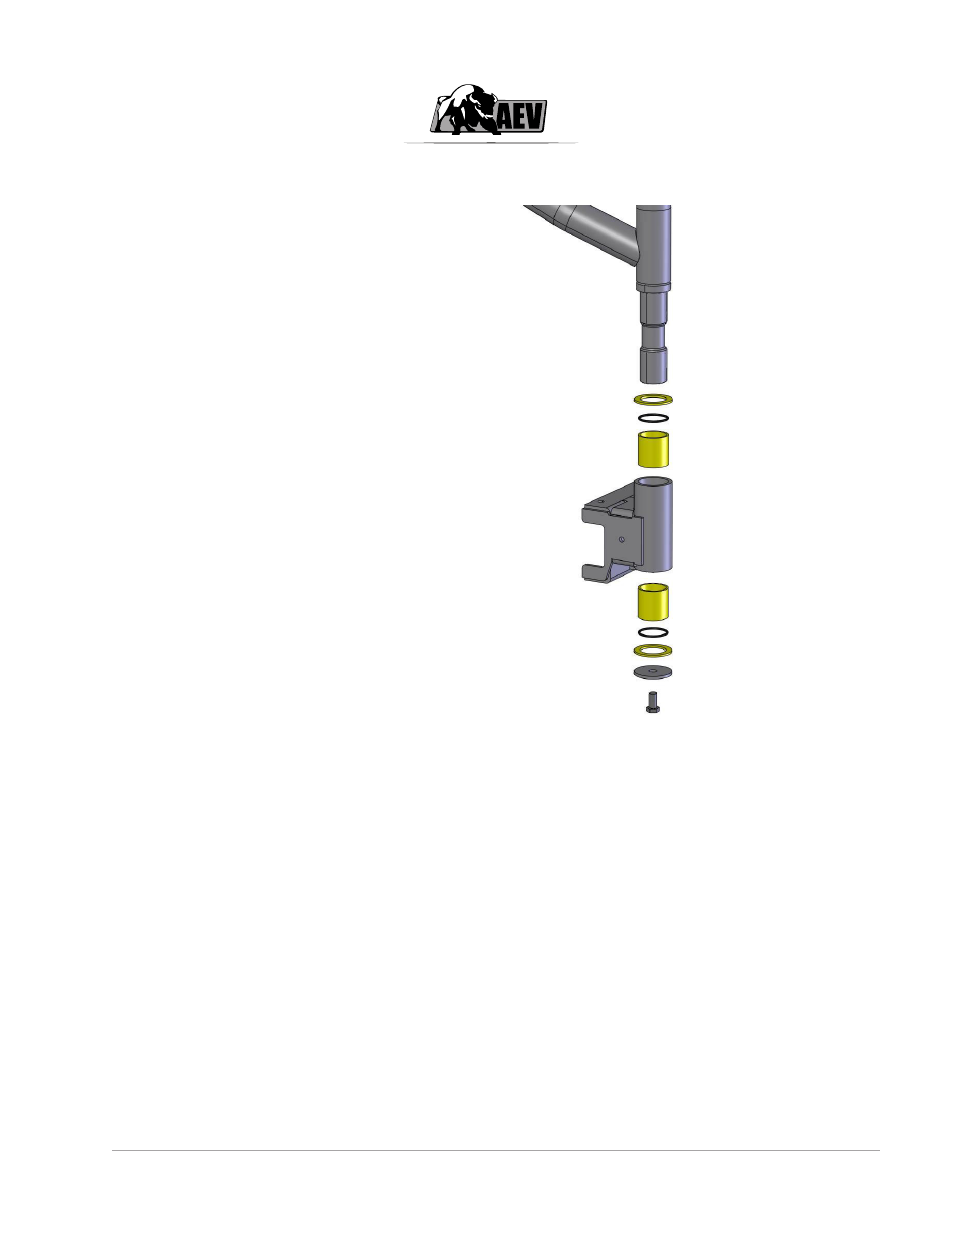
L. RE-INSTALL THE TIRE CARRIER TO THE SPINDLE HOUSING
1. Install the Tire Carrier into the Spindle Hous-
ing as shown. Lubricate the O-Rings and all
components thoroughly with grease during
assembly.
2. Tighten the ½” Tire Carrier Retention bolt.
Test for swing resistance on the Tire Carrier,
there should be mild resistance, if there is too
much, a thin washer can be placed between
the Retention Disc and the Tire Carrier Spindle
if necessary.
3. Be sure the Zerk fitting is pointing downward.
Fully grease the system at this point. Use any
conventional axle bearing grease.
4. Re-install the TURNBUCKLE LINKAGE to the
assembly as shown in STEP F.
M. INSTALLING THE TIRE AND ADJUSTMENTS
1. Install the spare wheel and tire, tighten the ½” bolt until the tire touches the Tire Carrier vertical and
horizontal tubes. Tighten the bolt another ¼” which equates to six or seven FULL turns.
2. Tighten the Anti-Vibration bolt to take any movement out of the backspacing adjustment. Loc-Tite is
recommended on this bolt.
3. Close the Tailgate and Tire Carrier and push/pull on the tire to check for any rattles or movement,
there should be virtually none. If there are any rattles or movement, adjust the turnbuckle in ¼ TURN
increments until the movement is gone.
4. Open the tire carrier fully and be sure the Turnbuckle Linkage fits into the channel on the Tire Carrier
without interference. If the Turnbuckle Linkage hits the channel, the Spindle Housing is not seated
properly and you must repeat the seating and tightening procedure outlined in sections E and G of
this manual.