Upb 25 • installation guide (continued) – Extron Electronics UPB 25 Installation User Manual
Page 4
4
UPB 25 • Installation Guide (Continued)
68-1179-01
Rev. E
08 12
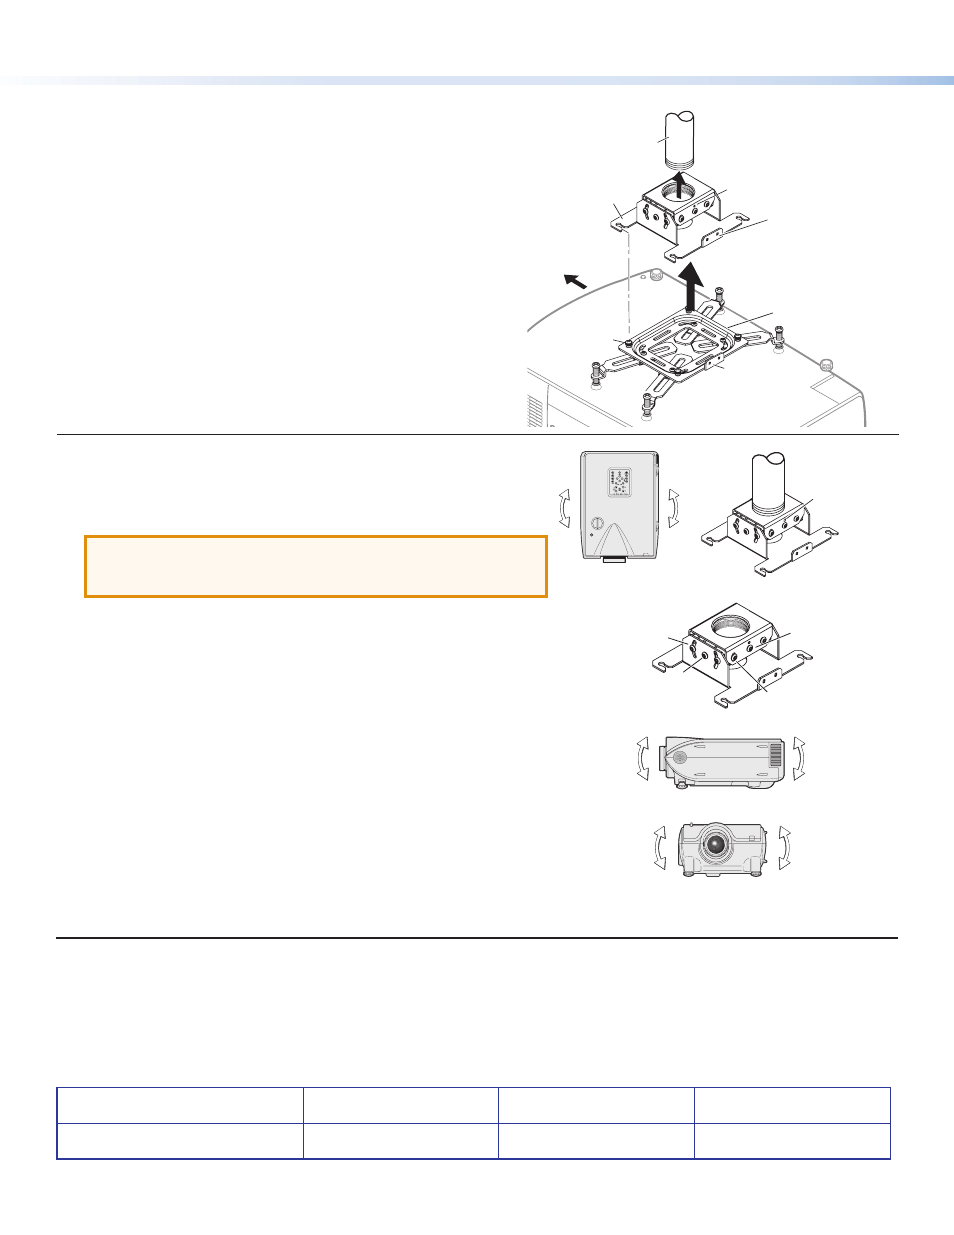
Attaching the Bracket to the Adjuster Plate
1.
Using the hex wrench, back out the set screws on the
Adjuster Plate, and, keeping the plate level, screw it onto the
bottom of the pole (see the figure at right). A minimum of
three turns are needed to safely secure the bracket on the
pole.
2.
Secure the Adjuster Plate in position by tightening the set
screws down.
3.
Carefully lift the projector up to the Adjuster Plate and, with
the security flanges at the rear, slide the Projector Bracket
onto the Adjuster Plate. Tighten the four Adjuster Plate
locking screws (see the figure at right).
Adjusting the Projector Alignment
Adjust the rotation (yaw)
Turn the unit on the projector pole to the correct position.
Secure the position by tightening the two set screws against the pole.
ATTENTION:
Potential Damage to Property.
Do not turn
the unit all the way to the end of the pole or the
projector may fall.
Adjust the vertical angle (pitch) and horizontal tilt (roll)
1.
Loosen the pivot point screws, and the vertical and horizontal
adjustment screws.
2.
Adjust the vertical angle (pitch) of the projector to the correct
alignment, then tighten down the four vertical angle adjustment screws.
3.
Adjust the horizontal tilt (roll) of the projector to the correct
alignment. Tighten down the four horizontal angle adjustment screws.
4.
When the projector is correctly aligned, tighten down all
the remaining adjustment and pivot screws.
Securing the Projector Installation
The full installation can be secured by using a padlock through the two security flanges on the rear of the Projector Bracket
and Adjuster Plate.
Alternatively, you can use an Extron Security Screws Kit (part number 70-555-01, ordered separately).
Vertical
Pivot Point
Screws (2)
Horizontal
Pivot Point
Screws (2)
Vertical Angle
Adjustment
Screws (4)
Horizontal Angle
Adjustment Screws (4)
a
Pitch/Vertical Angle
b
Roll/Tilt
c
Security Flange
(on rear)
Projector Bracket
Front
Lift the bracket with the
projector attached, up to the
adjuster plate and slide into place.
b
Adjuster Plate
Locking Screws (4)
Projector
Mounting
Pole
Adjuster
Plate
Lift Adjuster Plate up
to the projector pole
and screw into place.
Set Screws (2)
a
Security Flange
Yaw/Rotation
Set
Screws (2)
www.extron.com