Rack mounting, Rack mounting -4, Installation, cont’d – Extron Electronics ADA 2_GLI 350xi User Manual
Page 8
GLI 350xi & ADA 2/GLI 350xi • Installation
Installation, cont’d
2-4
GLI 350xi & ADA 2/GLI 350xi • Installation
2-5
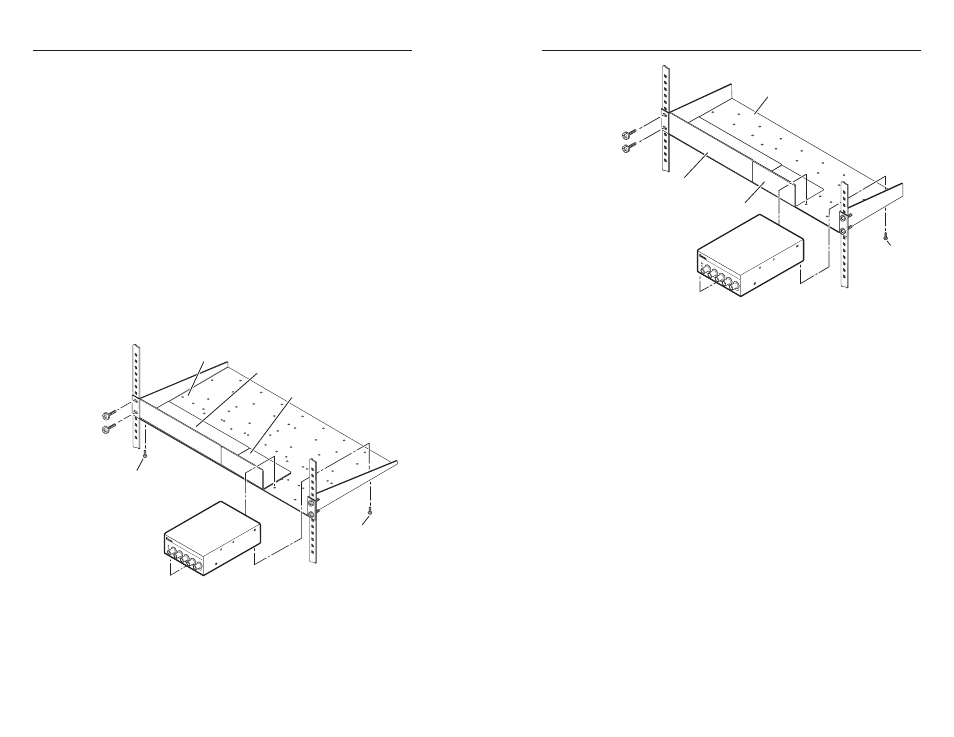
Rack mounting
The ground loop isolators can be mounted in a rack shelf using
the optional RSU 129 1U 9.5" deep universal rack shelf kit
(Extron part #60-190-01) or the RSU 126 1U 6" deep universal
rack shelf kit (Extron part #60-190-10), as follows.
1
.
If feet were installed on the bottom of the GLI, remove
them.
2
.
Place the GLI on one half of the 1U (one unit high, 19"
wide) rack shelf. Align the front of the GLI with the front
of the shelf, and align the threaded holes on the bottom of
the GLI with the holes in the rack shelf.
3
.
Attach the GLI to the rack shelf with the two provided
4-40 x 3/16” machine screws. Insert the screws from
the underside of the shelf, and securely fasten them into
diagonally opposite corners.
See the following illustrations of rack mounting using
Extron's RSU 129 universal 9.5 " deep and RSU 126
universal 6" deep rack shelves.
Use 2 mounting holes on
opposite corners.
(2) 4-40 x 3/16"
Screws
9.5" Deep Universal Rack Shelf
Both front false faceplates
use 2 screws.
1/4 Rack Width Front False
Faceplate
1/2 Rack Width Front False
Faceplate
GLI 3
50 x
i SE
RIES
GRO
UND
LO
OP IS
OLA
TOR
Rack mounting of the GLI in a 9.5" deep rack shelf
Use 2 mounting holes
on opposite corners.
1/2 Rack Width False Front
Face Plate
(2) 4-40 x 3/16"
Screws
6" Deep Rack Shelf
1/4 Rack Width False Front
Face Plate
GL
I 350
xi S
ER
IES
GRO
UND
LO
OP IS
OLA
TOR
Rack mounting of the GLI in a 6" deep rack shelf
4
.
Attach the false front panels (provided with rack shelf kit
part #60-190-01 or 60-190-10) to the unoccupied side of the
rack (as shown above), as desired.
5
.
Attach the rack shelf to the rack using four 10-32 x ¾” bolts
(provided). Insert the bolts through #10 beveled washers,
then through the holes in the rack, as shown above.