Installation, Mounting the fox t usw 203, Rear panel features – Extron Electronics FOX T USW 203 User Guide User Manual
Page 10: Input connectors, Mounting the fox t usw 203 rear panel features
Installation
This section describes information for connecting and wiring the FOX T USW 203. Topics in
this section include:
•
•
•
Mounting the FOX T USW 203
The FOX T USW 203 can be mounted in a rack, under a desk, or on a tabletop (see
on page 37 for more mounting details).
Rear Panel Features
FOX T USW 203
RS-232
CONTACT
RS-232
OVER FIBER
AUDIO
HDMI
HDMI
LOOP-THRU
ALARM
REMOTE
Tx Rx
Tx
Rx
OPTICAL
INPUTS
1
POWER
12V
0.8 A MAX
2
3
LINK
LINK
G
Tx Rx G
1 2
1
2 3 G
RGB/R-Y, Y, B-Y
OUTPUTS
j
b
d e
f
g h i
a
c
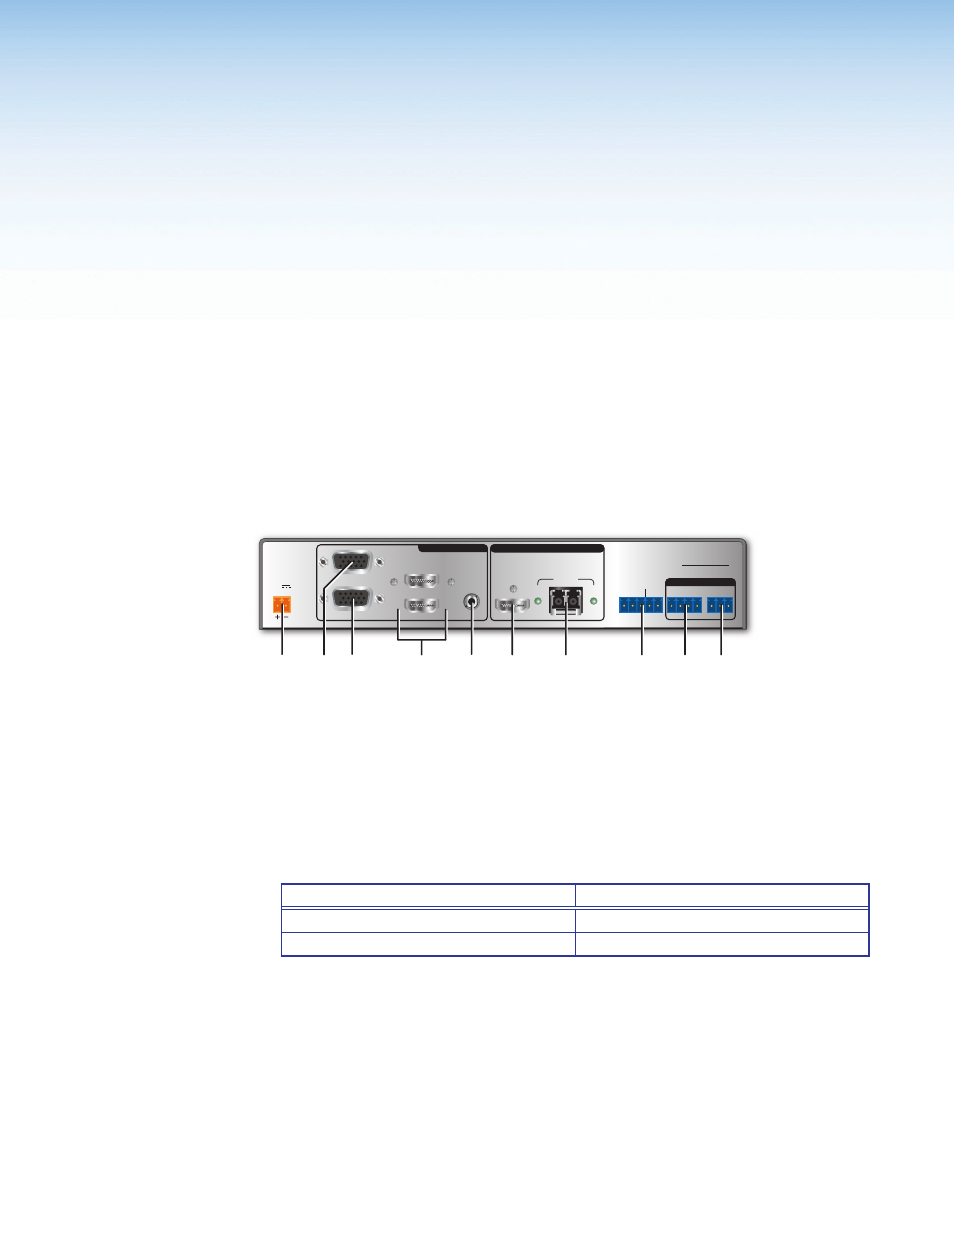
Figure 2.
FOX T USW 203 Rear Panel Features
Input Connectors
a
Analog video connector — Connect a video source to the female 15-pin HD
connector, labeled input 1 or RGB/R-Y,Y,B-Y.
b
Analog video loop-through connector — Connect an analog RGB or YUV video
display to the female 15 HD VGA connector for a local display of input 1 (VGA). This
output is always on.
Selected Video Input
VGA Loop-thru Output
VGA (input 1)
Always on
HDMI (inputs 2 and 3)
N/A
c
HDMI input connectors — Connect a source device to either or both HDMI
on page 7). These are inputs 2
and 3. They can accept HDMI, DVI, or dual mode DisplayPort video sources.
4
FOX T USW 203 Universal Switcher • Installation