Connectivity brackets • setup guide (continued), Retractor filler bracket – Extron Electronics Cable Cubby 1400 Connectivity Brackets User Manual
Page 2
Connectivity Brackets • Setup Guide (Continued)
Secure the brackets using
the provided mounting screw
with star washer (4).
Insert the brackets into
the Cable Cubby.
1
2
Insert cables through the
bottom of the connectivity
bracket and into the holes
of the grommet plate.
Secure the grommet plate
on the connectivity bracket,
using four of the provided
module screws.
Use the provided mounting screw
with the star washer to secure the
bracket in place.
Insert the mounting
pin through the
retractors.
Insert the retractor filler bracket into the
Cable Cubby enclosure as shown above.
Use the clip to secure
the mounting pin.
1
2
1
2
3
4
Snap the included hole plugs
into any unused holes.
Insert cables through the bottom of
the bracket and into the holes of the
grommet plate.
Secure the grommet
plate on the bracket,
using four of the provided
module screws.
1
2
3
3
Use the clip to secure
he mounting pin.
2
125V~ 12A MAX
TO
TAL
Power module
Retractor filler bracket
Retractor assembly
68-2474-01
Rev. A
09 13
Extron USA Headquarters
+1.800.633.9876 (Inside USA/Canada Only)
Extron USA - West:
+1.714.491.1500
FAX: +1.714.491.1517
Extron USA - East:
+1.919.850.1000
FAX: +1.919.850.1001
© 2013 Extron Electronics — All rights reserved. All trademarks mentioned are the property of their respective owners.
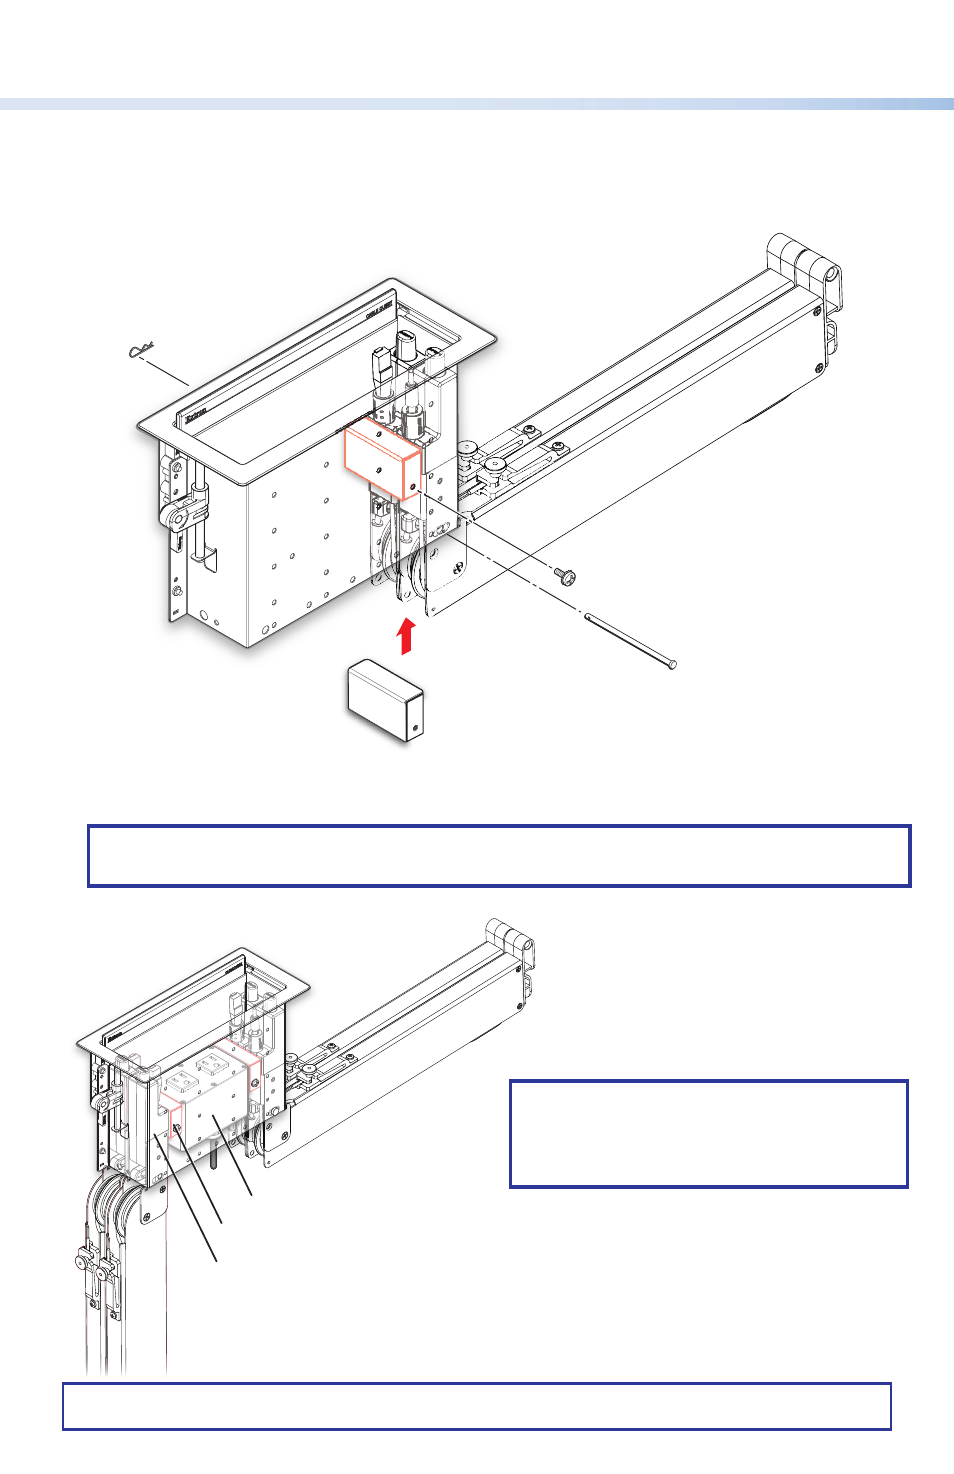
Retractor Filler Bracket
The retractor filler bracket fills the empty space between a two-retractor assembly (see image
below) and the center mounted power module. Follow the steps below to install a two-retractor
assembly and the retractor filler bracket.
NOTE:
For instructions on installing the power module, see the Cable Cubby 1200 and
1400 Installation Guide.
Application with Rectractor Assemblies
NOTE:
For instructions on mounting the
retractors in the horizontal orientation,
see the Cable Retractor Setup Guide
available online at
www.extron.com
.