2 parameter leds description, 3 settings – Xylem ECOCIRC XL, XLplus Electronic drive User Manual
Page 9
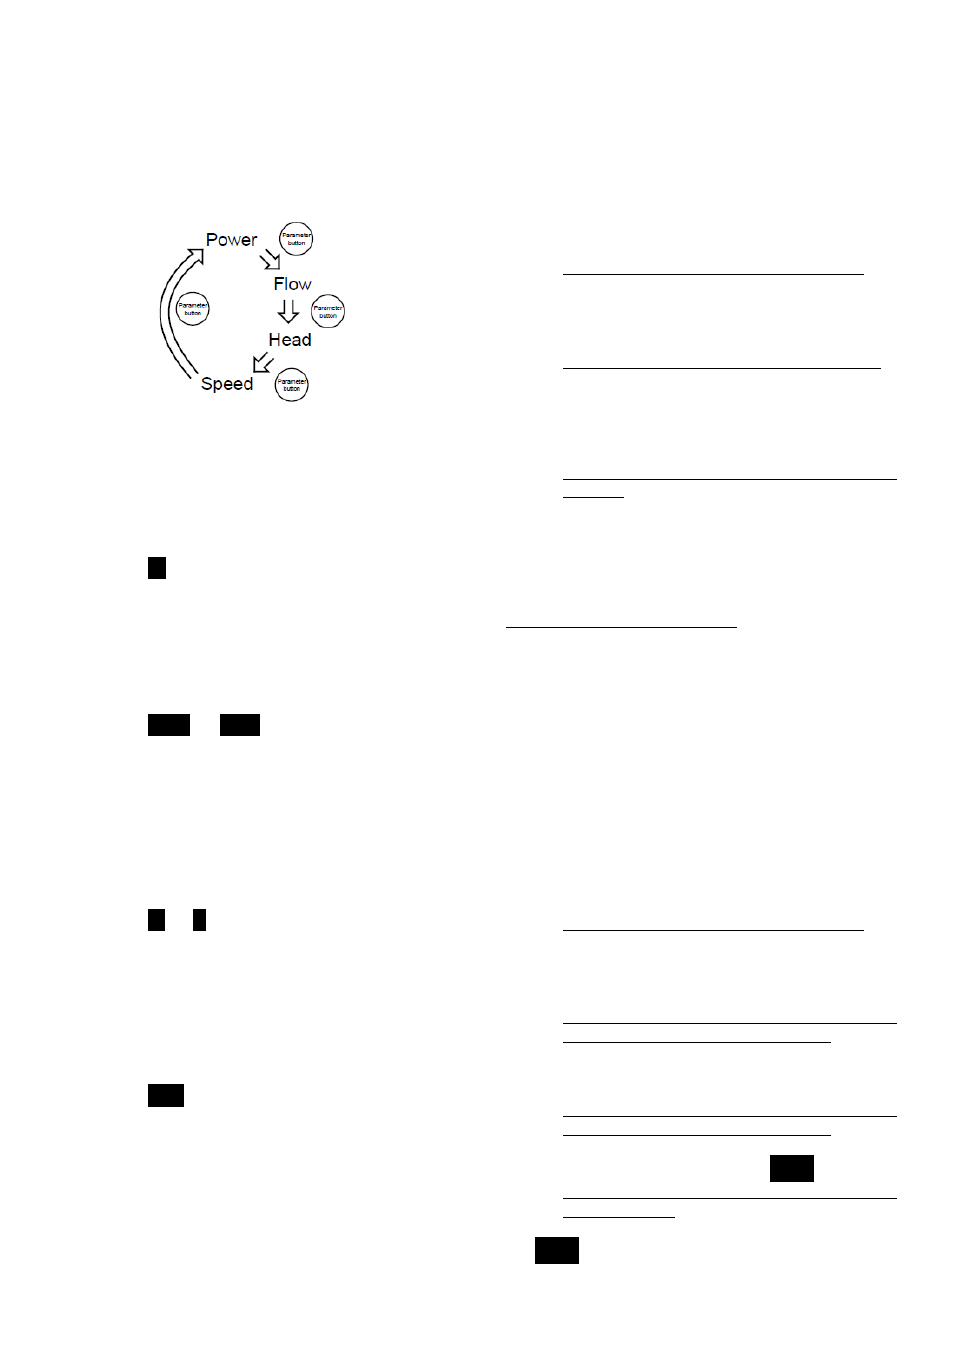
4.2 Parameter LEDs description []
Referring to
models) and to
connected models), use the Parameter button
to
change the displayed unit of measurements during
normal operation, following these logical flows:
Figure 2: On terminal-connected models
4.2.1 Power
When Power (input active electric power) is the
measurement selected:
The current power absorption from the power
line [watts] is displayed on the numeric display
The
W
indicator is permanently lit
4.2.2 Flow
When Flow (hydraulic water flow) is the measurement
selected:
The current water flow estimation [m
3
/h or US-
gpm] is displayed on the numeric display
The
m
3
/h
(or
gpm
) indicator is permanently
lit
4.2.3 Head
When
Head
(hydraulic
water
head)
is
the
measurement selected:
The current water head estimation [meters or
feet of water head] is displayed on the numeric
display
The
m
(or
ft
) indicator is permanently lit
4.2.4 Speed
When
Speed
(pump
impeller
speed)
is
the
measurement selected:
The
current
rotation
speed
measure
[revolutions per minute] is displayed on the
numeric display
The
rpm
indicator is permanently lit
NOTICE
Each hydraulic measure (Flow or Head) can be
singularly switched, between ISO and US units of
measure, by pressing the Parameter button
continuously for at least 2 seconds
4.3 Settings
4.3.1 Set points editing
Referring to
models) and to
connected models), use the Setting buttons
to
change the set point corresponding to the currently
selected Control Mode (see par. 4.3.3)
1. Press shortly one of the Setting buttons
The actual set point is shown (blinking) for 4
seconds on the Numeric display
, while the
relative unit of measurement is displayed on the
Parameter LEDs
.
2. Change the value with the Setting buttons
A short button pressure will vary the set point by
one single step, but if a button is kept pressed, the
variation will progress automatically in the selected
direction, with an acceleration factor proportional
to the pressure time
3. Wait 4 seconds to store and activate the new
set point
When the change is confirmed, the Numeric
display
stops blinking and gets back to the
measurement visualization active before entering
the edit operation
NOTICE
During the Set points editing (while the Numeric
display
is blinking), any pressure of the Parameter
button
is inhibited, therefore changing the
measurement selected is impossible. To do that, wait
till the end of the edit operation
4.3.2 Operating Modes
models) and to
connected models), use the Setting buttons
to
change the Operating mode from On (factory default)
to Off or vice versa.
4.3.2.1
On
Off
1. Press shortly one of the Setting buttons
The actual set point is shown (blinking) for 4
seconds on the Numeric display
, while the
relative unit of measurement is displayed on the
Parameter LEDs
.
2. Change the value with the Down arrow button
, till reaching the minimum set point
The minimum set point can be easily reached
keeping pressed continuously the Down arrow
button
3. A further short pressure of the Down arrow
button
sets the Off operating mode
When the operating mode is set to Off, on the
Numeric display
the message
OFF
appears
4. Wait 4 seconds to store and activate the new
operating mode
When the change is confirmed, the message
OFF
disappears, so that the Numeric display
,
the Parameters LEDs
and the Control mode