Reassembly, Seal assembly, Assemble the single mechanical seal (e-1532-s) – Bell & Gossett P2001409A Series e-1532 User Manual
Page 27
• Thoroughly clean the shaft and sleeve.
• Thoroughly clean the coverplate seal cavity.
• Inspect the surface for damage such as pitting, corrosion, nicks, and scratches.
Replace these parts if they are damaged.
Reassembly
Seal assembly
Assemble the standard mechanical seal (e-1532 and e-1532-F)
1. Lubricate the shaft sleeve and coverplate seal cavity with soapy water.
Do not use a petroleum lubricant.
2. Install a new cup gasket and a new seal insert with the indentation side down into the
cup.
3. Slide a new rotating seal assembly onto the shaft sleeve.
4. Push the top of the compression ring with a screwdriver until the seal is tight against
the seal insert.
5. Install the seal spring and point the narrow end toward the seal.
1
2
3
4
5
6
7
8
9
10
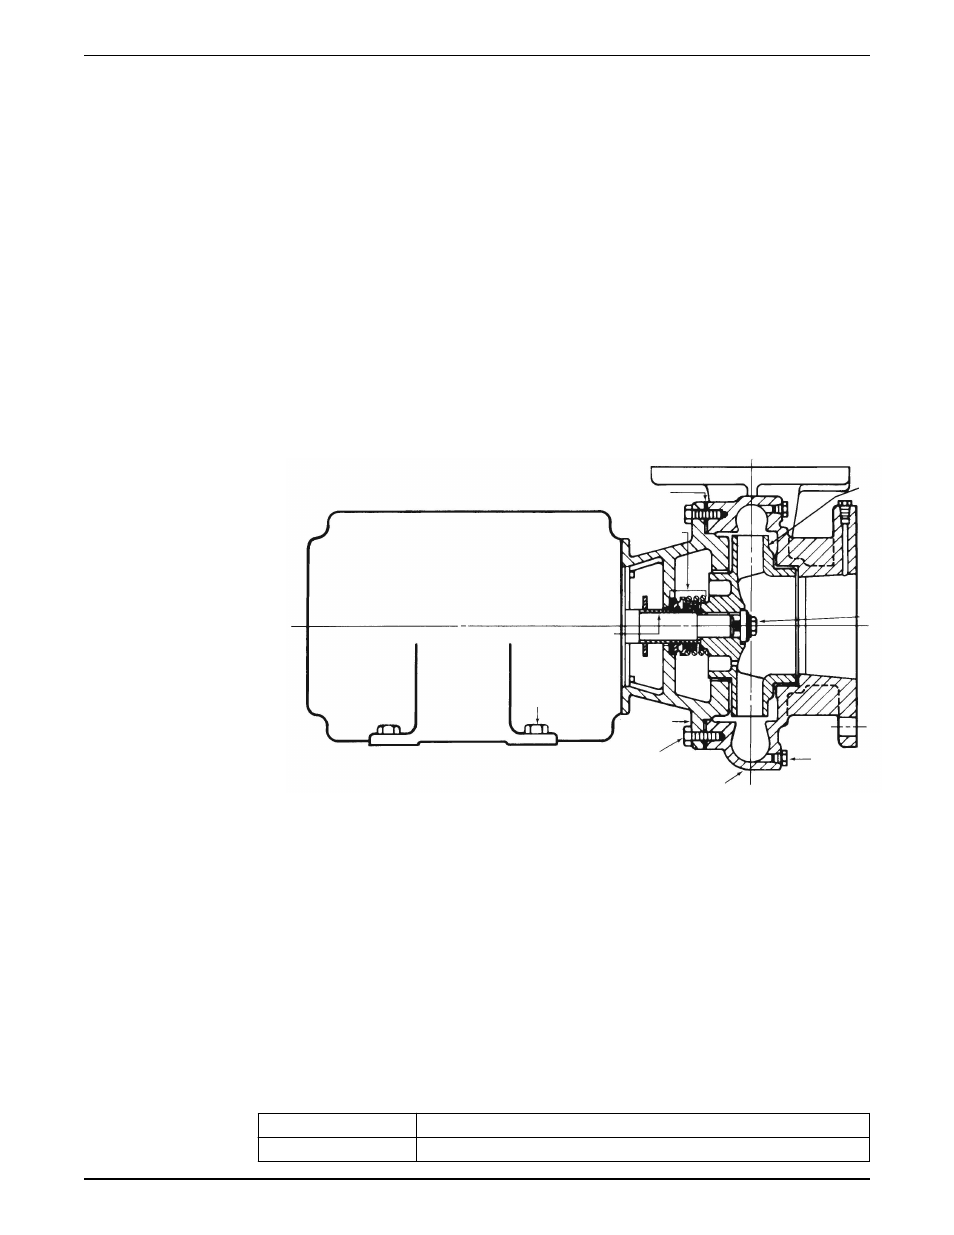
1.
Impeller
2.
Impeller capscrew
3.
Drain plug
4.
Volute
5.
Volute capscrews
6.
Motor bracket
7.
Motor foot capscrews
8.
Shaft sleeve
9.
Seal assembly
10. Volute gasket
Assemble the single mechanical seal (e-1532-S)
1. Lubricate the shaft sleeve and seal cap with soapy water.
Do not use a petroleum lubricant.
2. Insert a stationary seal with an O-ring into the seal cap and slide it onto the shaft.
3. Replace the seal cap gasket.
4. Slide the rotating portion of the seal assembly onto the shaft sleeve and lock it in
place.
ID seal size
Distance between collar and impeller end of the shaft sleeve
1-1/4 in. (3.175 cm)
1-13/32 in. (3.571 cm)
Maintenance
Series e-1532 INSTRUCTION MANUAL
25