Installing the flues – Zanussi ZHC6121X User Manual
Page 61
61
Installing the flues
1
=
=
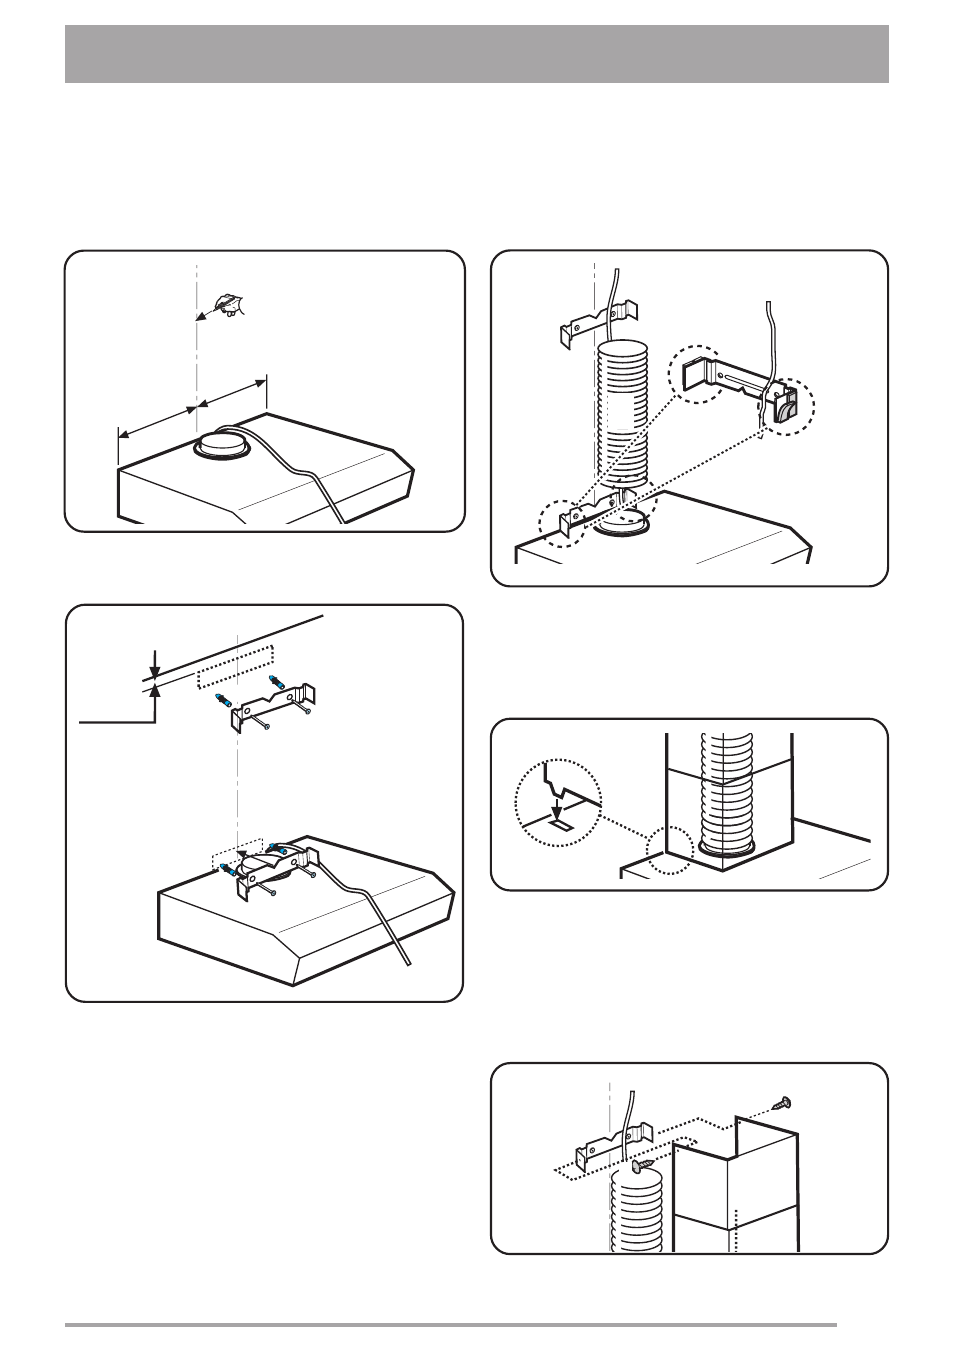
• Extend the vertical centre line so that it
reaches the ceiling (1).
2
2
÷ 3-4 mm
• Fit the 2 flue fixing brackets (2), 3/4 mm away
from the ceiling at the top and in contact with
the hood at the bottom. Use 2 screws and 2
rawl plugs per bracket.
Use the brackets as drilling templates.
The "v" indicator on each bracket should be
aligned with the centre line marked on the
wall previously.
3
5
5
4
• Connect the electricity supply (3) and exhaust
tube (4) if necessary.
• Cut the seals to size (4 pieces) and apply
them to the sides of the lower flue bracket (5).
• Fit the flues onto the lower bracket; insert the
flue tabs into the corresponding slots on top of
the hood (6).
• Fix the upper part of the flue in place using 2
screws (7).
6
7
7
Caution! Before beginning this procedure, we recommend you cover the hood with a protective
sheet; this will prevent it from being damaged by the dust created as you drill holes in the wall.