Asus P5ND2-SLI Deluxe User Manual
Page 175
A S U S P 5 N D 2 - S L I D e l u x e
A S U S P 5 N D 2 - S L I D e l u x e
A S U S P 5 N D 2 - S L I D e l u x e
A S U S P 5 N D 2 - S L I D e l u x e
A S U S P 5 N D 2 - S L I D e l u x e
6 - 7
6 - 7
6 - 7
6 - 7
6 - 7
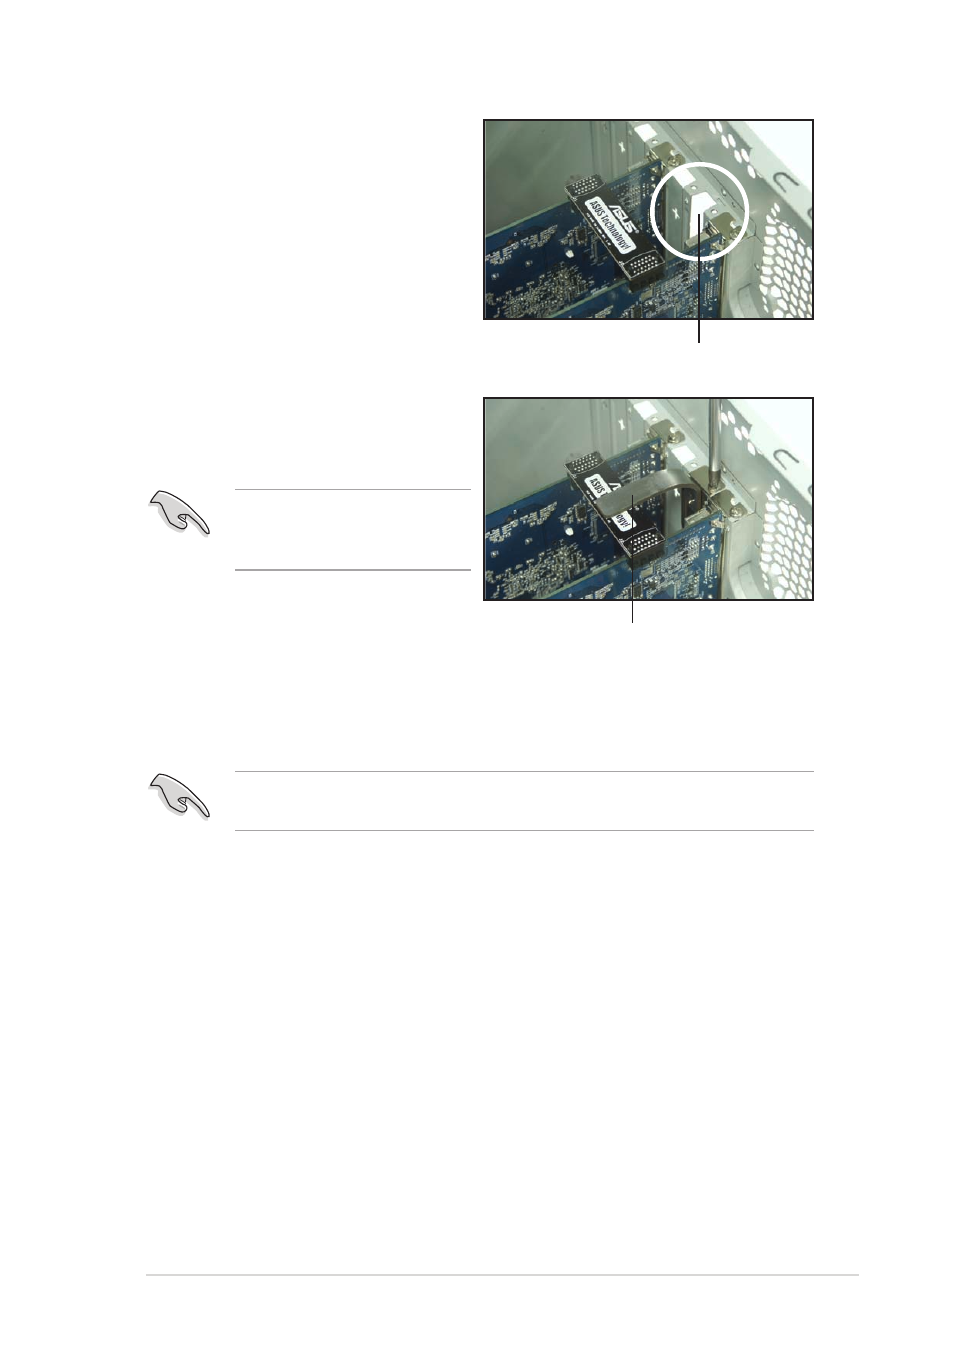
7.
Remove any of the two bracket
covers between the graphics
cards.
R e t e n t i o n b r a c k e t
R e t e n t i o n b r a c k e t
R e t e n t i o n b r a c k e t
R e t e n t i o n b r a c k e t
R e t e n t i o n b r a c k e t
B r a c k e t s l o t
B r a c k e t s l o t
B r a c k e t s l o t
B r a c k e t s l o t
B r a c k e t s l o t
9.
Connect a V G A c a b l e
V G A c a b l e
V G A c a b l e
V G A c a b l e
V G A c a b l e or a D V I - I c a b l e
D V I - I c a b l e
D V I - I c a b l e
D V I - I c a b l e
D V I - I c a b l e to the graphics card
installed on the b l u e
b l u e
b l u e
b l u e
b l u e PCI Express slot.
8.
Align and insert the retention
bracket into the slot then
secure it with a screw.
Make sure that the retention
bracket firmly supports the
two graphics cards.
We recommend to install an additional chassis fan for better thermal
environment.