Asus PIKE 2008/IMR User Manual
Page 23
ASUS PIKE 2008/IMR
2-9
Using Automatic Configuration
Follow these instructions to create a configuration with automatic configuration,
either with or without redundancy:
1. When WebBIOS displays the proposed new configuration, review the
information on the screen, and click Accept to accept it. (Or click Back to go
back and change the configuration.)
•
RAID 0: If you selected Automatic Configuration and No
Redundancy, WebBIOS creates a RAID 0 configuration.
•
RAID 1: If you selected Automatic Configuration and Redundancy
when possible, WebBIOS creates a RAID 1 configuration if only two
disk drives are available.
•
RAID 5: If you selected Automatic Configuration and Redundancy
when possible, WebBIOS creates a RAID 5 configuration if three or
more disk drives are available.
2. Click Yes when you are prompted to save the configuration.
3. Click Yes when you are prompted to initialize the new virtual drive(s).
WebBIOS CU begins a background initialization of the virtual drives.
Using Manual Configuration: RAID 0
RAID 0 provides drive striping across all drives in the RAID drive group. RAID
0 does not provide any data redundancy but does offer excellent performance.
RAID 0 is ideal for applications that require high bandwidth but do not require fault
tolerance. RAID 0 also denotes an independent or single drive.
RAID level 0 is not fault-tolerant. If a drive in a RAID 0 drive group fails, the
whole virtual drive (all drives associated with the virtual drive) fails.
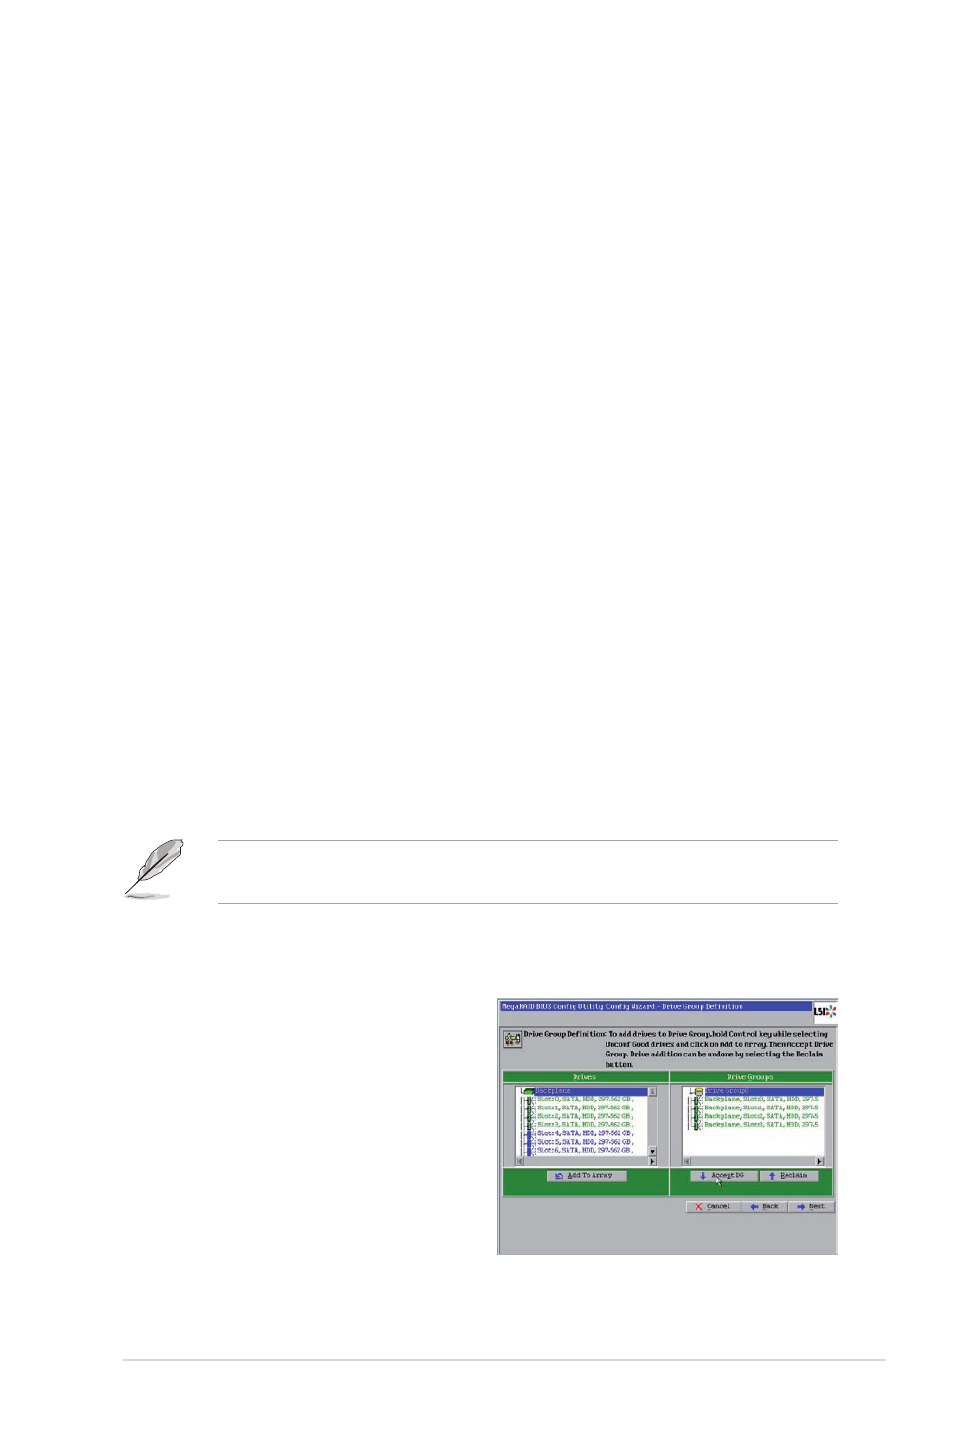
When you select Manual Configuration and click Next, the Drive Group Definition
screen appears. You use this screen to select drives to create drive groups.
1. Hold
more ready drives in the Drives
panel on the left until you have
selected all desired drives for the
drive group.
2. Click Add To Array to move the
drives to a proposed drive group
configuration in the Drive Groups
panel on the right, as shown in the
right figure.
If you need to undo the changes, click the Reclaim button.