Placement options, Desktop placement, Wall mounting – Asus GX1108N User Manual
Page 6: Quick start guide 5 en gl ish
Quick Start Guide
5
En
gl
ish
Placement options
Desktop placement
Place the GX1105N/ GX1108N switch on a flat and stable surface. Make sure
that the location meets the operating environment specification. See page 3 for
details.
NOTE: The length of the UTP Category 5 cable length cannot exceed 100
meters (328 feet).
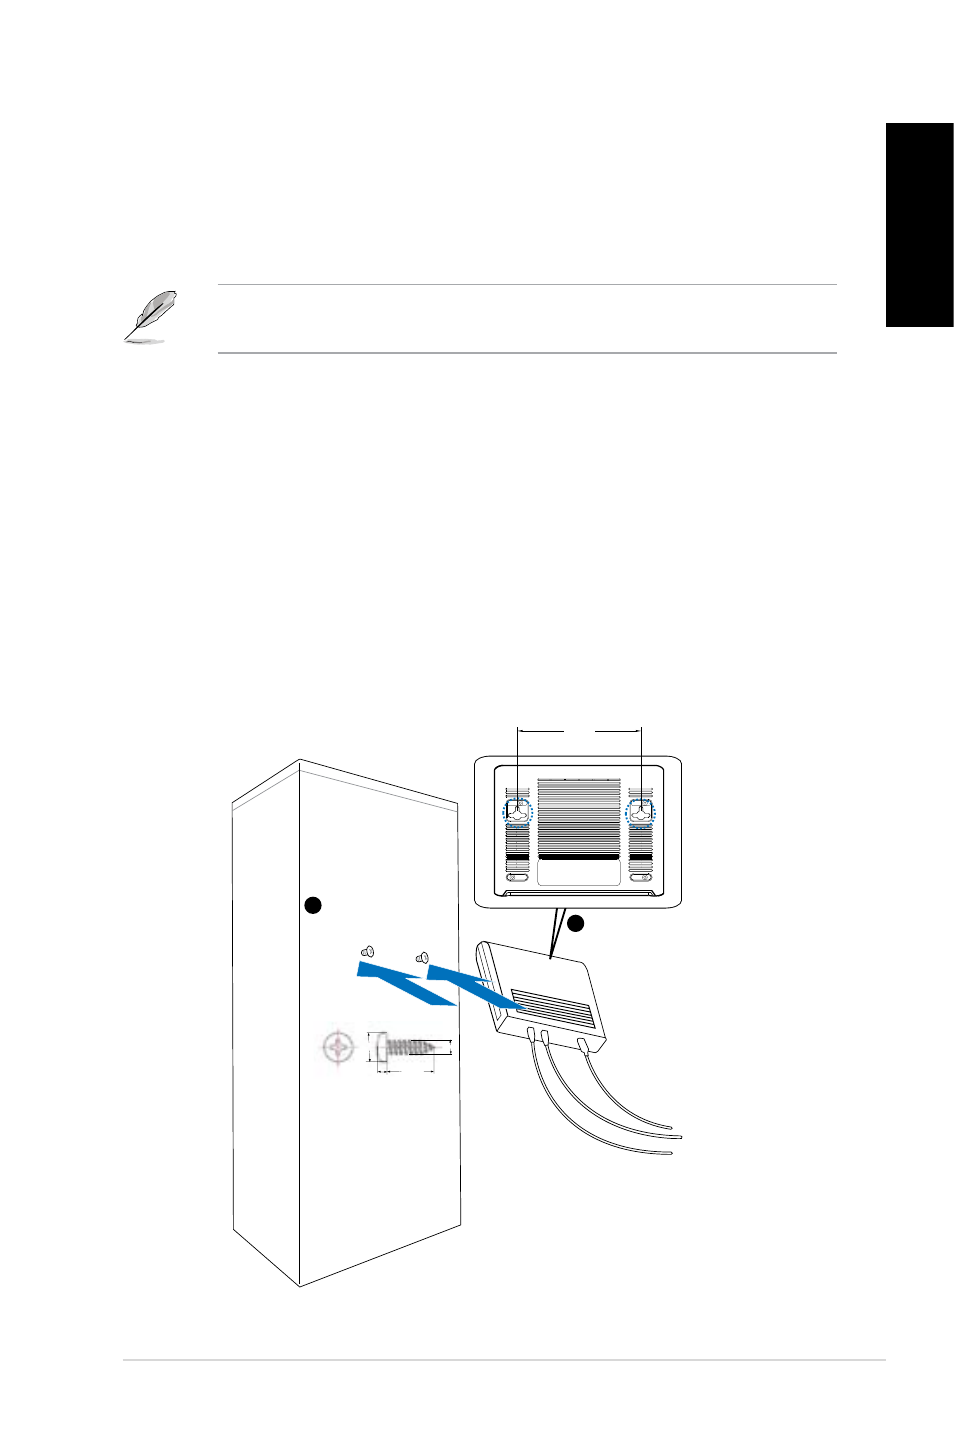
Wall mounting
You can mount the GX1105N/ GX1108N switch on a wall with the supplied
mounting screws.
To mount the switch on a wall:
1. Measure the distance between the two hooks on the bottom of the switch.
2. Mark the screw position on the wall with the same distance in between.
3. Secure the supplied screws on the wall until only 1/4 is showing.
4. Latch the hooks of the GX1105N/ GX1108N onto the screws.
Figure 5. Wall-mount installation
Bottom Side
Secure two screws on the wall
Latch the switch
onto the screws.
1
2
18.75mm
2mm
143.0mm
2.95mm
5.3mm