Hardware setup – Asus K7M-RM User Manual
Page 27
ASUS K7M-RM User’s Manual
27
3. HARDWARE SETUP
CPU
3. H/W SETUP
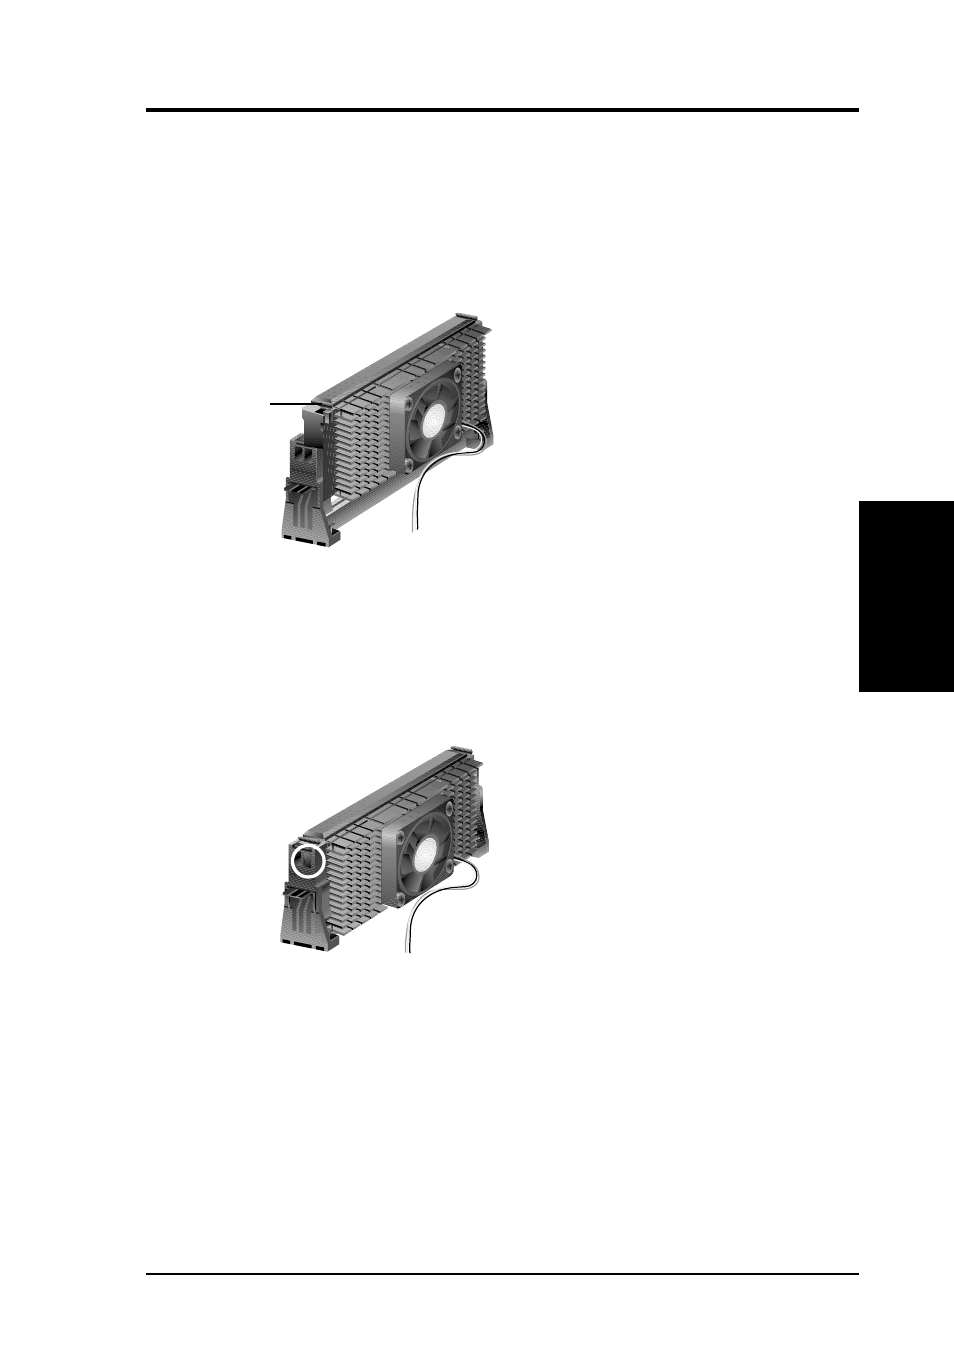
3. Insert the cartridge
Push the cartridge’s two locks inward until you hear a click (the picture in step 2
shows the locks in the outward position and inward in the picture below).
With the heatsink facing the motherboard’s chipset, push the cartridge gently
but firmly into the Slot A connector until it is fully inserted.
4. Secure the cartridge
Secure the cartridge in place by pushing the cartridge until it is firmly seated on
the Slot A connector.
The SECC locks should be outward when secured so that the lock shows through
the retention mechanism’s lock holes.
Push lock inward
CPU fan cable to
fan connector
CPU fan cable to
fan connector
Lock hole
See also other documents in the category Asus Motherboard:
- P5B Premium Vista Edition (188 pages)
- P5B (140 pages)
- P5B (56 pages)
- P5KPL-VM/1394/SI (94 pages)
- M2N68-CM (28 pages)
- P5GD1-VM (92 pages)
- P5AD2-E Premium (2 pages)
- P5GD1-VM (88 pages)
- P5AD2 Premium (8 pages)
- DELUXE A7N8X-E (114 pages)
- P5KPL-AM SE (62 pages)
- P5KPL-AM SE (40 pages)
- P5KPL-AM SE (38 pages)
- P4S8X-X (64 pages)
- P5K-VM (98 pages)
- K8V-X SE (82 pages)
- M2N68-AM SE2 (40 pages)
- P4P800 SE (16 pages)
- P4P800 SE (125 pages)
- DELUXE SERIES M3A32-MVP (176 pages)
- P5AD2 Deluxe (148 pages)
- M4A79 Deluxe (122 pages)
- A7V266-E (108 pages)
- Application Manual (4 pages)
- Application Manual (8 pages)
- Application Manual (2 pages)
- Application Manual (6 pages)
- Application Manual (9 pages)
- Application Manual (3 pages)
- Application Manual (1 page)
- Application Manual (5 pages)
- Application Manual (11 pages)
- Application Manual (10 pages)
- M4A88T-I DELUXE (44 pages)
- M4A88T-I DELUXE (70 pages)
- P9X79 DELUXE (2 pages)
- RAMPAGE IV GENE (1 page)
- P9X79 (156 pages)
- P8H61-M PLUS V3 (64 pages)
- A85XM-A (78 pages)
- M4A78L-M LE (64 pages)
- M2N68-AM (96 pages)
- M2N68-AM (62 pages)
- M2N68-AM (38 pages)
- Blitz Formula (2 pages)