5 install a hard disk drive – Asus Terminator P-III User Manual
Page 19
ASUS Terminator Barebone System
19
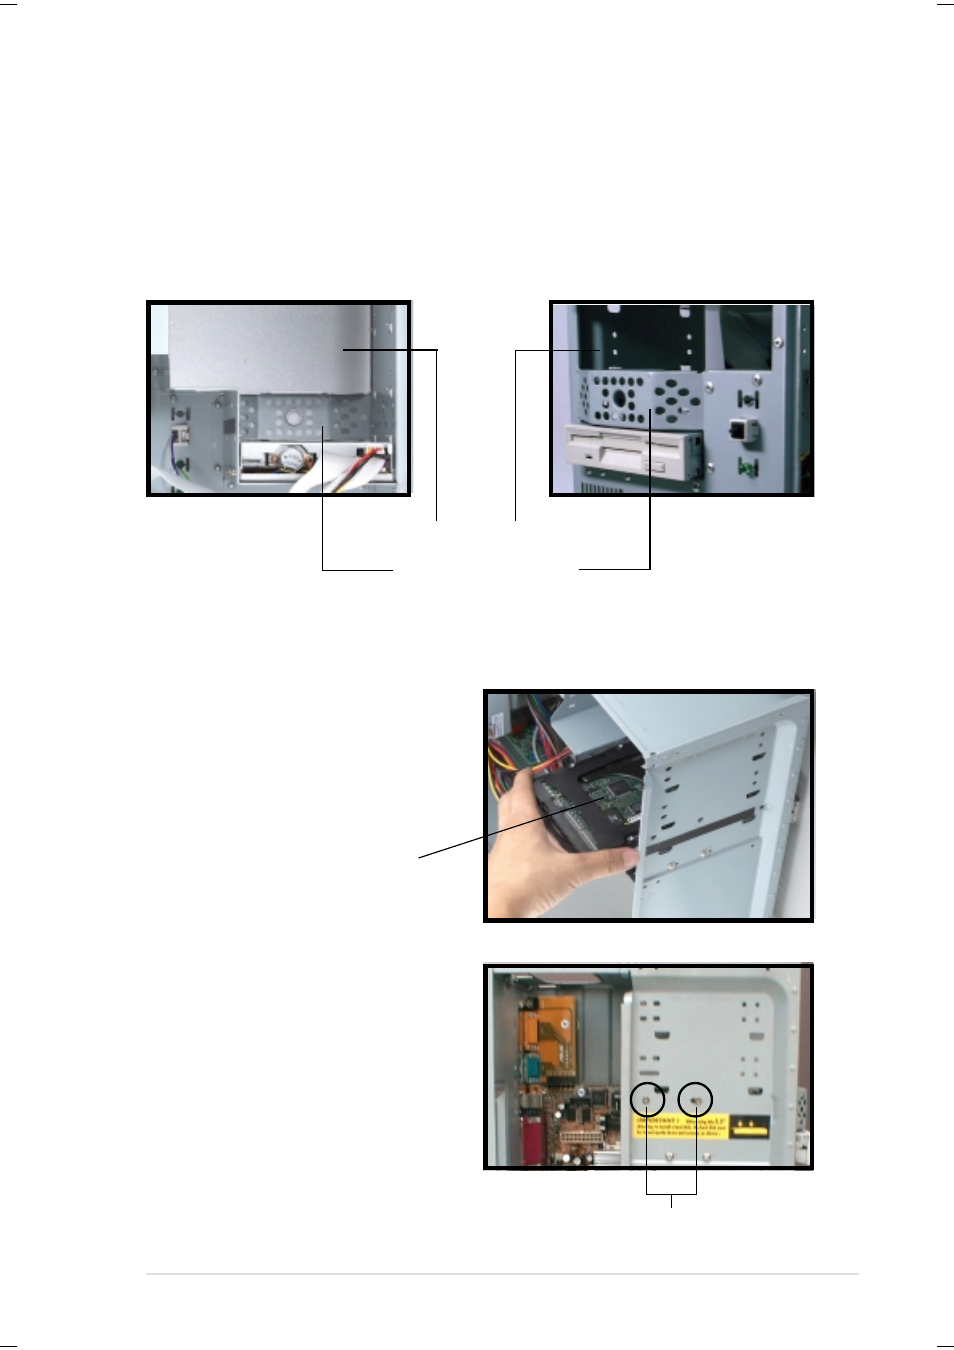
2.5 Install a Hard Disk Drive
The chassis has one 3.5-inch hard disk drive (HDD) bay right under
the 5.25-inch bay. The following figures show the internal and external
views of the HDD bay location.
Follow these steps to install an
IDE HDD.
1. Place the chassis upright.
5.25-inch Drive Bay
3.5-inch HDD Drive Bay
3. Carefully push the HDD into
the bay until its screw holes
align with the holes on the bay.
Internal View
External View
HDD Component Side
HDD Screws
4. Secure the HDD with two
screws on each side of the
bay.
2. With its component side up,
carefully insert the HDD into
the 3.5-inch bay.
See also other documents in the category Asus Computers:
- CG8565 (410 pages)
- CG8565 (246 pages)
- CS5111 (26 pages)
- CS5120 (1 page)
- ET1611PUK (38 pages)
- S2-P8H61E (80 pages)
- P2-P5945GCX (90 pages)
- P2-PH1 (80 pages)
- P1-P5945G (80 pages)
- CG8270 (534 pages)
- CG8270 (362 pages)
- CG8270 (218 pages)
- CG8270 (536 pages)
- CG8270 (72 pages)
- CG8270 (76 pages)
- P3-P5G31 (100 pages)
- P3-PH4 (80 pages)
- P2-M2A690G (80 pages)
- P2-M2A690G (8 pages)
- P4-P5N9300 (82 pages)
- P4-P5N9300 (1 page)
- P2-P5945GC (92 pages)
- P1-P5945GC (92 pages)
- P3-P5G33 (98 pages)
- T3-P5945GC (80 pages)
- T3-P5945GCX (80 pages)
- P2-M2A690G (94 pages)
- T3-PH1 (82 pages)
- T3-PH1 (80 pages)
- T5-P5G41E (76 pages)
- T5-P5G41E (82 pages)
- S1-AT5NM10E (68 pages)
- P6-P7H55E (67 pages)
- ES5000 (174 pages)
- T4-P5G43 (104 pages)
- T-P5G31 (92 pages)
- BT6130 (60 pages)
- BT6130 (54 pages)
- BT6130 (2 pages)
- CG8265 (210 pages)
- CG8265 (350 pages)
- CM1740 (330 pages)
- CM1740 (70 pages)
- CM1740 (198 pages)
- P6-M4A3000E (59 pages)