1 remove the cover – Asus Terminator P-III User Manual
Page 14
14
Chapter 2: Basic Installation
Locking Tab
2.1
Remove the Cover
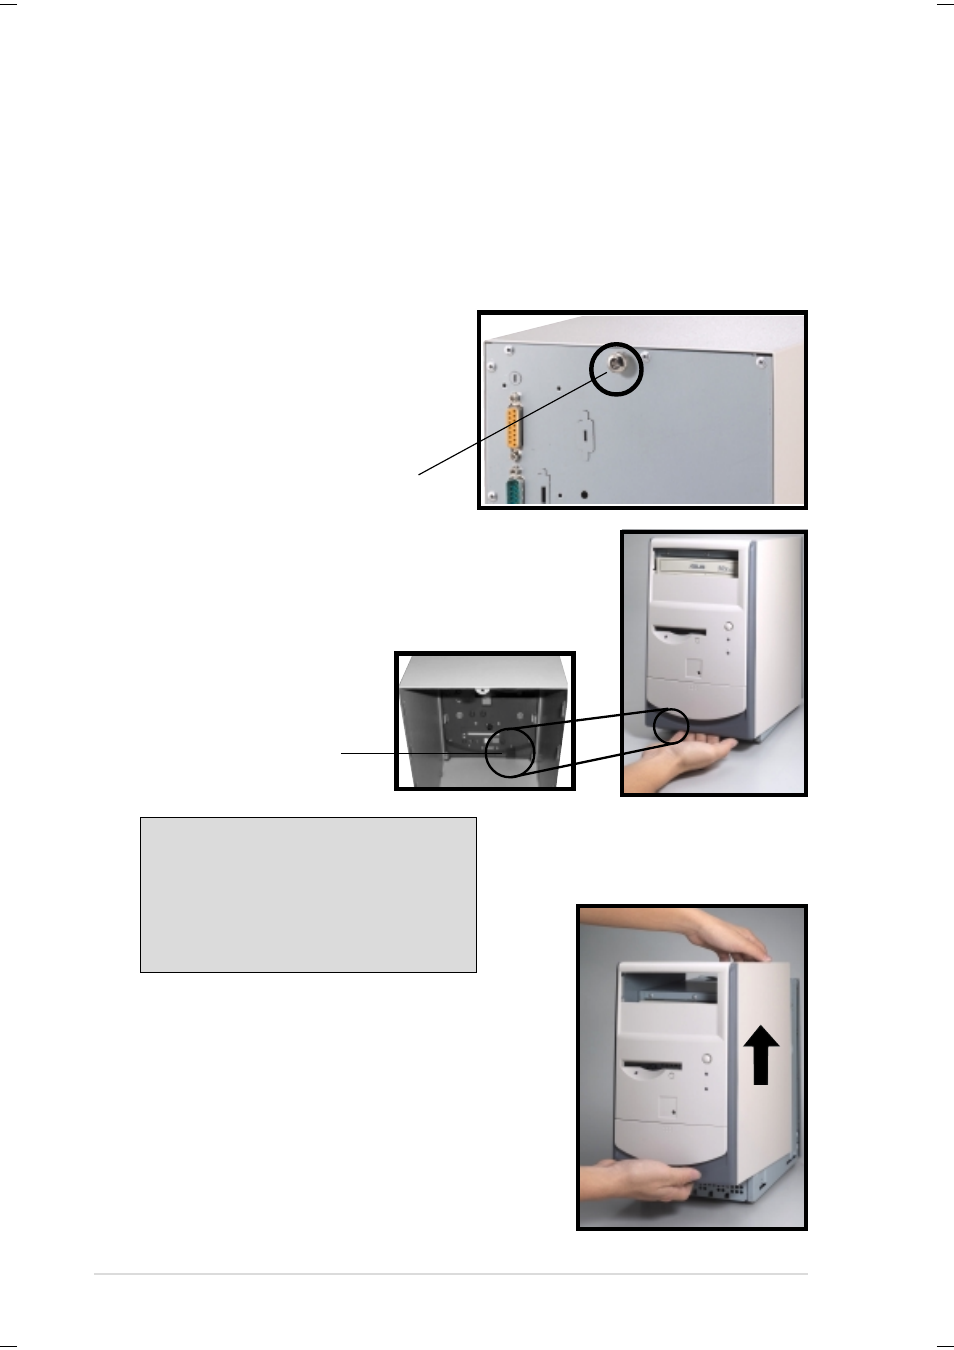
The chassis cover is secured by a thumbscrew located on the rear
panel.
Follow these steps to remove the
chassis cover.
1. Turn the captive thumbscrew
counter-clockwise to release
the cover. You don’t have to
remove the thumbscrew from
the chassis.
2. Place your hand underneath
the front panel and push up
the locking tab that secures
the panel to the chassis.
Thumbscrew
3. Pull up the front panel for
about an inch after unlocking
the tab.
4. While still holding the front
panel, place your other hand
on the top rear edge of the
cover and carefully lift the
cover from the chassis.
TIP
Another way to release the
cover is to push on the CD-
ROM area with your thumbs
while holding the upper part of
the front panel. Then lift it up.
- CG8565 (410 pages)
- CG8565 (246 pages)
- CS5111 (26 pages)
- CS5120 (1 page)
- ET1611PUK (38 pages)
- S2-P8H61E (80 pages)
- P2-PH1 (80 pages)
- P1-P5945G (80 pages)
- P2-P5945GCX (90 pages)
- CG8270 (536 pages)
- CG8270 (72 pages)
- CG8270 (76 pages)
- CG8270 (534 pages)
- CG8270 (362 pages)
- CG8270 (218 pages)
- P3-P5G31 (100 pages)
- P3-PH4 (80 pages)
- P2-M2A690G (80 pages)
- P2-M2A690G (8 pages)
- P4-P5N9300 (82 pages)
- P4-P5N9300 (1 page)
- P1-P5945GC (92 pages)
- P2-P5945GC (92 pages)
- P3-P5G33 (98 pages)
- T3-P5945GC (80 pages)
- T3-P5945GCX (80 pages)
- P2-M2A690G (94 pages)
- T3-PH1 (80 pages)
- T3-PH1 (82 pages)
- T5-P5G41E (76 pages)
- T5-P5G41E (82 pages)
- S1-AT5NM10E (68 pages)
- P6-P7H55E (67 pages)
- ES5000 (174 pages)
- T4-P5G43 (104 pages)
- T-P5G31 (92 pages)
- BT6130 (54 pages)
- BT6130 (2 pages)
- BT6130 (60 pages)
- CG8265 (350 pages)
- CG8265 (210 pages)
- CM1740 (70 pages)
- CM1740 (198 pages)
- CM1740 (330 pages)
- P6-M4A3000E (59 pages)