Billet Specialties Premium Tru Trac Serpentine System - Big Block Ford User Manual
Page 4
www.billetspecialties.com
www.billetspecialties.com
7
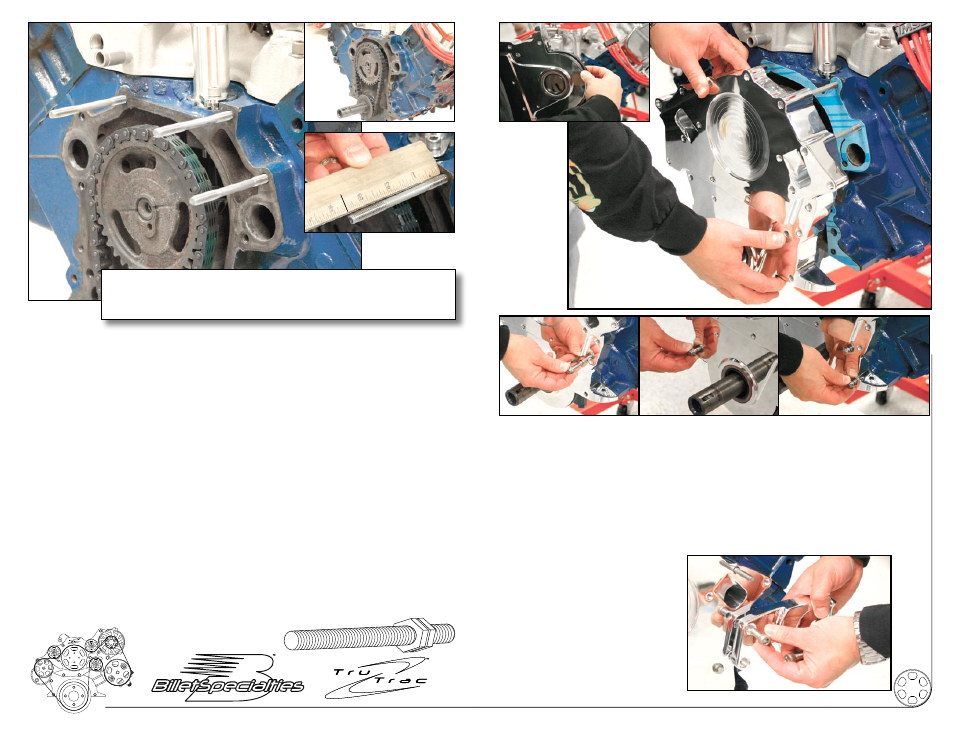
Figure 1 - Prepping The Block
Disconnect battery; remove all existing accessory drive brackets and components from
motor. Remove crankshaft damper and spacer. Remove water pump and timing cover
housing, scrape away any existing gasket material with a gasket scraper and dress surface
with a Scotch Brite® pad.
Drop oil pan and repeat surface prep. Clean and inspect oil pan and hardware. Replace as
necessary. Store hardware in a safe place for later use.
Clean and prep threads on engine block, use a 5/16-18 thread chaser if necessary. Thread
chasers are available at your local auto parts store or tool dealer and are different from a
thread cutting tool.
Install Studs In Block
Apply RTV sealer to one end of the three 5/16-18 x 4” threaded studs and thread stud (A) into
the upper passenger block mount hole. Follow by threading stud (B) into the upper driver
side block mount hole near the distributor. Thread the last remaining stud (C) into the upper
water pump mount hole on driver side of block.
Apply anti-seize to the exposed threads of the studs at this time. Check installed height of
studs by measuring 3-1/2” from block surface – adjust as necessary.
The studs can easily be tightened by threading two 5/16-18 zinc coated nuts (supplied) onto
the stud and tighten them against each other to act as a drive nut (discard nuts after use).
Example
3-1/2"
[A]
[B]
[C]
Figure 2 - Prepare & Install Timing Cover
[A] Install oil pan end seal into timing cover with a thin bead of RTV silicone (use sparingly).
Lubricate crank seal with motor oil or grease to protect seal at start-up. Apply Permatex
Hylomar® gasket dressing to both sides of timing cover gasket and place on engine block.
Install Timing Cover
[B] Slide timing cover over studs. Apply anti-seize to four 5/16-18 x 2” ARP 12pt. cap screws.
Install 5/16” stainless steel washers to each screw at this time. Thread screws and washers
into bottom mount holes in timing cover and finger tighten.
For Kits With Power Steering
Apply anti-seize to two 3/8-16 x 1”
socket head cap screws. Place
power steering bracket #14607 to
timing cover and thread the two
3/8-16 x 1” socket head screws
through bracket and into timing
cover. Tighten firmly.
[A]
[B]
NOTE: Fuel pump eccentric must be removed from timing gear. Replace cam bolt
& washer. Refer to your repair manual for proper torque specifications for cam bolt.
CAUTION: If cam bolt becomes loose severe engine damage can occur. A good
thread locking compound should be use.