3B Scientific 3B NETlog™ with Ethernet Port (230 V, 50__60 Hz) User Manual
Page 7
7
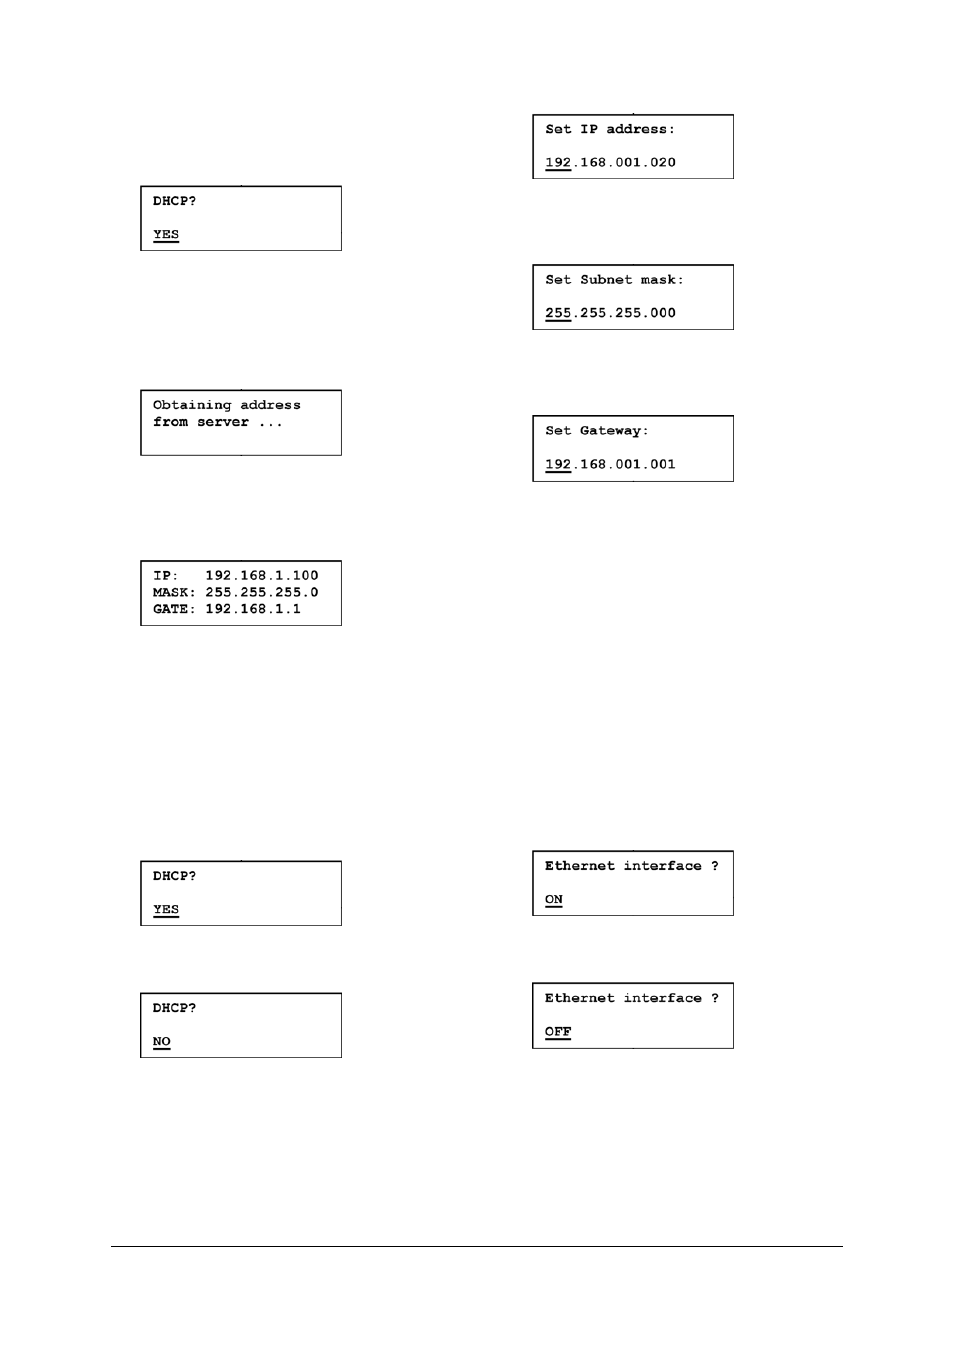
•
Confirm this by pressing the "DATE/TIME" but-
ton. The following will then appear on the dis-
play:
•
Now plug in the Ethernet cable to connect the
3B NETlog™ unit to the local network. Confirm
the above question by pressing "DATE/TIME".
An available IP address for the local network will
be sought out and assigned to the device:
After about 3 seconds, the IP address, the subnet
mask and the gateway address will be displayed.
The display might, for example, display the follow-
ing:
•
Use the "DATE/TIME" button to confirm. The
3B NETlog™ unit will then have the IP address
assigned to it.
9.2 Assignment of a known or fixed IP address
•
Turn off the 3B NETlog™ device and unplug the
Ethernet cable.
•
Press down the "STORE" button and turn on
the 3B NETlog™. The display should show the
following:
•
Press the "RATE" or "STORE" button until the
display shows the following:
•
Use the "DATE/TIME" button to confirm this,
then plug in the Ethernet cable to connect the
3B NETlog™ unit to the local network.
•
Now you can modify the known, fixed IP ad-
dress by pressing the "STORE" or "RATE" but-
tons along with "CHANNEL" or "DATE/TIME"
e.g.:
•
Confirm the address by pressing the
"DATE/TIME" button. Now enter or modify the
subnet mask, e.g.:
•
Confirm the mask by pressing the "DATE/TIME"
button. Now enter or modify the gateway ad-
dress, e.g.:
•
Confirm using the "DATE/TIME" button.
9.3 Assignment of default value for IP address
•
Turn off the 3B NETlog™ device and unplug the
Ethernet cable.
•
Remove a battery from the unit.
•
Pressing down the "RATE" and "DATE/TIME"
buttons at the same time, put the battery back
in the unit.
9.4 Turning off Ethernet mode
•
Turn off the 3B NETlog™ device and unplug the
Ethernet cable.
•
Press down the "STORE" button and turn on
the 3B NETlog™. The display should show the
following:
•
Press the "RATE" or "STORE" button until the
display appears as follows:
•
Confirm by pressing the "DATE/TIME" button.
Ethernet mode is now switched off.
The full menu for configuring Ethernet can be
found in the appendix.