Newport Brass 280L Ithaca User Manual
Page 3
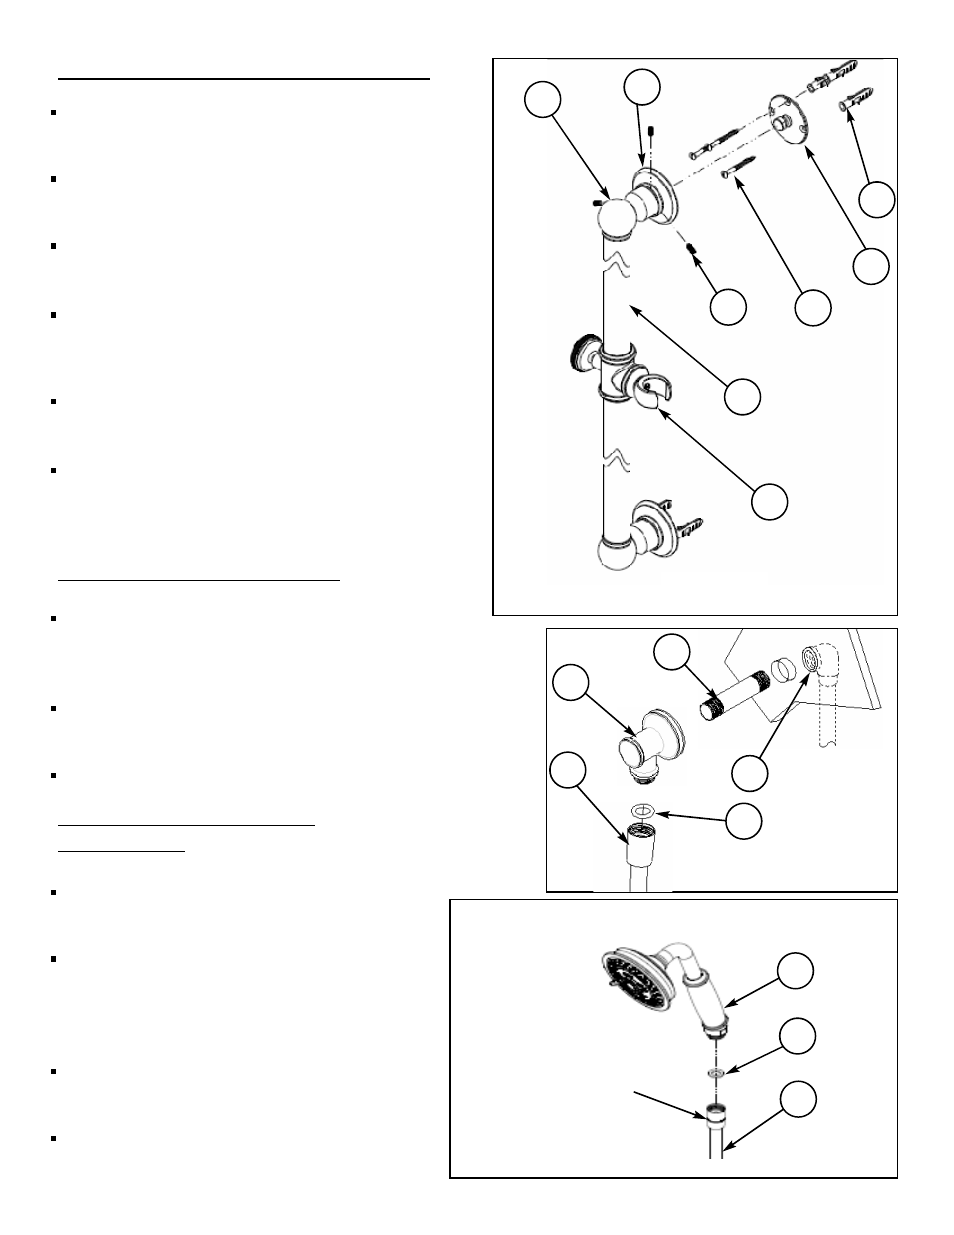
Hand Shower and Hose
Installation:
See Figure 5
.
Place rubber WASHER (10) into both ends of
HOSE (9).
Attach longer conical end of HOSE (9) onto
hand SHOWER (8). Note: This end of HOSE
(9) has swivel joint to prevent coiling of
HOSE (9).
Attach the other end of HOSE (9) onto supply
ELBOW (3). See Figure 1.
Place hand SHOWER (8) into HOLDER (6).
Figure 5
8
9
10
Long
hose
end
Supply Elbow Installation:
See Figure 4.
Based on finished wall thickness, installer must use
an appropriate length 1/2” NPT NIPPLE (1), not included,
for hand SHOWER (8) installation.
Apply thread sealant to both ends of the NIPPLE (1) and
thread into FITTING (2) behind finished wall.
Attach supply ELBOW (3) onto other end of NIPPLE (1).
Figure 4
2
3
1
9
10
Figure 3
1
3
4
5
2
8
7
6
Installation of Slide Bar Assembly
Locate the desired position of slide bar on finished
wall. See Figure 1.
Mark wall and drill 5/16” holes for WALL ANCHORS
(1) to dimension shown in Figure 1.
Place BRACKETS (2) over wall ANCHORS (1) and
secure with SCREWS (3).
Slide ESCUTCHEON (4) onto END POST (5), and
place END POST (5) onto the lower BRACKET (2)
and secure with SETSCREWS (6).
Slide ESCUTCHEON (4) back against finished wall
surface.
Insert SLIDE BAR (8) into the secured END POST
(5) and repeat the above steps to the other end
of SLIDE BAR (8) as shown in Figure 3.
NWP-280L
EN-1735
REV -