Newport Brass 9486 User Manual
Page 2
Recommended Installation by a Professional Plumbing Contractor
Note:
I. Countertops having a thickness of ¾” or less may require additional material reinforcement to allow
for adequate load distribution.
II. Pot filler may get hot when arm is positioned above the stove’s burner. Swing the pot filler arm away
from the stove after use.
III. The use of petroleum based plumbers putty on this product will nullify the warranty.
We recommend the use of silicone based sealing materials as needed.
Installation:
1. Mark the location for the pot filler installation. Verify adequate reach of the faucet for your
intended use, and the center of the location is at least 1.5” away from the wall, so the escutcheon
will not intefere with the wall.
2. Drill a 1-1/8” (2.9cm) to 1-3/8” (3.5cm) hole at the marked location.
3. Verify the O-RING (3) is installed on the underside of ESCUTCHEON (2). If desired, sealant may
be applied to the underside of the ESCUTCHEON (2).
4. Slide ESCUTCHEON (2) onto the faucet SHANK (1). Insert faucet SHANK (1) through the
mounting hole.
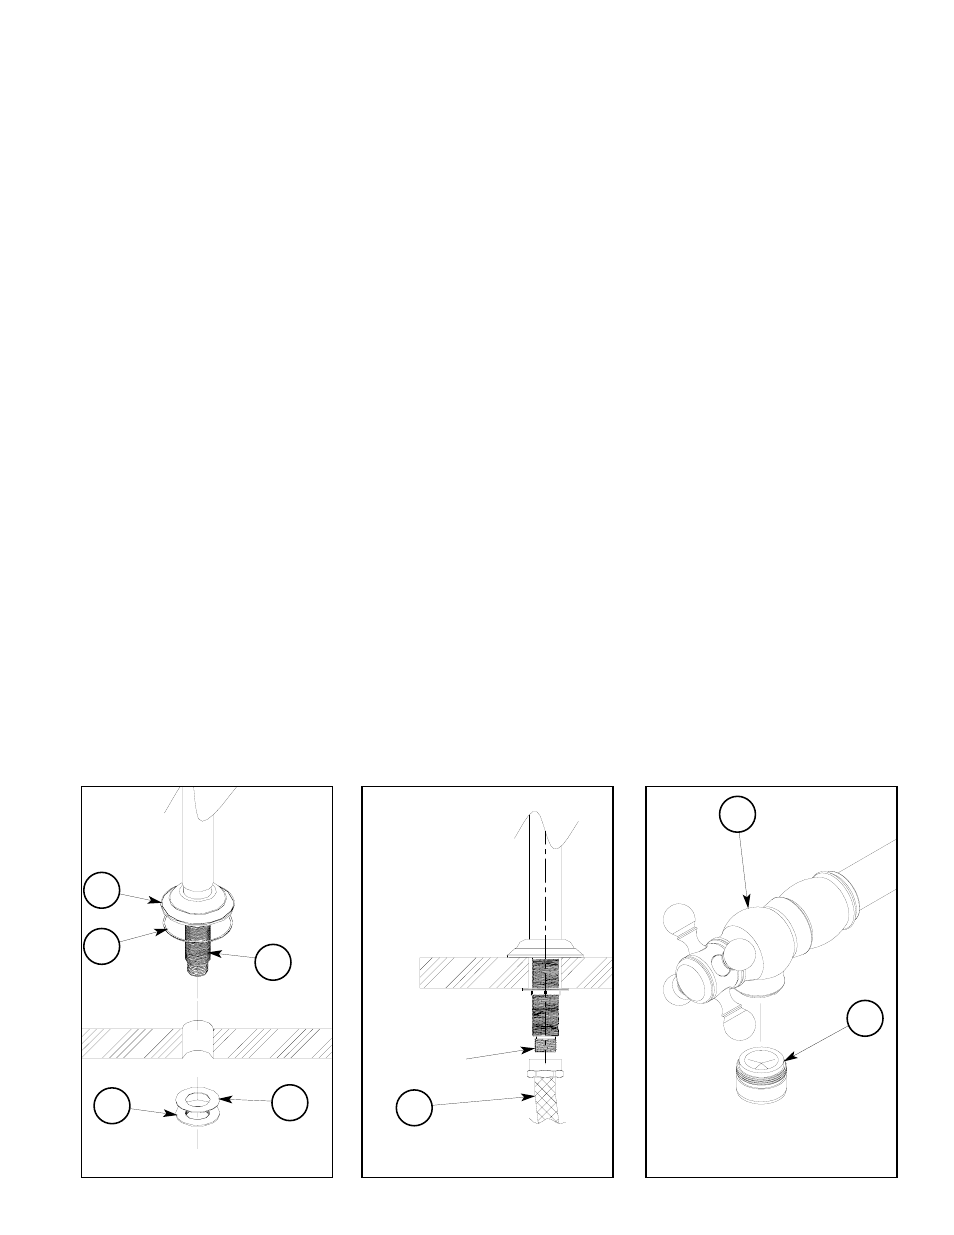
5. Slide WASHER (4), from underside of mounting deck, onto faucet SHANK (1). Thread mounting
NUT (5), from underside of mounting deck, onto faucet SHANK (1) and hand-tighten. See
Figure 1.
6. Orient the faucet as desired and tighten mounting NUT (5) to secure.
7. Connect cold water SUPPLY (6), not supplied, to 1/2 NPSM connection is required. See Figure 2.
8. Turn on water supply, check for leaks and make adjustments as required.
9. Remove AERATOR (7) from SPOUT (8), open valve and flush pot filler of debris. See Figure 3.
10. Reattach AERATOR (7) to SPOUT (8).
NWP-9483
Figure 1
2
1
3
4
5
Figure 2
6
1/2 NPSM
Figure 3
8
7