Trim installation, Fig. 3, Table 1 – Newport Brass 3-906 Kayan User Manual
Page 3
2/28/06
Trim Installation
Note:To achieve desired handle rotational alignment, the cartridge MUST be tightened in a clockwise rota-
tion only.The use of petroleum base plumbers putty on our products will nullify the warranty. We recom-
mend the use of clear silicone sealing materials. (Cartridge factory torque is set @ 14-16 ft-lbs.)
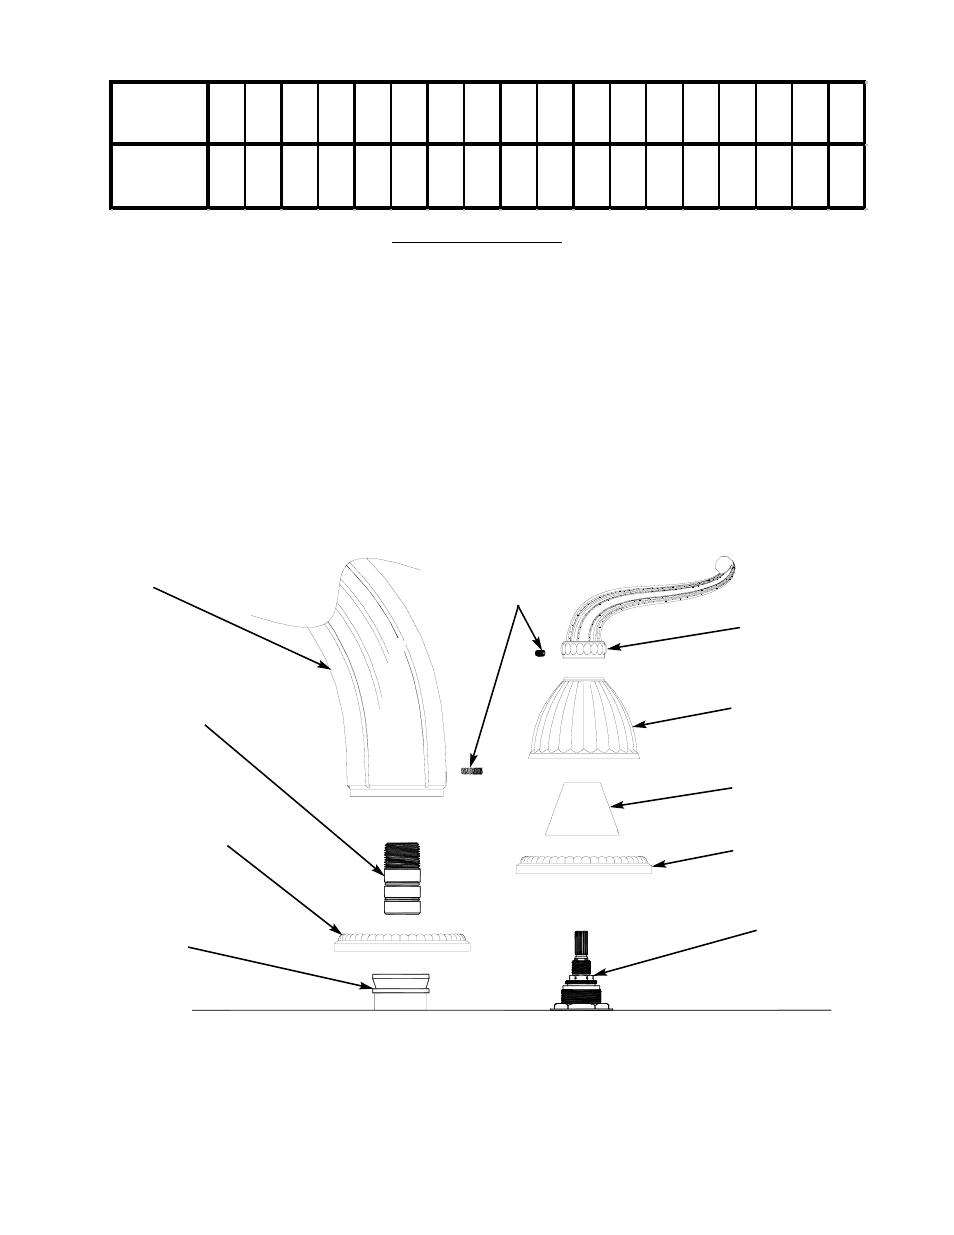
4. Attach handle trim to valve. When possible, any adjustments for rotational alignment should be made to the
valve body - not to the cartridge. (Note:Allow minimum spacing between handles and escutcheon/bonnet to
prevent damage to the surface finish.) Secure handles into place with setscrew. See Figure 3.
5. Apply Teflon tape to spout nipple and install into base of spout. Slide spout nipple into quick connect deck
flange (re-grease if necessary). Make sure spout is flush with deck and secure into place with setscrew. See
Figure 3.
6. Turn on water supply, check for leaks and make any final adjustments required.
Fig. 3
** Optional item based on model selection
Spout nipple
w/ o-rings
Decorative ring**
Quick connect
Deck flange &
spacer
Shroud **
Handle
Setscrews
Spout
Valve
Bonnet **
Escutcheon **
SERIES
876
886
896
906
956
966
1026
1056
1066
1076
1086
1096
1106
1606
1626
1646
1666
1746
STEM
LENGTH
2-
3/
8"
2-
7/
16"
2-
1/
4"
2-
1/
4"
2-
3/
8"
2-
1/
4"
2-
7/
16"
2-
5/
8"
2-
1/
2"
2-
5/
8"
2-
5/
8"
2-
1/
2"
2-
1/
2"
2-
1/
4"
2-
1/
4"
2-
1/
16"
2-
1/
16"
2-
3/
16"
TABLE 1