Fig. 6.1 fig. 6.2 – Peerless-AV FPE42F-S - Installation User Manual
Page 12
12 of 16
ISSUED: 07-16-10 SHEET #: 061-9050-7 08-07-12
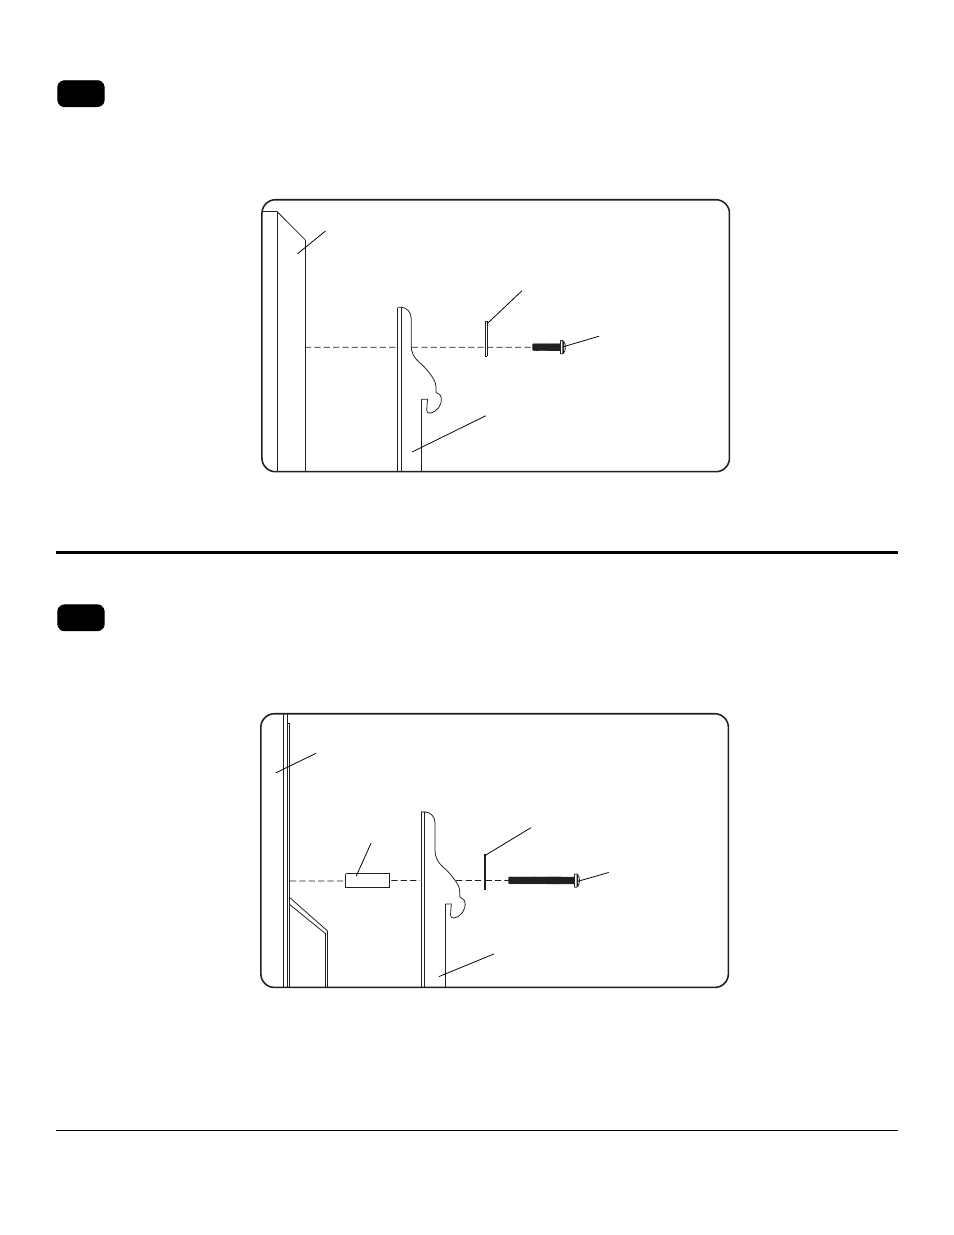
SCREEN
MULTI-WASHER
SCREW
ADAPTER
BRACKET (
BB or CC)
SPACER
ADAPTER
BRACKET (
BB or CC)
SCREEN
MULTI-WASHER
SCREW
Begin with the shortest length screw, hand thread through multi-washer and adapter bracket into screen as shown
below. Screw must make at least three full turns into the mounting hole and fit snug into place. Do not overtighten.
If screw cannot make three full turns into the screen, select a longer length screw from the baffled fastener pack.
Repeat for remaining mounting holes, level brackets and tighten screws.
NotE: Spacers may not be used, depending upon the type of screen.
Begin with longer length screw, hand thread through multi-washer, adapter bracket and spacer in that order into
screen as shown below. Screw must make at least three full turns into the mounting hole and fit snug into place.
Do not overtighten. If screw cannot make three full turns into the screen, select a longer length screw from the
baffled fastener pack. Repeat for remaining mounting holes, level brackets and tighten screws.
For Flat Back Screen
For Bump-out or Recessed Back Screen
6-2
6-1
If you have any questions, please call Peerless customer care at
1-800-865-2112.
If you have any questions, please call Peerless customer care at
1-800-865-2112.
SCREW
MULTI-WASHER
ADAPTER BRACKET (
B)
SCREEN
SCREEN
MULTI-WASHER
SCREW
ADAPTER
BRACKET (
BB or CC)
SPACER
ADAPTER
BRACKET (
BB or CC)
SCREEN
MULTI-WASHER
SCREW
SCREW
MULTI-WASHER
ADAPTER BRACKET (
B)
SCREEN
SPACER
fig. 6.1
fig. 6.2