American Car Craft Dodge Charger _ Chrysler 300 5.7L Plenum Cover Perforated 2011-2013 User Manual
Page 2
2
PROTECTIVE LINER INFORMATION: Your new accessories will come to you with a protective surface liner. Leave this
liner in place until the installation is complete to prevent finger prints and/or possible scratches during installation.
1. The first step will be to remove the factory engine shroud. Also remove the four stud bolts that secured the
factory engine shroud and then snap them back into the removed cover for re-use if you decide to return to
stock in the future.
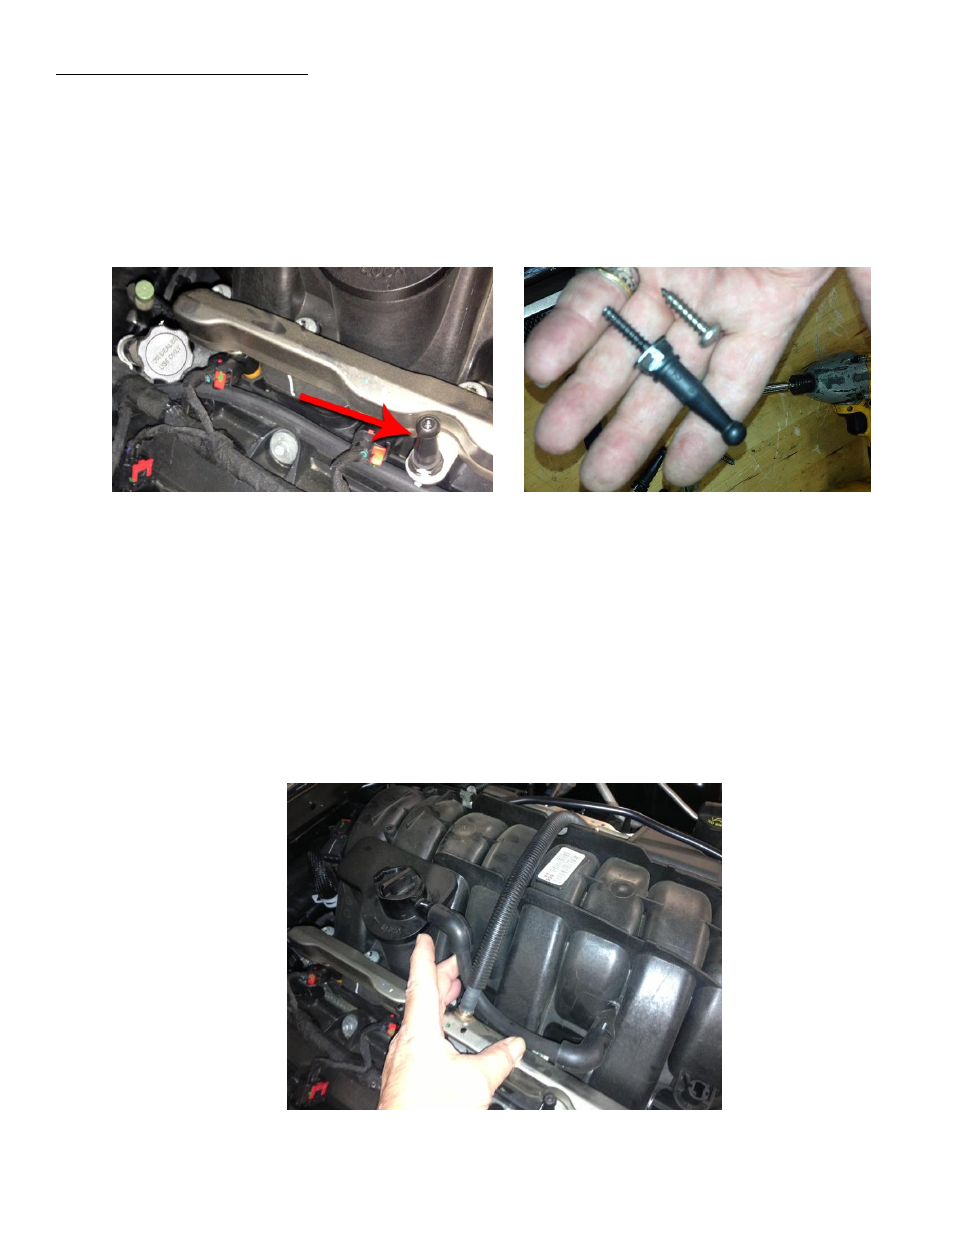
2. Install the (4) ¾” #12 pan head stainless screws to secure the fuel rails. See images 1 & 2 below.
Image 1 Image 2
3. With the factory cover removed take a good look at the engine so you can familiarize yourself with a few things
that will need to be done. One of the first things you will notice is the two main vacuum hoses on both sides of
the factory plenum. These two hoses will need to be rerouted and tightened up in order to allow the new covers
to set in place properly. We will start with the passenger side first. You have been provided with three 90 degree
rubber elbows. Two of these elbows will be used on this side. Remove the rubber hose from the plenum. Then
attach the two rubber elbows provided to each port. Then bring the factory hose close to the elbows to
determine the length and cut the factory hose so that you will be able to insert the two ends into the elbows
thusly creating a tighter configuration of this vacuum hose. It is important that you accomplish this so that the
new configuration rests just inside the fuel rail as in the pictures 3 & 4. This will allow the new plenum cover to
rest onto the factory’s flat fuel rail without any obstruction from the vacuum hose.
Image 3