B&B Electronics USR604 - Quick Start Guide User Manual
Serial ports leds, Usb port, Dip switches
Install the Drivers
1
3
2
Set DIP Switches
4
Connect the Converter
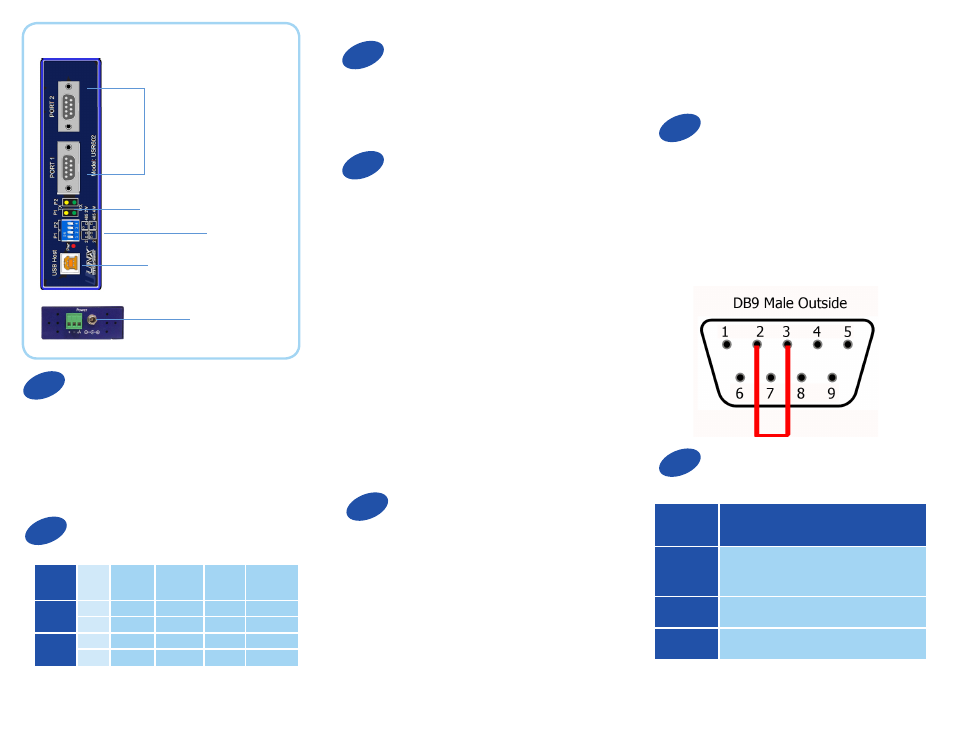
Product Overview
Serial
Ports
LEDs
Power the Converter
USB
Port
The USR602 can run on 5 V USB power if the host
port is providing 500 mA. It can also be powered
via the terminal block or barrel jack port.
Set the converter to RS-232 mode using the DIP
switches. Loopback pins 2 and 3. Using Hyper Termi-
nal or similar program, connect to the COM port. Set
the desired baud rate. Ensure that Hyper Terminal
local echo is OFF. Transmit data. If the same character
string is returned, the test is good.
DIP
Switches
Terminal block
and barrel jack
To prevent installation errors, do not plug in the hard-
ware until you have already installed the drivers.
Use the included CD to install the converter’s drivers in
the attached PC.
When you connect the converter to the host
computer’s USB port the Found New Hardware
wizard will open. It will discover and install the
USB device. Then it will discover and install each
serial port. Allow Windows to install the converter
“Automatically.” There is no need to connect to the
Internet or Windows Update.
If a popup window says the software has not passed
Windows logo testing, that’s OK. Just click on
“Continue Anyway.”
When the wizard is complete the serial ports on the
converter will appear in Windows Device Manager
as new COM ports.
5
Configure the Serial Ports
Open Control Panel. Click “System” to open the
Device Manager. Under “Ports,” double-click the
port to be configured.
On the “Serial Port Properties” window, set the
required communications parameters for the system
with which you are communicating. If necessary,
6
Loopback Test
7
LEDs
LED
Type
Indication when ON
PWR
Computer is receiving adequate
voltage and current from USB or
power source
TX
Serial interface is transmitting data
RX
Serial interface is receiving data
click Advanced and set up the Advanced Properties.
(Refer to manual for more information.)
DIP
Switches
SW# RS-232 RS-422
RS-485
4-Wire
RS-485
2-Wire
Port 1
1
Off
ON
Off
ON
2
Off
ON
ON
Off
Port 2
3
Off
ON
Off
ON
4
Off
ON
ON
Off