Tc near control panel – mixer page, De-esser module, Damping meter – TC Electronic Impact Twin User Manual
Page 9: All bypass, Fader module, Parametric eq module, Compression module
applied. This parameter can also be controlled using the
ADJUST knob on Impact Twin’s front panel.
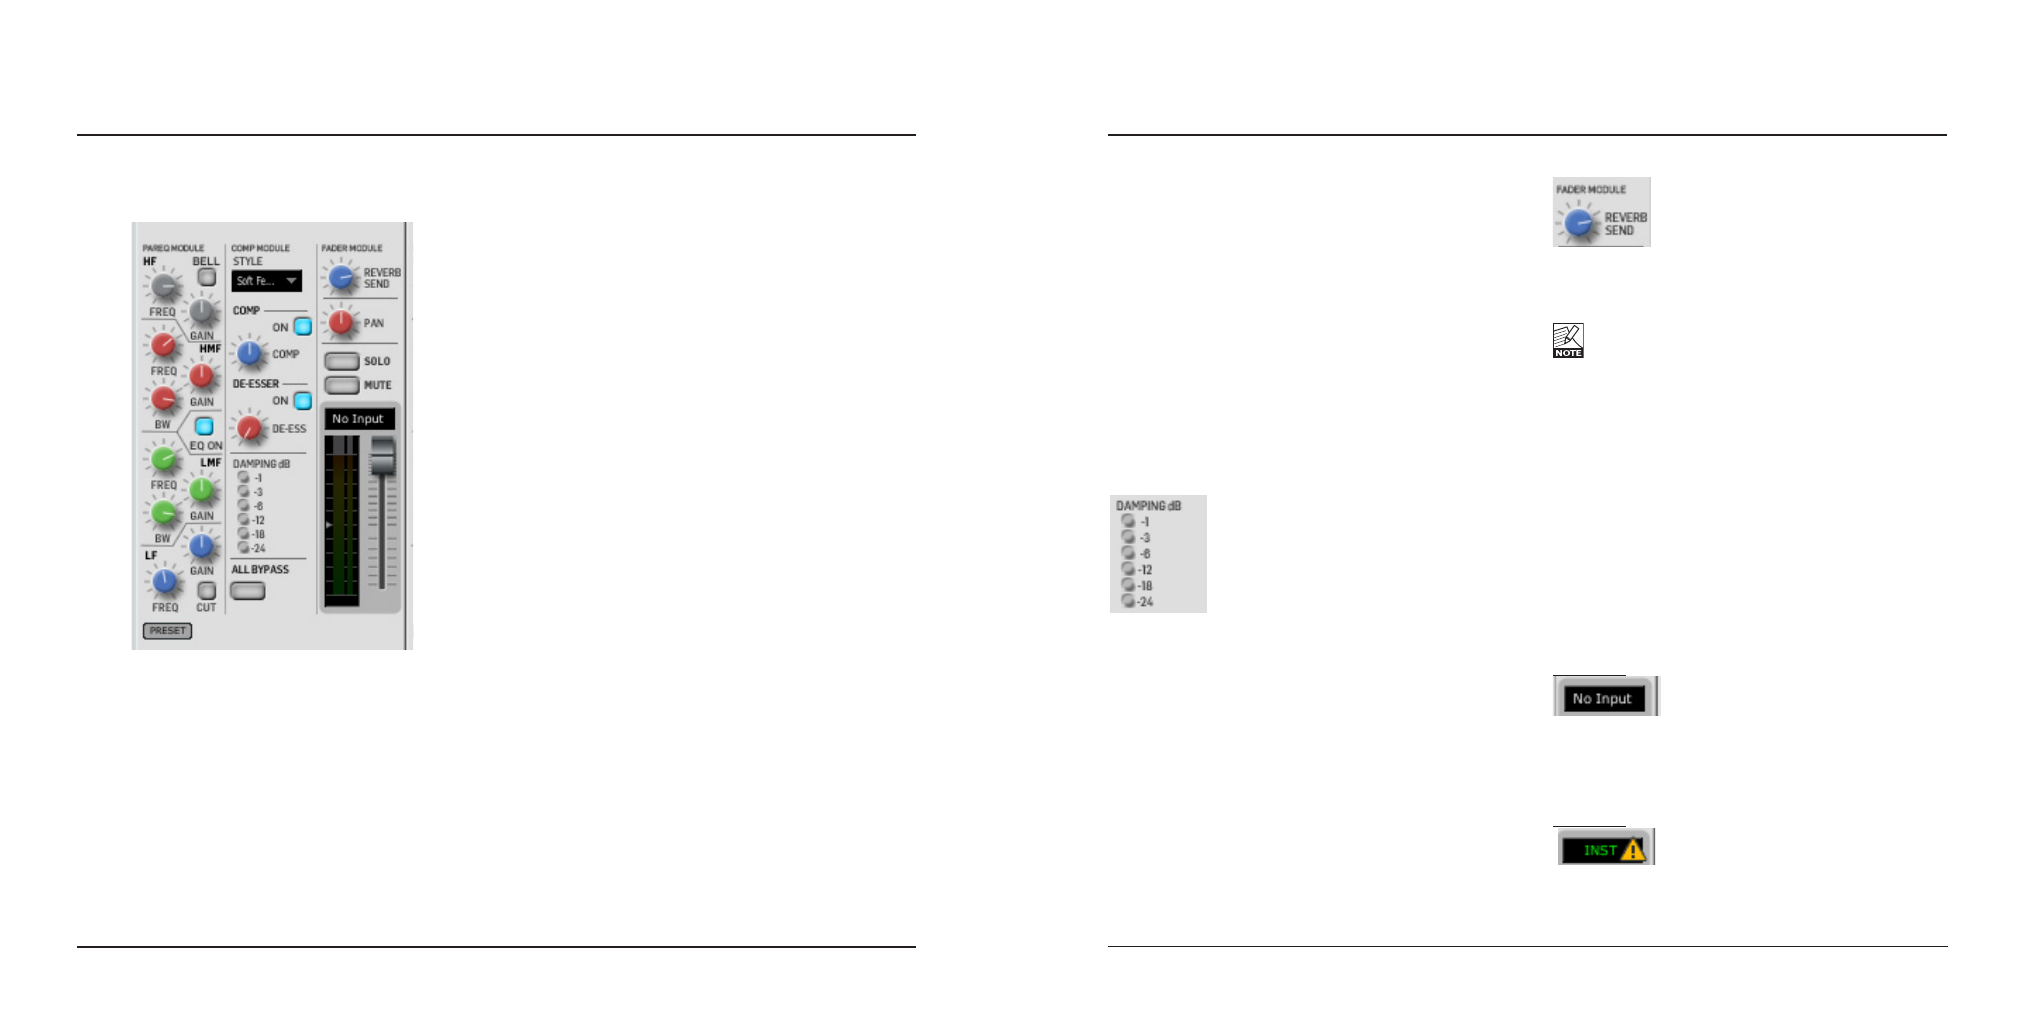
De-Esser Module
When recording voices, a de-esser can reduce or
eliminate excessive sibilant sounds. The operation of the
Impact Twin De-Esser is easy.
ON Button
Activates the De-Esser.
DE-ESS Knob
Sets the amount of de-essing.
Damping Meter
The Damping meter indicates the amount of compression
applied.
All Bypass
When you activate All Bypass, all channel processing
modules are bypassed, and the input signal is recorded
directly to your DAW.
Fader Module
The following descriptions of Reverb Send, Solo, Mute
and Fader & Meters apply to all instances of these
parameters.
TC NEAR CONTROL PANEL – MIXER PAGE
15
Channel Sections 1 and 2
Channels 1 and 2 each have a control section as shown
above. To the left, there is a 4 band parametric EQ, in
the middle there is a compressor and a de-esser, and to
the right there is a fader module with reverb send, pan,
solo and mute controls and the actual level fader.
Parametric EQ Module
The module is split into four bands:
HF:
High frequencies
HMF: High/Mid frequencies
LMF: Low/Mid frequencies
LF:
Low frequencies
The following parameters apply to the HMF and LMF
bands:
FREQ: Sets the center frequency to be boosted or
attenuated by the Gain control.
GAIN:
Sets the amount of boost or attenuation of the
selected frequency.
BW:
(Bandwidth) Determines the frequency range
to control around the selected frequency.
LF CUT: For the LF (low frequency) band, the CUT
button alternates between Cut and Shelving
type.
HF BELL: For the HF (high frequency) band, the
BELL button alternates between Parametric
(Bell-shape) and shelving type.
EQ ON
Press this button to activate or deactivate the EQ
section.
Compression Module
The compression module offers a number of predefined
compression settings that allow you to find the
compression style you are looking for, fast and easy.
STYLE Selector
A number of styles can be selected from the drop down
menu. Select your style based on the source you are
working with (e.g. “Male Vocal”, “Guitar” or “Piano”).
Note that the selected Style applies to both the
compressor and the de-esser.
ON Button
Press this button to activate or deactivate the
compressor.
COMP Knob
This knob sets the amount of compression. The
compressor features auto make-up gain that “evens
out” the signal level – even when heavy compression is
TC NEAR CONTROL PANEL – MIXER PAGE
14
Let’s take at look at the different sections of the TC
Near Control Panel’s mixer page.
Reverb Send
Sets the amount of signal sent to the Reverb Module and
patch bay from a particular channel.
If you don’t hear any reverb when turning up this
control, make sure that the fader on the Reverb module
is turned up as well.
Solo Button
Mutes all other channels, allowing you to hear this
particular channel solo.
Mute Button
Mutes this channel only.
Fader & Meters
The fader sets the channel level. The meter indicates
the level. The text field above the fader can indicate a
number of things.
Example 1
A 1/4 jack has been inserted into this channel’s input.
You should see meter activity when the source sends a
signal.
Example 2
If you see an exclamation mark, you have inserted a jack
in the instrument input. To engage the instrument input,