Impact twin as mic pre & a/d converter + file menu, Setup example: “to external mixer with adat in, Total recall - file menu – TC Electronic Impact Twin User Manual
Page 16
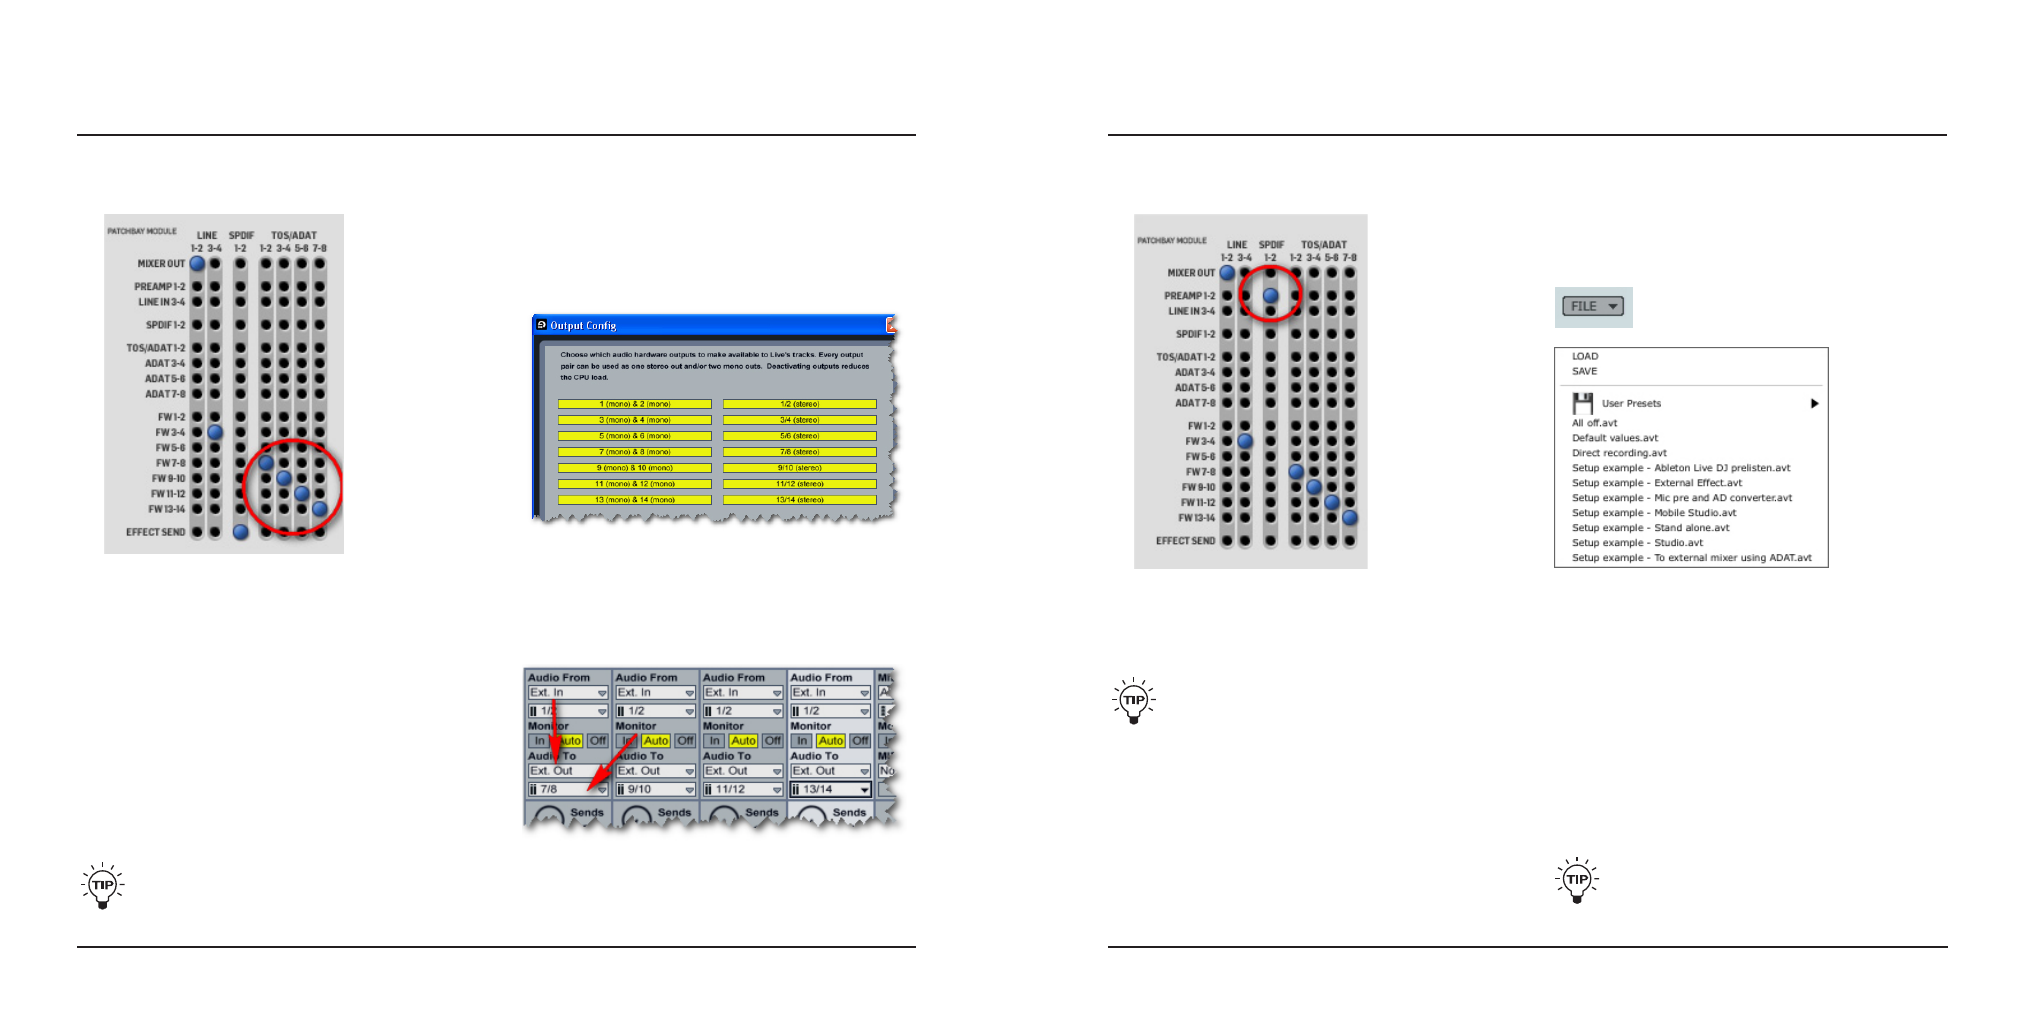
You can use Impact Twin as an excellent AD
converter.
In this example, we route the output of channels 1+2 to
the S/PDIF out. Note that EQ, compression and De-Ess
is still applied. The Reverb, however, is not routed to the
S/PDIF out.
The described settings for this example can be
recalled as a preset via Impact Twin’s file menu.
IMPACT TWIN AS MIC PRE & A/D CONVERTER + FILE MENU
29
Here, we are sending channels via ADAT to an
external mixer with ADAT inputs.
In addition to using the TC Near Control Panel’s Effects
Send to feed an external effects processor using the S/
PDIF in and out jacks (as explained in example #4), this
routing also allows you to send eight channels via the
ADAT out to an external mixer with ADAT in.
– Connect Impact Twin’s S/PDIF out to the external
effect’s S/PDIF in. Connect the external effect’s S/
PDIF out to Impact Twin’s S/PDIF in.
– Connect Impact Twin’s ADAT out to your mixer’s
ADAT in using a standard optical cable.
– Create four busses in your DAW and route your
tracks to these channels.
The described settings for this example can be
recalled as a preset via Impact Twin’s file menu.
How to create busses in Ableton Live and route
these busses to the ADAT channels
– In Ableton Live, select “Options” / “Preferences”.
– Select “Output Channel configuration” and select
several mono or stereo busses. In the example
below, we have created four mono and four stereo
busses.
– Create four audio tracks in.
– For each track, select “Ext. Out” from the “Audio To”
drop-down menu.
– Then select FW channel pairs 7/8, 9/10, 11/12 and
13/14. See below:
SETUP EXAMPLE: “TO EXTERNAL MIXER WITH ADAT IN”
28
Total Recall - File Menu
Where Channel Strip presets hold only parameter
settings for the channel strip, the Total Recall presets
hold all settings on the Mixer, Tuner and About Page.
Press the FILE button to open the File menu.
LOAD
By selecting Load, you can navigate to any folder in the
system, including shared folders. By default you will be
directed to the default location for Impact Twin presets.
Only presets located in the default file locations for TC
Near control panel will be visible in the drop down menu.
SAVE
By selecting “Save”, you can save your preset to any
folder in the system that you have write access to,
including any shared folder. By default, presets are
saved to the default location of the TC Near control panel
presets.
All setup examples described on the previous
pages are available as factory presets. - See
above.