Setup example: “studio – TC Electronic Impact Twin User Manual
Page 12
21
20
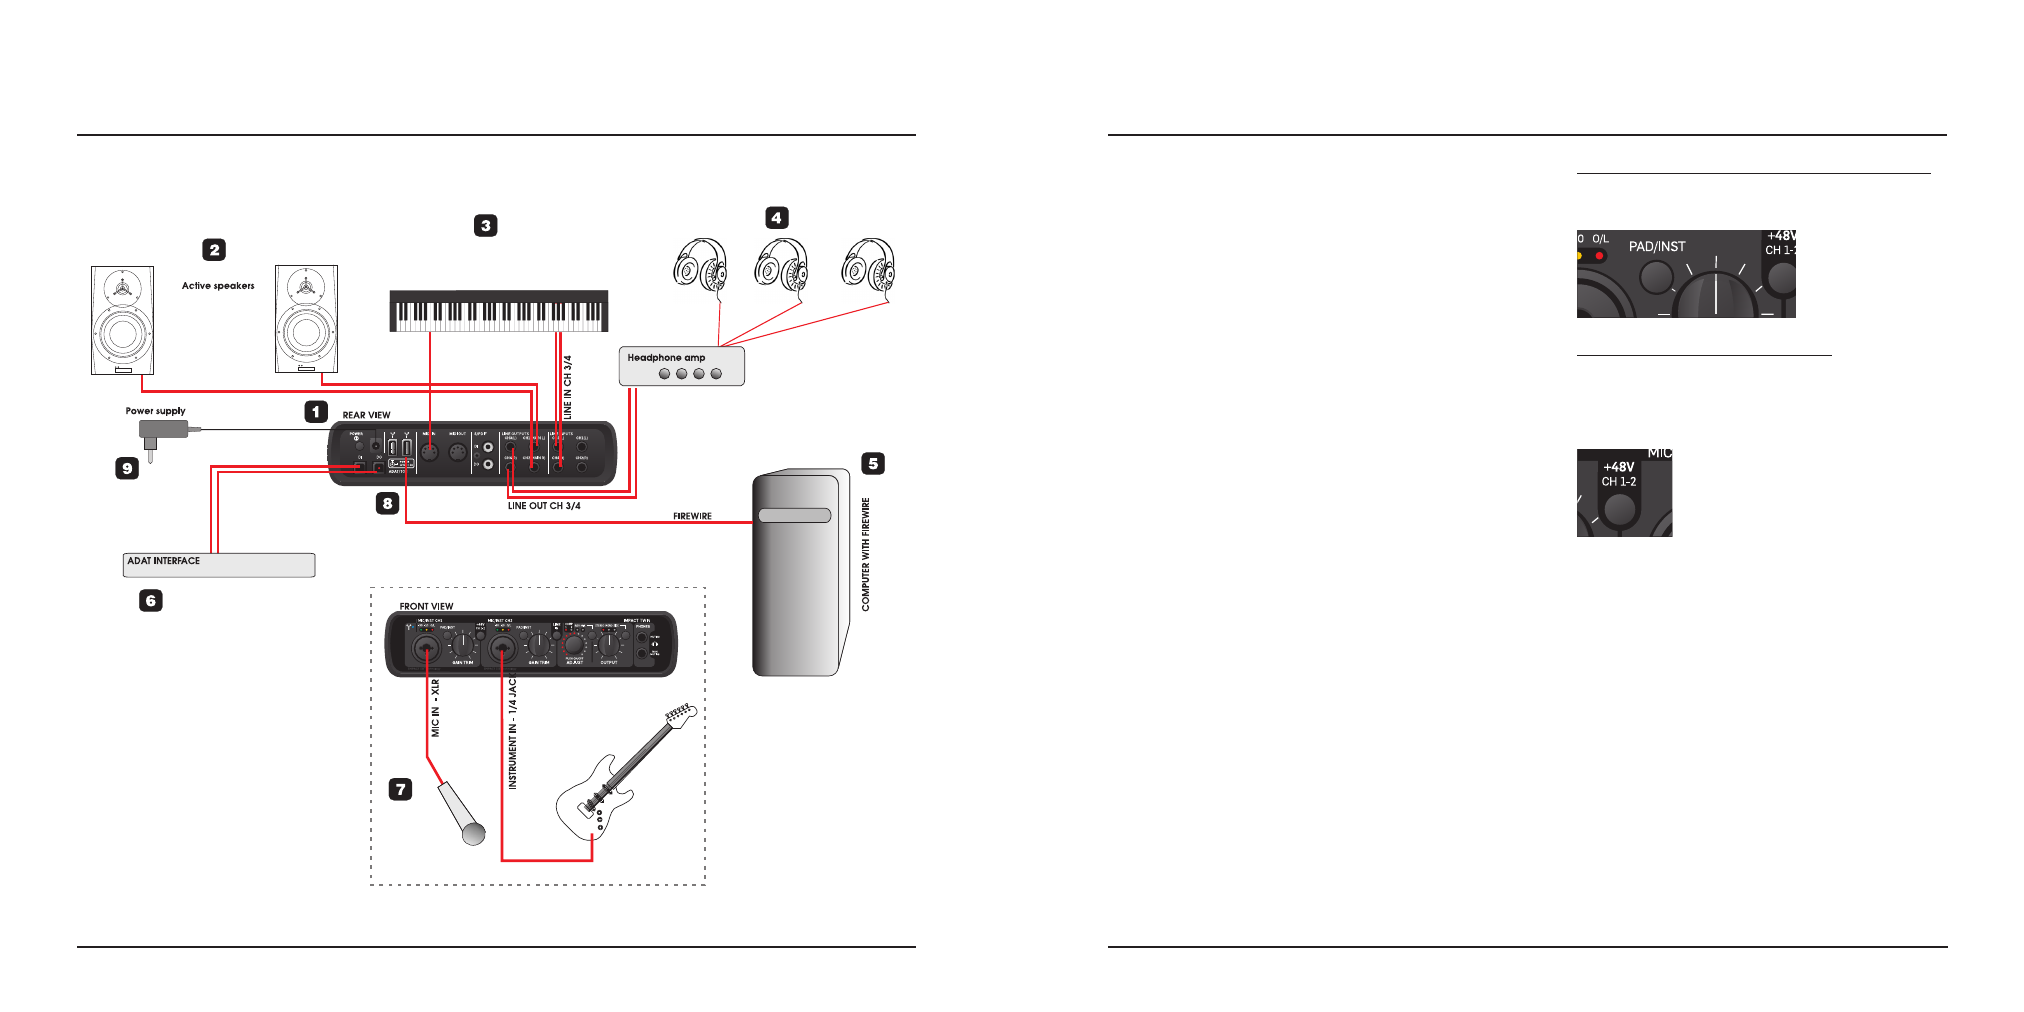
1 Impact Twin Rear
The Impact Twin’s rear panel.
2 Active Speakers
In this particular setup we illustrate the Impact Twin in
use with a set of active monitors (You may of course
use a standard amplifier and passive speakers if you
prefer).
3 Keyboard
A keyboard is connected to Line In 3/4 for monitoring/
recording purposes. The MIDI connection can be
used to control software instruments in your DAW.
4 Headphones
Multiple headphones are connected via a separate
headphone amp. Line outputs 3/4 on the Impact Twin
are used to feed the headphone amp.
On the front panel, an additional set of headphones
can be connected to the non-muting headphones
connection.
5 Computer
Computer with FireWire interface. Please see the
“System Requirements” section for information on
minimum requirements.
6 ADAT Interface
Standard ADAT interface with 8 input and 8 output
channels.
7 Impact Twin Front + Instruments
Front panel view of the Impact Twin illustrated with a
microphone and an electric guitar connected.
Connecting an electric guitar directly to Impact Twin
Connect a guitar using a standard 1/4 jack and set
the PAD/INST button to “in” position.
Connecting a Condenser Microphone
Impact Twin delivers +48V phantom power on the
XLR part of the Combo connection for use with
condenser microphones. Press “+48V” to activate
phantom power:
8 FireWire Connection to Computer
Use as standard FireWire (IEEE 1394) cable between
the computer and Impact Twin. Any of the two
connections can be used.
Note that a FireWire 800 adapter is supplied with
Impact Twin.
9 Power Supply
Impact Twin can be bus-powered directly from your
computer’s FireWire connection. Please refer to the
computer’s manual to see if this is an option.
If bus-power is insufficient or if more than one Impact
Twin units is connected to one FireWire bus, you
should use the external power supply delivered with
Impact Twin.
SETUP EXAMPLE: “STUDIO”
SETUP EXAMPLE: “STUDIO”