System settings, Buffers and latency, Audio dropouts – TC Electronic Impact Twin User Manual
Page 17
Buffers and Latency
“Buffer size” and “latency” are commonly used
terms in the audio computer world – so let us give a
short introduction to these important concepts.
“Latency” is a small delay measured in milliseconds (ms)
introduced by the fact that you computer needs time to
work with the audio signals that come in and go out.
Due to the way a computer (or more precisely: the
operating system) works, it needs to “slice” the audio
into small “chunks” – these are the buffers. The size of a
buffer is measured in samples.
The computer can either work with small but many
buffers – or with larger and fewer buffers.
E.g., let’s assume your computer needs to process 1024
samples (this would be very few samples, but this a good
number for the example).
It can do this by either processing two buffers of 512
samples, four buffers of 256 samples or perhaps eight
buffers of 128 samples, all depending on the buffer size.
The point here is: The larger the buffers are, the more
time it takes before the audio is being processed.
Accordingly, larger buffers introduce larger latency. On
the other hand: The more buffers need to be processed,
the more CPU power the computer has to allocate to this
process.
So basically the buffer size represents the balance
between latency and CPU power consumption.
Setting the right buffer size therefore very much depends
on how fast your computer is and how many other CPU
consuming tasks the computer has to do.
It is worth noticing that audio plug-ins tend to consume
a lot of CPU power. This is especially true for virtual
instruments, but also for some effects plug-ins (such as
high-quality reverbs).
If the buffer size is set too low, you will experience audio
dropouts.
So if you have a very fast computer and run few
plug-ins, you can easily go for a low buffer size. You’ll
be rewarded with low latency, i.e. a system that is very
responsive.
But if you have a slower computer and/or use lots of
plug-ins at the same time, you will have to choose a
larger buffer size, which will introduce more latency.
Direct Monitoring
Large latency is only a problem if you monitor your audio
through your computer or if you play virtual instruments
using an external MIDI controller. In this case, the lag
between the notes you play and the audio you hear can
become irritating.
If you need to run your system with large buffers, be
aware that all TC audio interfaces have a built-in “direct
monitor” section, which is used to monitor your signal
(you can e.g. listen to your microphone through your
headphones) with a very low latency (few milliseconds).
Audio Dropouts
In general, audio drop-outs are the result of two different
types of irregularities.
A: Drop-outs caused by limited CPU power
This situation typically occurs when you run a great
number of audio tracks and plug-ins at the same time.
In this case the solution would be to increase the Buffer
Size. Increased buffer size allows the computer to work
on bigger chunks of audio and thus use less power.
However, increasing the buffer size also results in a
higher latency time.
The optimal buffer size setting will therefore depend on
the components of your computer, particularly the CPU.
Bottom line:
Higher buffer size: more stability and more latency.
Lower buffer size: less stability and less latency.
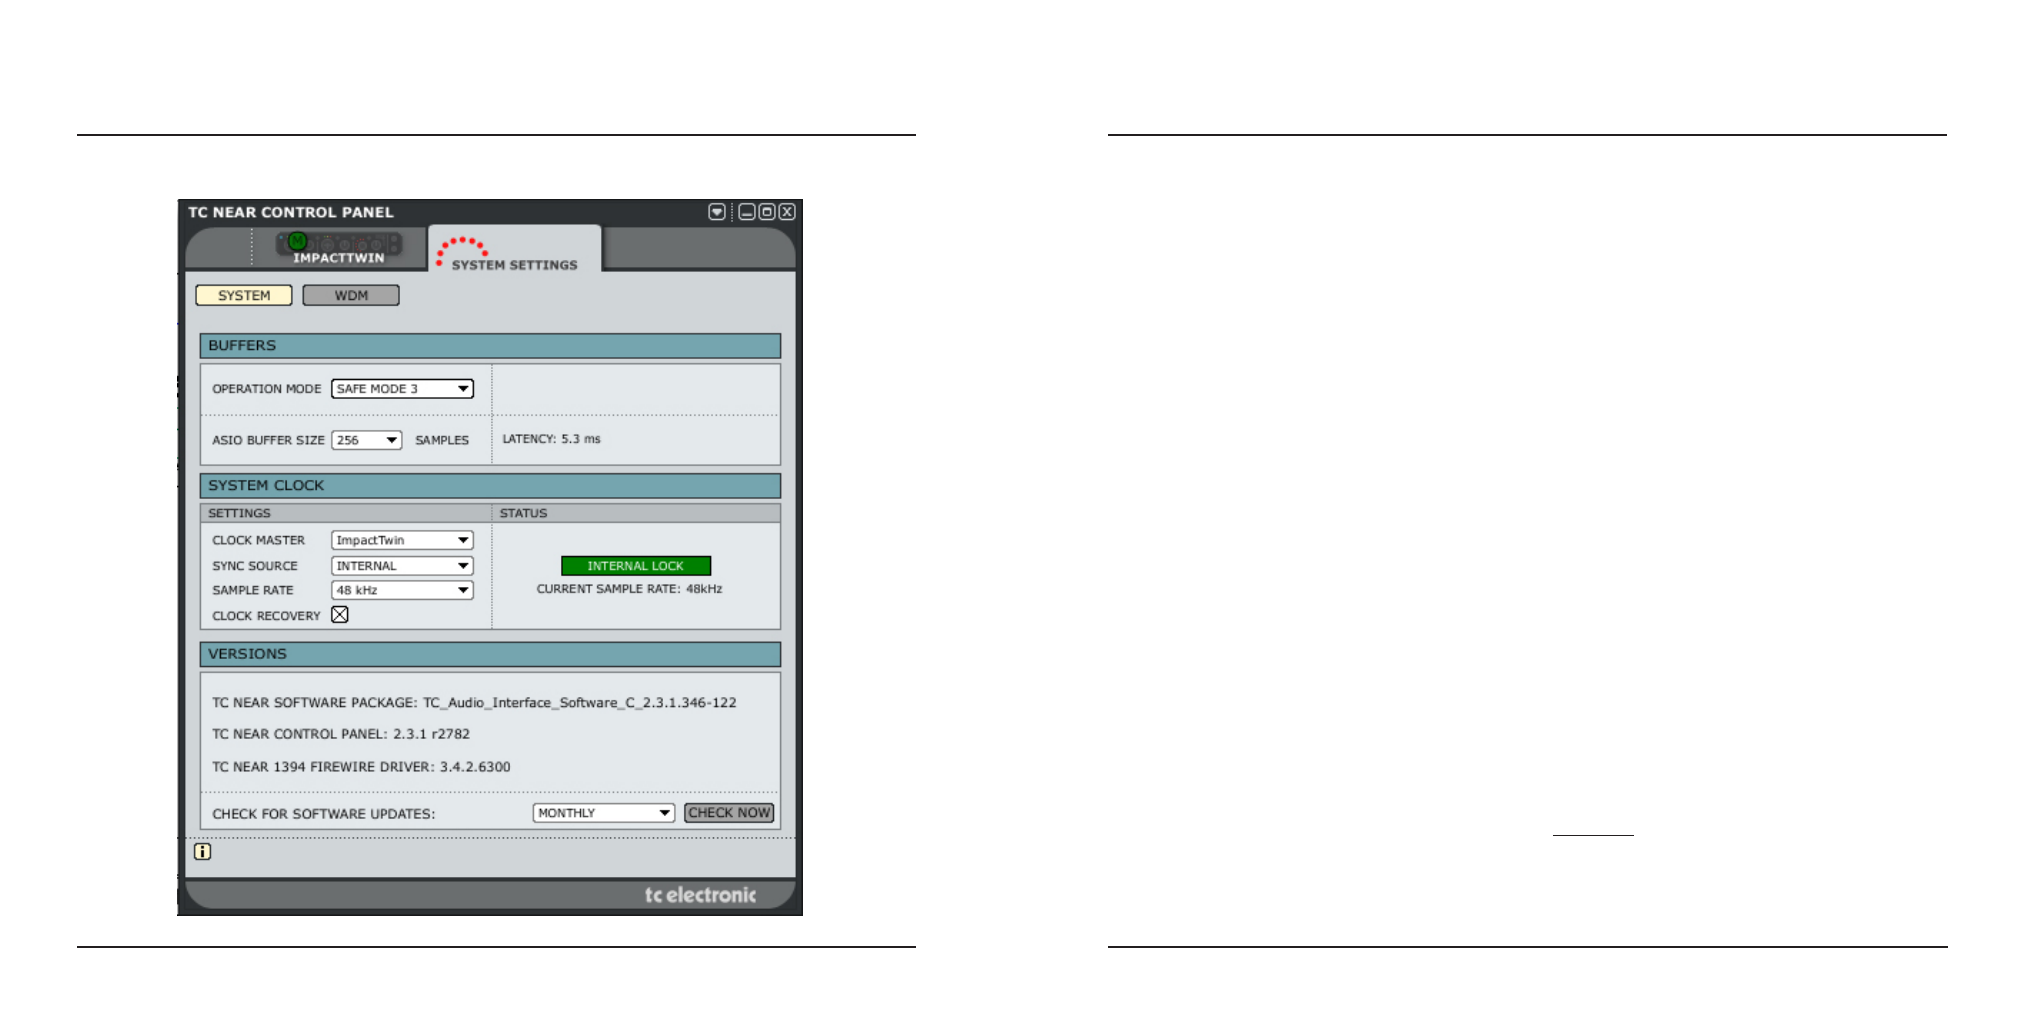
SYSTEM SETTINGS
SYSTEM SETTINGS
31
30
Access the System Settings page by clicking on “System Settings”.