Setup example: “ableton live – dj – TC Electronic Impact Twin User Manual
Page 14
25
SETUP EXAMPLE: “ABLETON LIVE – DJ”
24
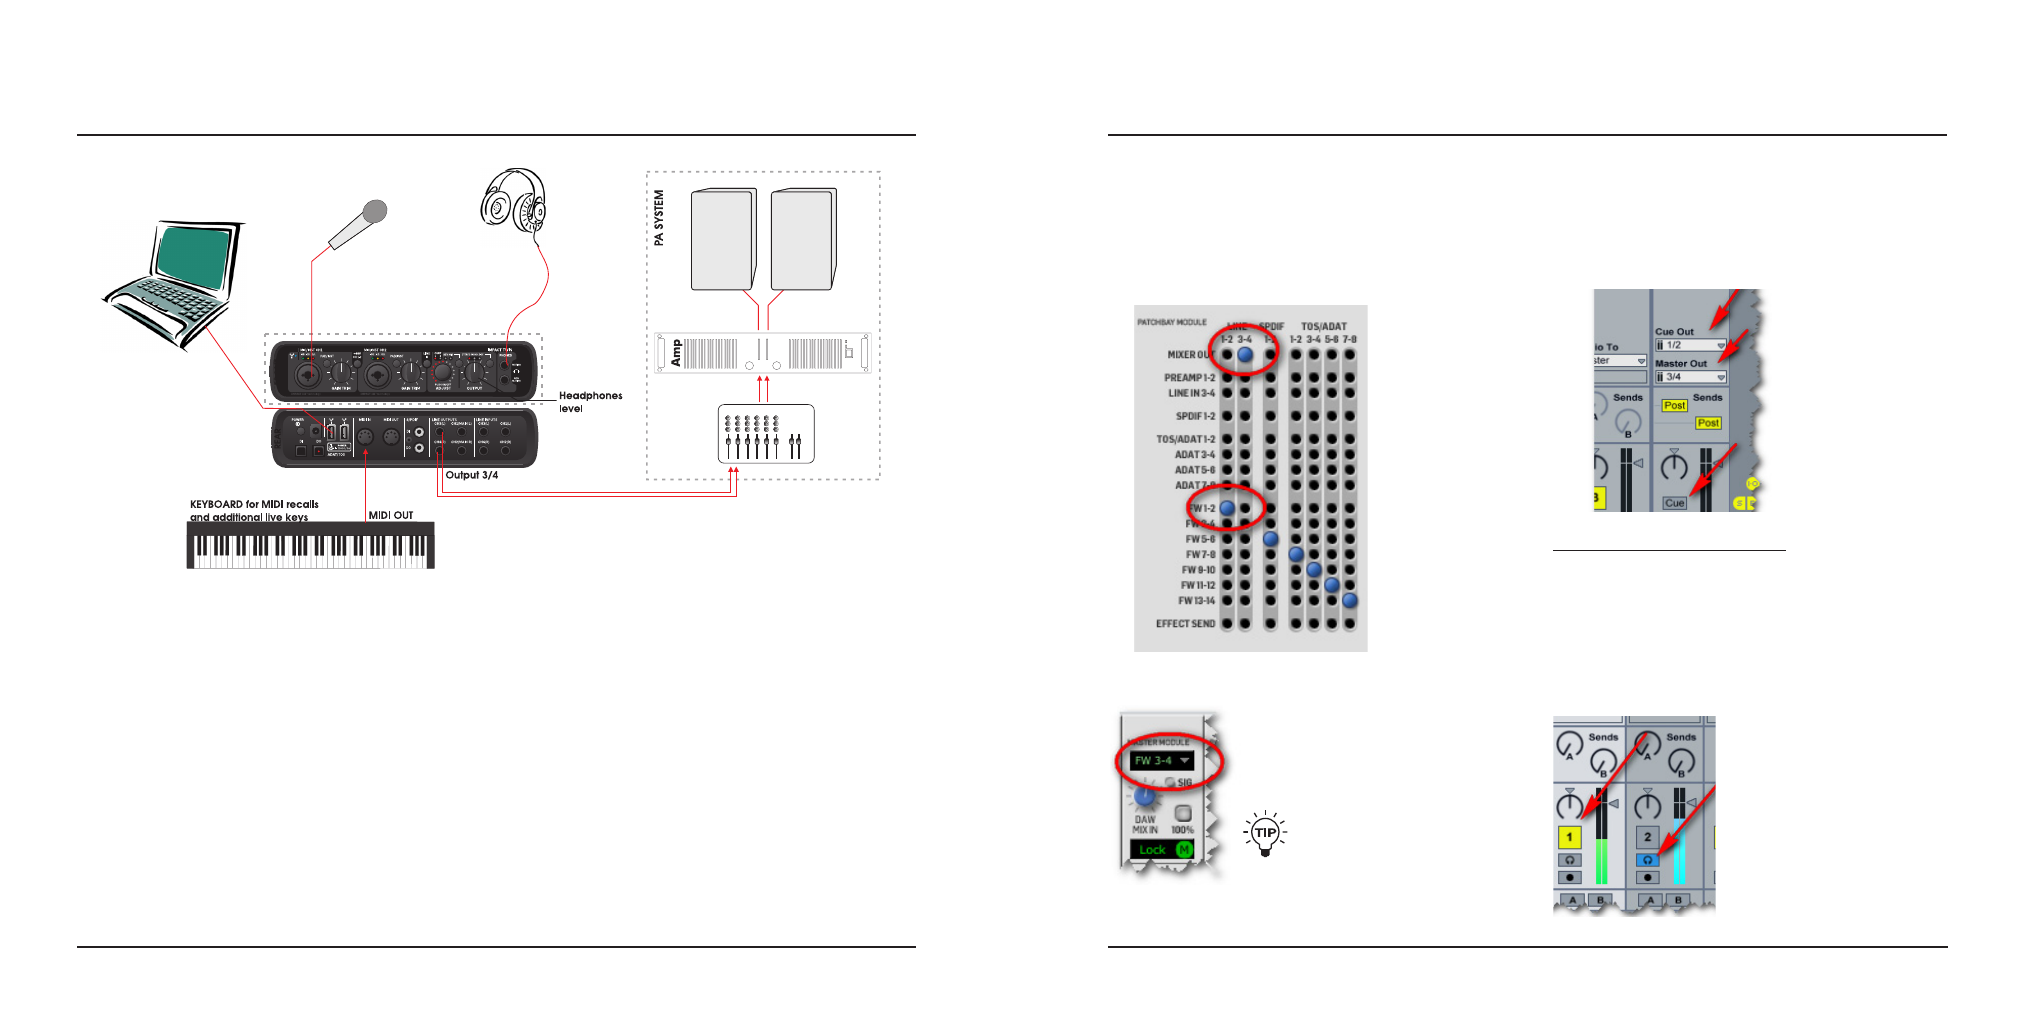
Ableton Live Settings
The object here is to send your “pre-listen” signal to Line
1-2 (which is also your headphones out) and the main
mix for the audience to Line 3-4 and further on to the
venue’s amplifier/speaker system.
First let us take a look at the Master section.
Three settings are important here:
– “Cue Out” sends to main outputs 1/2. These outputs
are linked to the headphones output.
– “Master Out” sends to line outputs 3/4. This is the
signal that you feed to the PA.
– Cue must be selected – as opposed to “solo”, which
is the other option. Press the button to alternate
between the two settings.
Now we need to link two tracks to Cue Out and Master Out.
Here, we have linked track 1 to
Master Out – this is the signal
the audience will hear.
On track 2, we have pressed the
Headphones button – this track is
sent to Cue Out.
TC Near Patch Bay Example – DJ pre-listen
The object here is sending a) the track you want to
pre-listen to your headphones and b) the main mix for
the audience to a separate channel set.
In the TC Near Patch bay, we send FW 1-2 to Line
(main) outputs 1-2 and TC Near’s Mixer out to line
outputs 3-4.
TC Near Mixer Settings
To send the main mix on Line 3-4,
“FW 3-4” must be selected in TC
Near’s Master module.
The described settings for this
example can be recalled as a
preset via Impact Twin’s file
menu.
SETUP EXAMPLE: “ABLETON LIVE – DJ”
This example illustrates how Impact Twin can
be perfectly integrated into a live setup. The
components of such a live setup could be:
• A DAW/laptop playing audio files.
• Headphones for undisturbed cue monitoring using the
OUTPUT level control for separate headphone levels.
• Microphone for vocals, utilizing Impact Twin’s
IMPACT™ pre-amps and Channel strip.
• MIDI controllers for playing additional chords or
melodies and/or sending program changes.
• Distribution to PA on output channels 3/4.
Connect all devices according to the illustration above.
If you are using a condenser microphone, remember to
activate the +48V phantom power. Also note that outputs
3/4 in this setup are used as main outs to the PA.
Advantage of this Setup
This setup enables you to route different signals to the
headphones and PA system via the DAW. This is useful
for numerous purposes. E.g., this setup allows excellent
cue monitoring for DJs, allowing for individual level
control of the two signals.
On the following page, we will show you how to
make the required settings in Ableton Live and the
TC Near Patch bay.