Model 5600 economider, Installation and start-up procedure (cont’d.), Page 9 – Peerless Water 5600_5600 Econominder User Manual
Page 9
Printed in U.S.A.
Page 9
MODEL 5600 ECONOMIDER
®
Installation and Start-up Procedure (Cont’d.)
The water softener should be installed with the inlet, outlet and drain connections made in accordance with
manufacturer’s recommendations and to meet applicable plumbing codes.
1. Manually index the softener control into the service
position and let water flow into the resin tank. When
the water flow stops, open a softened water tap until
all air is released from the lines, then close the tap.
NOTE: The various regeneration positions may be
dialed manually by turning the knob on the front of
the control until the indicator shows that the softener
is in the desired position.
2. Set water usage program wheel using any one of the
following procedures:
Typical Residential Application
To program, just set the time, set the hardness and it
automatically
monitors
system
needs
and
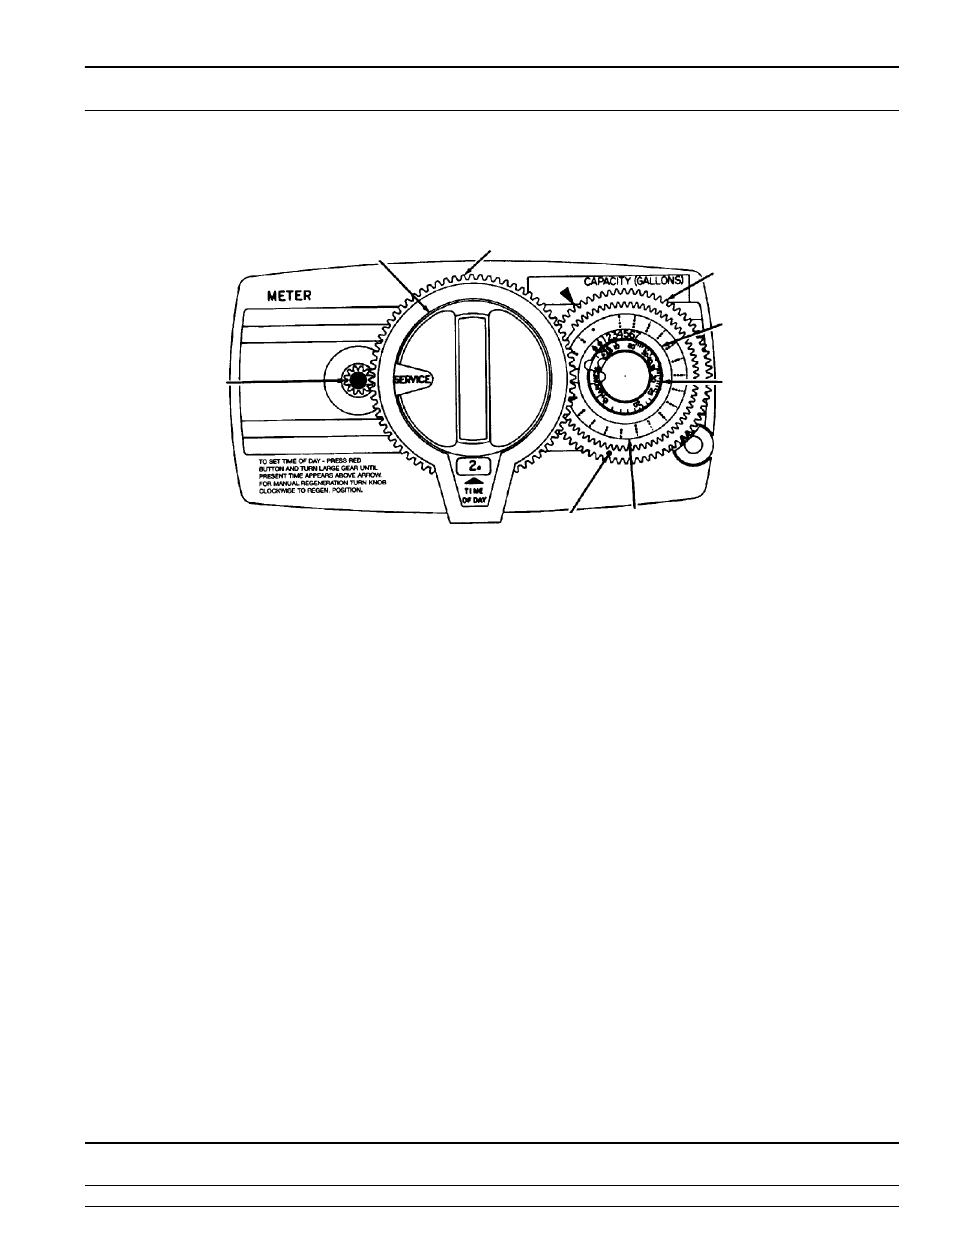
regenerates only when necessary. To set time of day
press red time set button and turn 24 hour gear until
present time of day is at “time of day”. Set program
wheel by lifting the “people” dial and rotating it so that
the number of people in the household is aligned with
the household grains per gallon water hardness.
Release the dial and check for firm engagement at
setting. (This method will provide reserve capacity
based on 75 gallons per person.)
Optional Programming Procedures
Calculate the gallon capacity of the system, subtract
the necessary reserve requirement and set the
gallons available at the small white dot on program
wheel gear. Note, drawing shows 850 gallon setting.
The capacity (gallons) arrow denotes remaining
gallons exclusive of fixed reserve.
3. Rotate the program wheel counterclockwise until it
stops at regeneration position.
4. Manually index the control to the back-wash position
and allow water to flow at the drain for 3 or 4 minutes.
5. Remove back cover plate.
6. Make sure than the salt dosage is set as
recommended by the manufacturer. Manually index
the control to the brine fill position and allow the brine
tank to fill to the top of the air check.
7. Manualy index the control to the brine rinse position
and allow the control to draw water from the brine
tank until it stops.
8. Plug in the electrical cord and look in the sight hole in
the back of the montor to see that it is running.
9. Manually advance the control to the beginning of the
brine fill position and allow the control to return to the
service position automatically.
10. Fill the brine tank with salt.
11. Replace back cover on the control. Be sure cable is
not pinched between cover and housing.
12. Make sure that any by-pass valving is left in the
normal service position.
RED TIME
SET
BUTTON
WHITE
PEOPLE DIAL
GALLONS
DOT
LABEL
PROGRAM WHEEL
GRAINS PER GALLON
WATER HARDNESS
SCALE
24 HOUR GEAR
MANUAL
KNOB
REGENERATION