Installation steps – Daystar KT09115-1 User Manual
Page 3
Instruction Sheet P10668-01
2008 Daystar Products Intl
Page 3 of 3
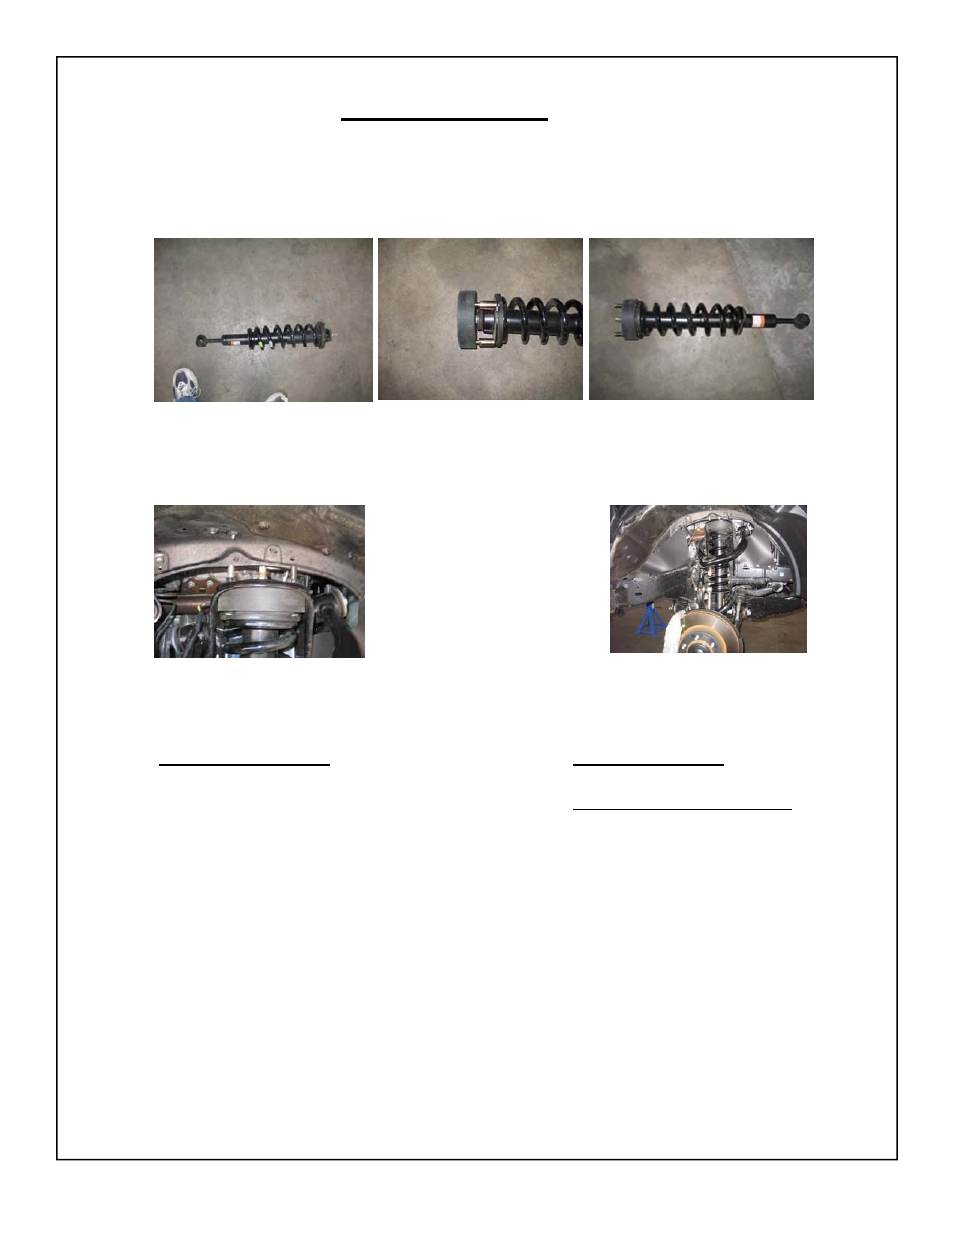
Installation Steps
8. Remove the lower strut bolt and nut ( 19mm) .
9. Remove the strut from the vehicle.
10. Install the stud extenders and spacer on the top of the strut plate.
11. Reinstall the strut into the vehicle and tighten the upper strut nuts. You will have
to push up on the upper a-arm to get the strut back in.
12. Reinstall the suspension working in reverse order.
13. Recheck all bolts after 500 miles.
14. Daystar Recommends that you have your wheel alignment checked.
TOOLS NEEDED
1. Floor
Jack
2. Jack
stands
3. Wheel
chocks
4. Set of metric tools from
10mm to 19mm
5. Hammer
Bill of Materials
Part No. Description Qty
M03724 Spacer
2
S11057 Stud ext 6
P11131 Instructions
IMPORTANT NOTE: The advertised amount of lift that this kit provides and the thickness of
the spacers supplied will not be the same! For example, a 2-1/2” lift may only have 1-1/2” thick
spacers. The reason for the difference between the spacer thickness and the amount of lift has
to do with suspension geometry. There is a ratio involved, and it is this ratio that determines
the thickness of the spacers. Rest assured, installing the spacer supplied will result in the proper
amount of lift out at the wheel.