Daystar KJ09117BK-1 User Manual
Page 2
Jeep KJ Liberty 2002-2006
Front Coil Spring Spacers
www.DaystarWeb.com
Tech Support Contact Info
Phone: 623.907.0081
Fax: 623.907.0088
841 South 71
st
Avenue
Phoenix, AZ 85043
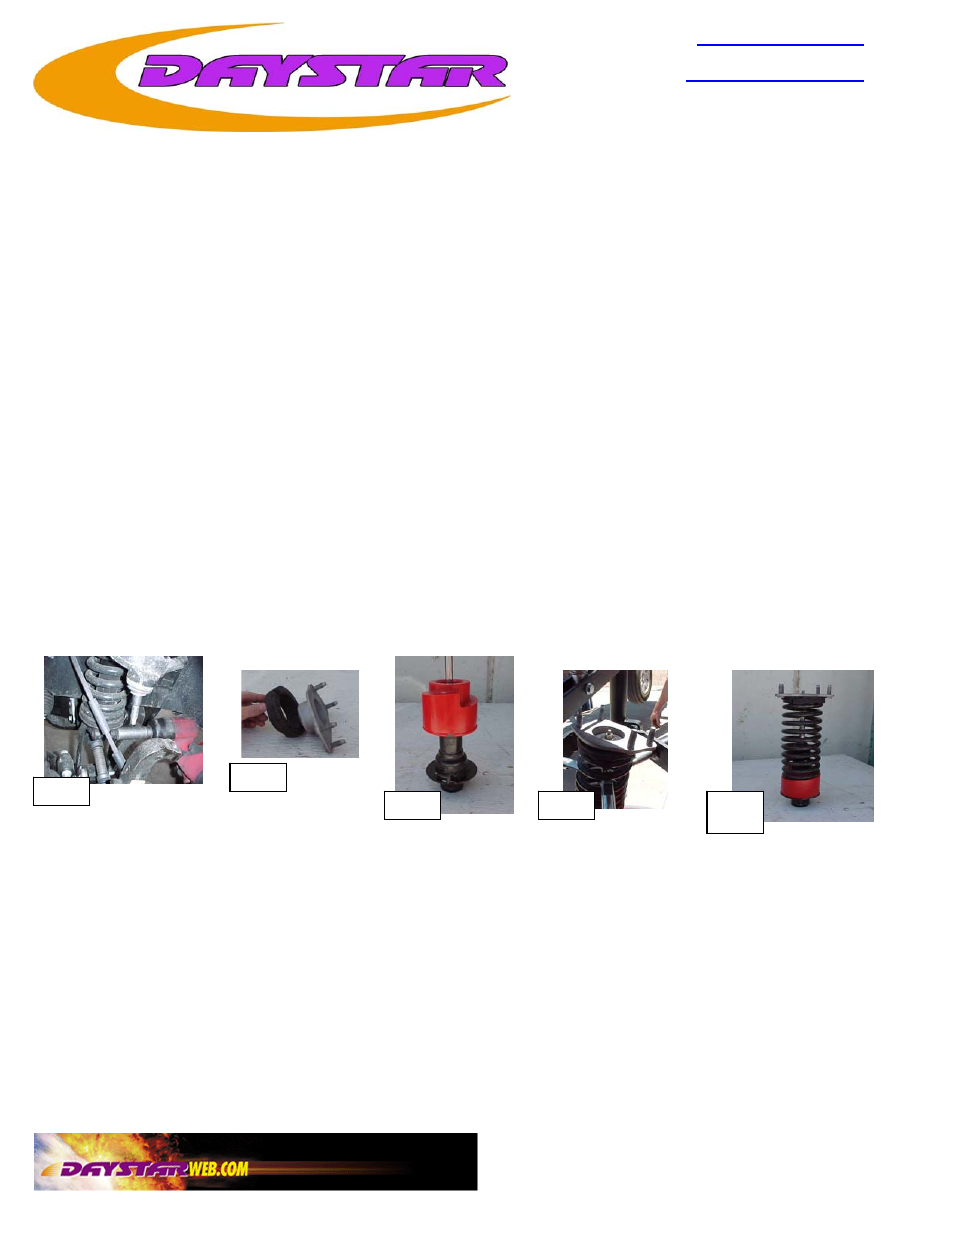
9. When reassembling the strut assembly make sure that the coil spring sits correctly into the coil spring spacer.
Figure 3.
10. Remove upper strut plate studs using a shop press. Install the factory studs into the new strut mounting plate
with the studs facing in the upward position. Reinstall the upper strut isolator onto the new mount. Figure 2.
11. Press washer attached to boot off of strut, then cut / remove factory boot off of factory washer.
12. Insert one of the provided washers into the inside groove on smaller end of the boot.
Reassemble the strut assembly with the washer that is in inside of the boot, then factory
washer (bevel down), stem cushion, strut mount plate, stem cushion, factory washer and
nut. Making sure that the lower strut fork keyway aligns with the new upper strut mounting
plate studs for reassembly, keyway faces outward as does the wide set of upper studs.
Tighten the upper strut
assembly nut and washer. Figure 4.
13. Reinstall the strut assembly into the vehicle and start the upper nuts, hand tighten only, reinstall the lower
strut fork and hand tighten the bolt at the strut. Install the lower fork bolt onto the lower control arm. An
external spring compressor with thin claws will help in assembly. (Make sure that the lower strut fork is
aligned with the strut assembly keyway)
14. Tighten the upper 4 factory nuts on each side and reinstall the air box. Tighten the upper and lower fork bolts.
a. Reassemble the upper control arm and recheck all nuts and bolts for tightness. Torque to
manufacturers specifications.
15. Install the wheels, remove the jack stands and lower the vehicle to the ground.
16. Recheck all bolts after 500 miles. Daystar recommends that you have the front-end alignment checked for
proper alignment
Fig. 2
Fig. 1
Fig. 3
Fig. 4
Fig. 5
WARNING
This vehicle has been modified to enhance its performance. The steering, braking and handling of this vehicle
will differ from standard passenger cars and trucks, This vehicle handles differently from an ordinary vehicle in
driving conditions which may occur on streets, highways and off road.
Avoid unnecessary abrupt maneuvers, sudden stops, sharp turns and other driving conditions that could
cause loss of control, possibly leading to a roll over or other accident that could result in serious injury or death to
driver and passengers. If larger tires are installed the speedometer will read lower than the vehicles actual speed.
DRIVE WITH CARE, REDUCE SPEED AND WEAR SEAT BELTS AT ALL TIMES.
This kit should be installed by a professional mechanic
Instruction Sheet P10527-09
© 2008 Daystar Products International Inc.