Banks Power Chevy_GMC Trucks: Duramax LLY-LBZ (Diesel ’06 - 07 6.6L) Power Systems- PowerPack & Stinger Systems w EconoMind (LLY & LBZ) '06-07 (iQ) Compatible with Optional Banks iQ User Manual
Page 25
96816 v.3.0
25
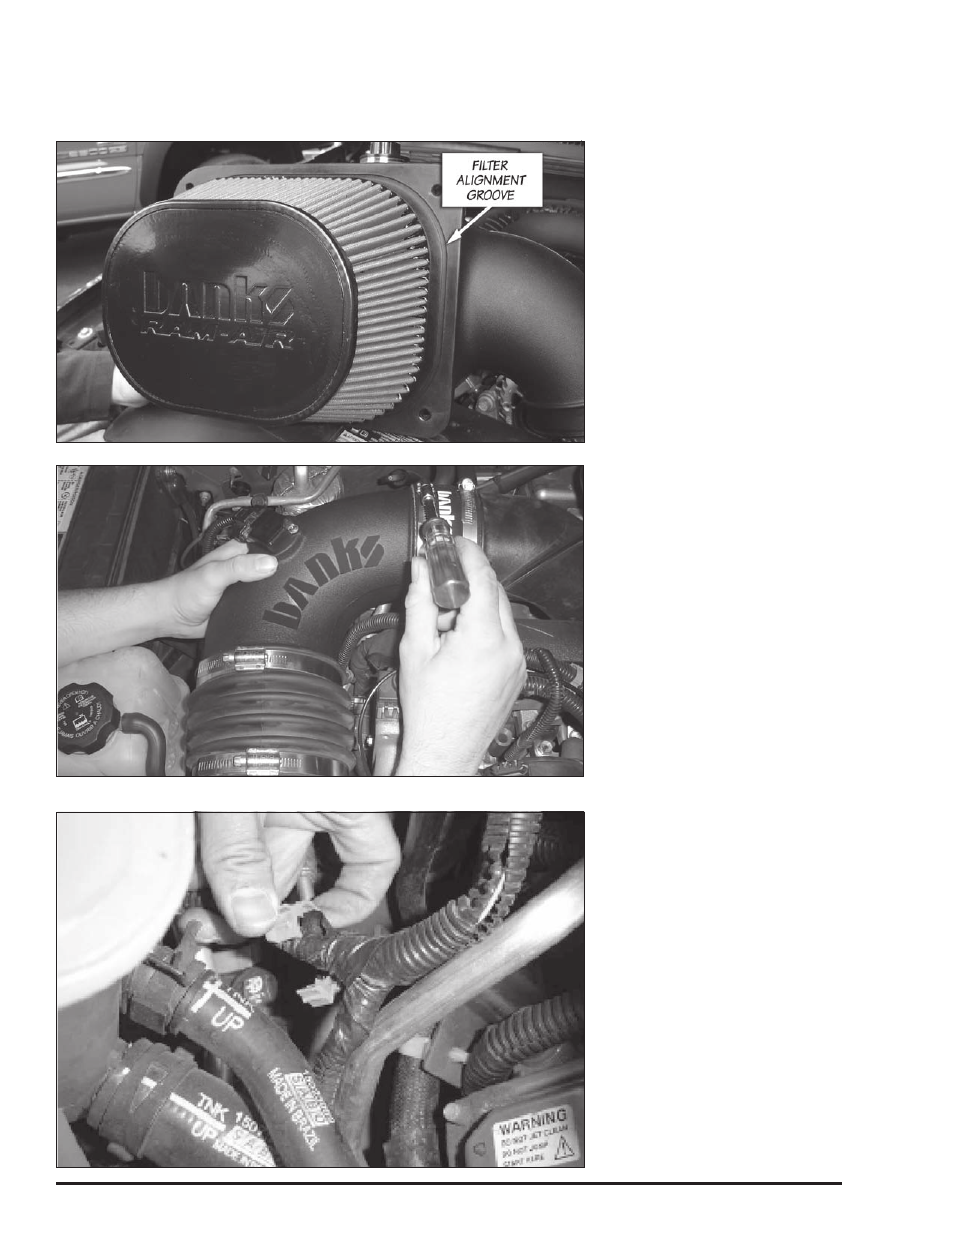
14.
After verifying the alignment
between the Banks Ram-Air filter
and the Banks Ram-Air cover, press
fit the two pieces together until an
audible snap is heard. This process
will ensure that a correct seal has
been established.
15.
Tighten the Banks Ram-Air filter
hose clamp to the Banks Ram-Air
filter cover.
16.
Place the Banks Ram-Air filter
cover onto the Banks Ram-Air
housing. Align and loosely fit the
cover onto the housing.
17.
Install, but do not tighten, the
Banks bellows hose and hose clamp
onto the Banks Ram-Air housing
cover.
18.
Locate the Banks turbo intake
hose, tube, and hose clamps from
your Banks Ram-Air kit. Loosely
assemble the Banks intake hose
to the Banks intake tube with the
supplied hose clamps. Attach the
turbo intake hose to the turbo intake
tube. Leave the hose clamps loose.
19.
Install the Banks Ram-Air intake
tube into the Banks bellows. Tighten
all the hose clamps to secure the
Banks intake tube. See Figure 4.8.
CauTION: Ensure Intake tube
is not touching any engine
components.
20.
Fasten the Banks air filter cover
to the Banks air filter housing using
the Banks cover screws and tighten.
21.
Re-attach the MAF sensor
connector to the MAF sensor in the
Banks intake tube.
NOte: You may have to loosen the
wire harness clips to increase the
slack in the wiring harness to allow
the MAF connector to reach the MAF
sensor in the Banks intake air tube
(Figure 4.9).
22.
Re-connect battery grounds.
You have successfully completed
the installation of the Banks Ram-
Air Intake system. See Figure 4.10.
Make sure to check all hose clamps
for tightness and connectors for a
sure fit. Make sure that the intake
tube is not touching any engine
components.
-END, SEcTION 4-
Figure 4.7
Figure 4.8
Figure 4.9