Velleman VCC6 User Manual
Page 5
VCC6/VCC7
22.07.2010
©Velleman nv
5
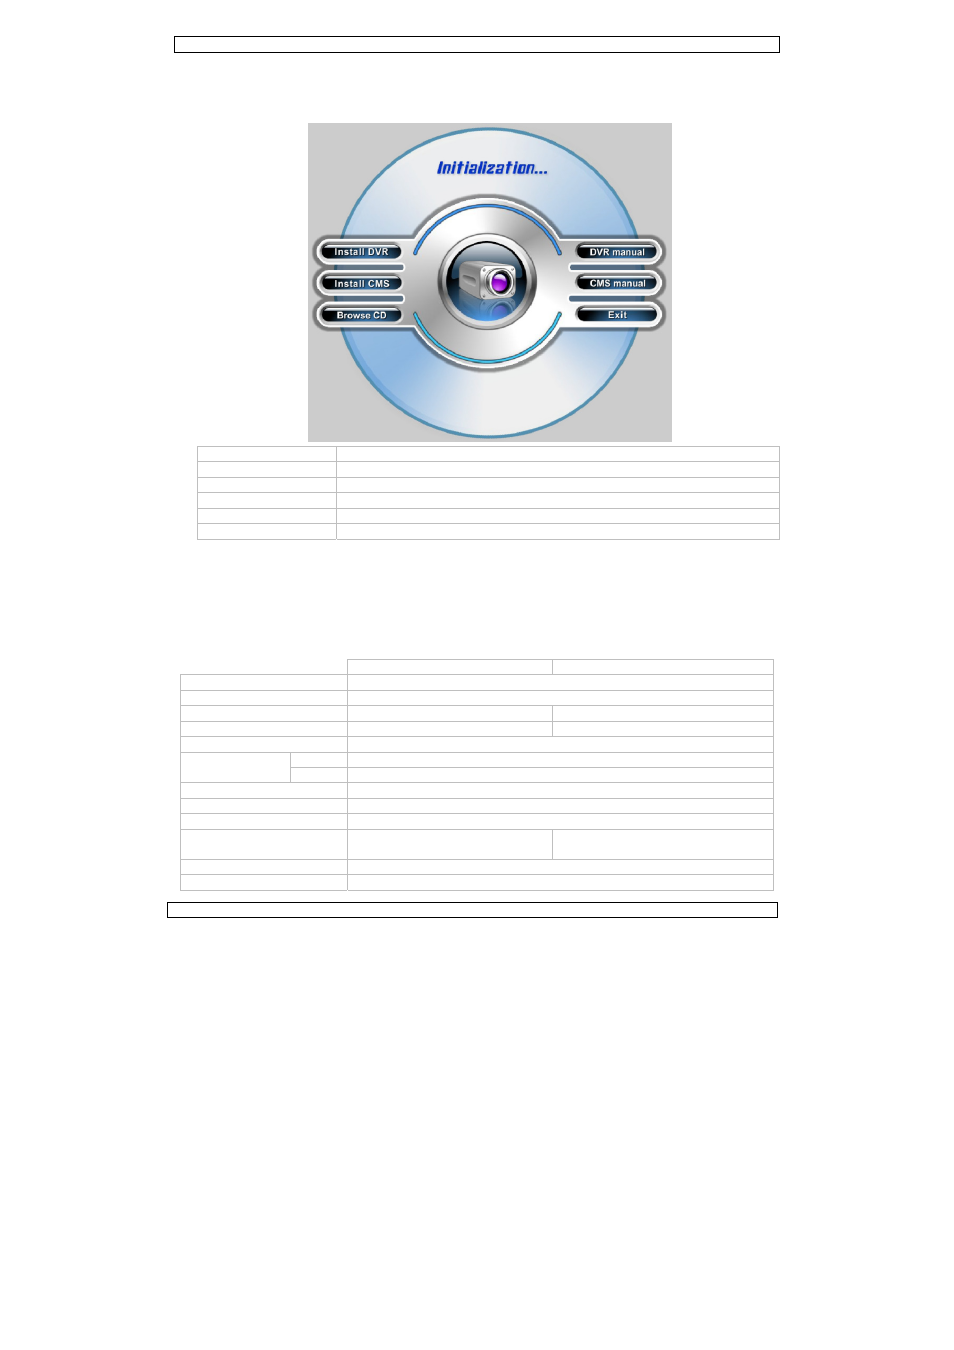
7. Software installation
• At start up, Windows will open the Hardware Wizard. Just click Cancel.
• Insert the included CDROM into a suitable CD-ROM drive. When autorun is disabled, open
Windows explorer and browse to the CD-ROM. Locate AUTORUN.EXE and double click on it.
Install DVR
Install Digital Video Recorder (DVR) drivers and software
Install CMS
Install the Central Management Software (CMS)
Browse CD
Browse the CD-ROM
DVR manual
Open the Digital Video Recorder (DVR) user manual
CMS manual
Open the Central Management Software (CMS) user manual
Exit
Close the CD-ROM menu.
• For installing the DVR and/or CMS software, follow the instruction on the screen. Click on the
‘Continue anyway’ button when the ‘Windows Logo Testing failed’ message appears.
• Restart the computer.
• After reboot, first open the SuperDVR software and then connect the camera(s).
• Open the DVR and/or CMS user manual for instructions on how to use the software (English
only).
8. Technical specifications
VCC6 VCC7
input BNC
video input
4 cameras
display rate
25fps (PAL), 30fps (NTSC)
100fps (PAL), 120fps (NTSC)
recording rate
25fps (PAL), 30fps (NTSC)
100fps (PAL), 120fps (NTSC)
compression format
H.264
video resolution
PAL
704 x 576, 352 x 288
NTSC
640 x 480, 320 x 240
recording media
HDD, USB and DVD
record mode
motion, sensor, schedule, manual
network TCP/IP
I/O device
4-channel input, 1-channel relay
output
4-channel input, 2-channel output, 1-
channel relay output
PTZ
protocol configurable, remote control capability
remote software
Internet Explorer browser and CMS software (incl.)