Planetarium operation, Installing batteries for the light wand, Operating your planetarium – Uncle Milton Star Theater User Manual
Page 3
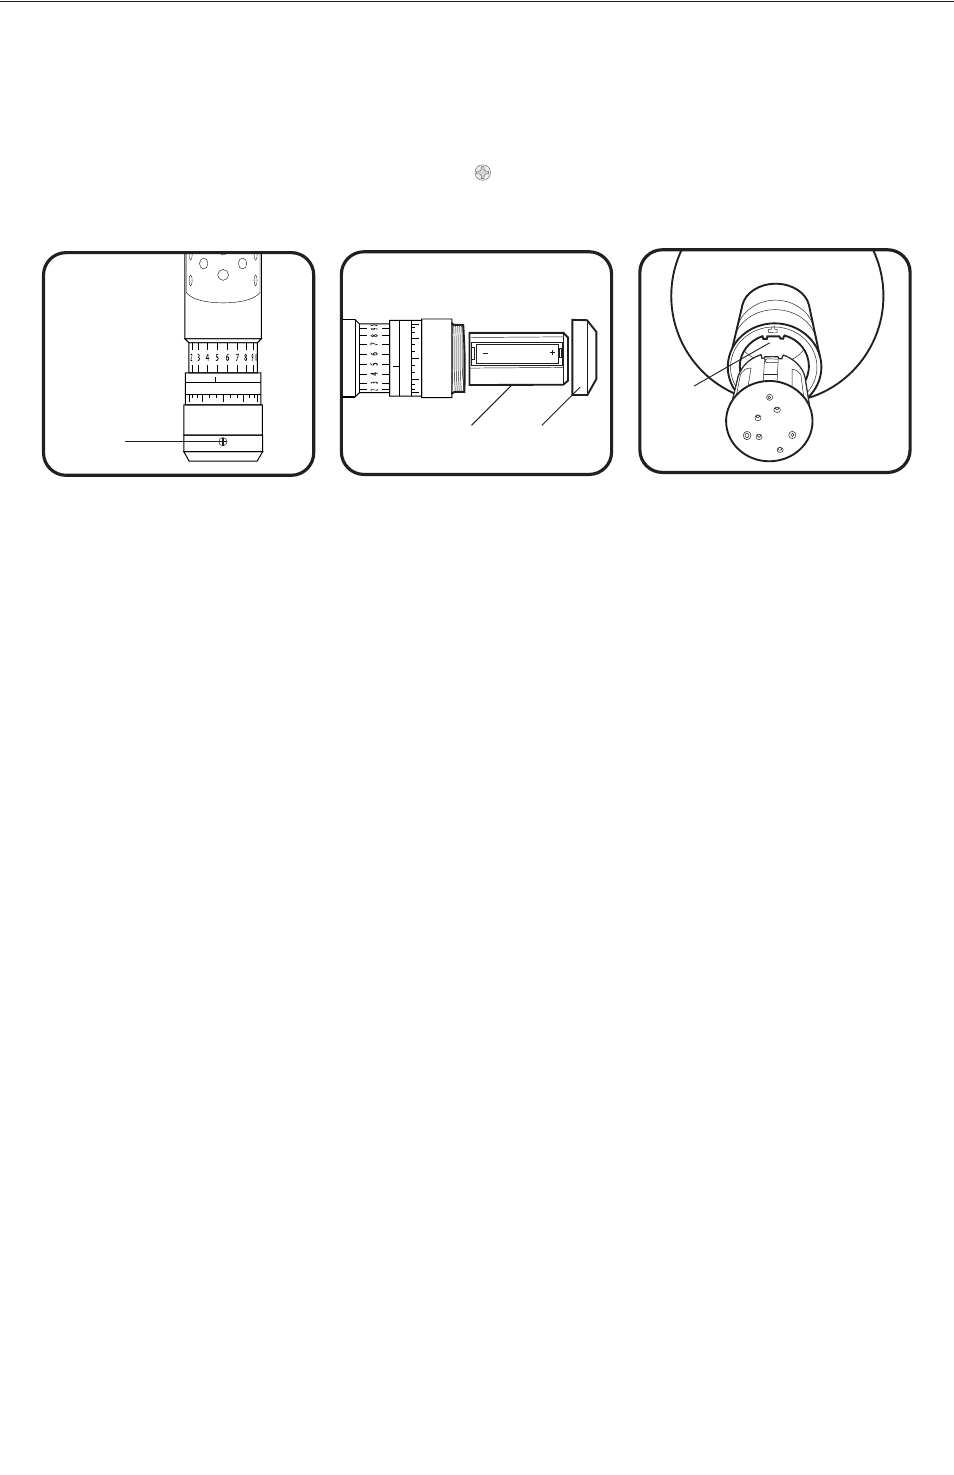
Battery
Cap
Screw
MAY
SPRING
SUMMER
AUG
JUL
JUN
Battery
Cap
Battery
Module
MAR
SPRING
SU
MMER
JUN
MA
Y
APR
Align
Battery
Module
with
groove
Planetarium Operation
The Star Sphere is powered by three 3 AAA/LR03 batteries.
Tool required - Small Phillips-head screwdriver
Installing Batteries for the Light Wand
1. Remove light wand from
base.
2. With a small Phillips-head
screwdriver, remove the
screw on the battery cap.
Unscrew battery cap
located at the end of wand.
Gently shake the wand so
that the battery module
slides out.
3. Insert three 3 AAA/LR03
batteries into battery
module, making sure the
“+” and “-” ends are in
correct placement as
indicated on module.
Alkaline batteries are
recommended.
4. Insert battery module
into light wand, making
sure the grooves align.
Replace battery cap and
Phillips-head screw (do
not over-tighten). Place
the light wand back into
base.
Operating Your Planetarium
1. Place planetarium on a table in the center of the room. A room with smooth, light-colored
walls and ceiling works best. A room that is roughly square and no larger than 12 x 12 feet
provides the best projection quality. Star Theater works best when it is located two to six feet
from the projection surface.
2. Date selector is located on the light wand. To set your planetarium for the beginning of the
audio tour, rotate light wand until “AUTUMN” lines up with pointer on the base. (The month
and date settings and the time ring will be used after the audio tour to set your planetarium
for a specific date and time of day.)
3. In a darkened room, turn on projection lamp. (Do not look directly at the Star Sphere while its
light is on, or you will lose your darkness adaptation.)
CAUTION: Do not look directly into the light source. Doing so can cause serious and
irreparable eye damage.